The Insightly CRM add-on needs to be installed and activated to see the features mentioned in this this documentation.
Introduction to Features
The Insightly CRM extension for Ninja Forms enables you to send your form submission data directly into your Insightly CRM account. Supported modules are:
- Contacts
- Leads
- Organizations
- Opportunities
- Projects
- Tasks
In addition to this impressive list of modules, your contacts will automatically be linked with the Organization, Opportunity, Project, and Task. If you create a Lead, it will be linked to the Task.
Custom Fields you create in Insightly are also available for use. Whenever you create a new custom field in your Insightly Account, a simple refresh in the WordPress dashboard will pull those new fields into Ninja Forms and made ready for use (more on that later).
Connecting Ninja Forms to Insightly
To connect Ninja Forms to Insightly, you’ll need to retrieve your API Key from your Insightly account. This key will look something like this:
1x111xxx-1111-1×11-111x-11x1x111xx1x
By default, the user whose API Key is used will be the owner of records sent to Insightly. Some, but not all, modules do allow you to change the owner so be sure to use the API key of the one who you would like as the default owner.
Enter this API Key on the Ninja Forms settings page in the “Insightly Settings” section in the text box named “API Key”.
After entering, click the “Save Settings” button. Click the link below your API key to test your connection. If your API key is correct, the extension will successful create a test contact in your account. If it is incorrect, the message will prompt you to verify your API key.
Once you have saved your valid API Key to the Ninja Forms settings, you will be able to set up your forms to connect to Insightly. If your API key is incorrect, you will get a message on the settings page to let you know before going any further.
Here is an example of how your Insightly Settings will look with your API Key entered and actively communicating with your Insightly account.
Helpful Hint: If you have custom fields in Insightly, any time that you visit the settings page and refresh it, the extension will contact Insightly
Mapping Form Fields to Insightly
Field mapping is the process of connecting specific fields on your Ninja Form to the Insightly field where you’d like the submitted field data to go. It is best for you to have your Ninja Form already built prior to starting this step. Of course, as you add or modify fields on your form, you always have the opportunity to modify your field maps.
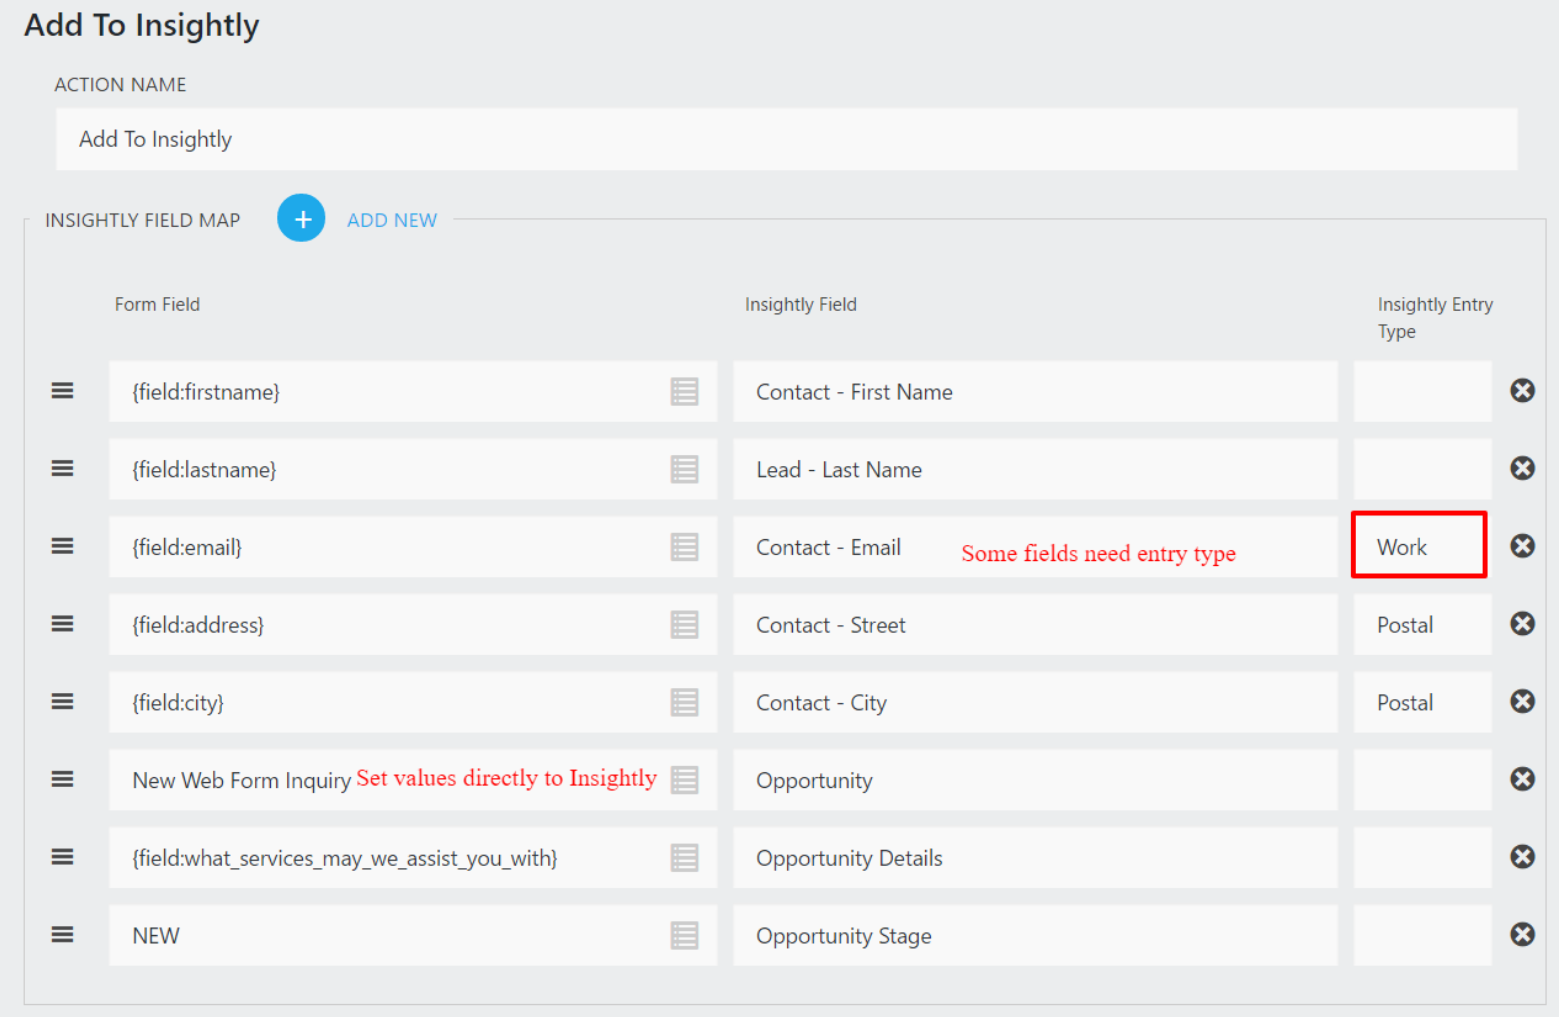
To map fields, go to the Emails & Actions section of your form design, click the “+” to add a new action, and select the “Add to Insightly” action. You will then see the Add to Insightly Field Mapper, as shown in the image. For each field to map:
- In the “Insightly Field Map” box, click the “+ ADD NEW” button to add a new field map. Use the “Form Field” drop down icon to bring up a list of all the available fields on your form and click to select the form field you wish to use. If you want to set a specific value instead of one entered by the site visitor, type in the value you wish to use in this field.
- Click in the “Insightly Field” text box to bring up a list of all the Insightly fields available for receiving the form data. Click on the field you wish the form data to be sent to.
- The “Insightly Entry Type” box is used only on Email, Web, Phone, Address, and Social Insightly fields. Use this field to specify the entry type when mapping. For most other Insightly fields, this setting is not used.
Add to Insightly Field Mapper
Helpful Hint: The Insightly custom fields are numbered and each item has a more descriptive name in the drop-down list when selecting. If you can’t remember the custom field numbers, you can click to drop down the list and view the descriptive names.
Optional Modules
In addition to creating your Lead or Contact in Insightly, you have the ability to attach various other modules to your newly created person.
About Opportunities
The Opportunity module has the following fields available:
- Name
- Details
- State
- Pipeline ID
- Stage ID
- Tags
About Projects
The Project module has the following fields available:
- Project Name
- Details
- Status(must match a state in your account, e.g., “Not Started”)
- Role (relationship to the new contact)
About Tasks
The Tasks module has the following fields available:
- Task Title
- Task Due Date (how many days/weeks from when form is submitted (e.g. “2 days”
- Task Details
- Task Status(must match a state in your account, e.g., “Not Started”)
- Task Priority (one of the following integer values: 1 , 2 , 3 )
- Task Percent Complete (integer increments of 5: 5 , 10 , 15 , etc)
- Task Responsibility ID (required if not creating any of the other modules (see below)
- Task Owner ID (required if not creating any of the other modules (see below)
The due date is set relative to the time of the form submission date/time, for example “2 days” or “3 weeks”. The date interval does not calculate “business days” – it counts every day.`
Advanced Commands
The advanced commands text box gives you an easy way to change the extension’s functionality without needing any programming experience. You can add as many of these commands as you want by putting a comma in between them as shown here:
After adding the commands you want, click “Save Options” and then REFRESH your browser page for your changes to take effect.
Here is a list of the current available advanced commands available:
Helpful Hints
Setting Fixed Values
In certain cases, you may want to send a fixed value into your CRM. For example, you may have a field for lead source and you want it always to say “Web Form Submission”. To do this, add a row to your Field Map action and, instead of selecting a form field, simply type in the value you want sent, and then map the value to the CRM field you wish.
In this screenshot example, we want to assign user “bobsmith727” to be in charge of a new opportunity, which we have in our CRM as Opportunity Owner:
Troubleshooting
Usually, when a form submission doesn’t make it into your CRM, it means that one or more fields doesn’t fulfill the requirements for that particular field. We are constantly making our support messages on the Settings page smarter to guide you so your first step would be to read the messages there for some quick help. Here are some common errors and how to resolve them
DETAIL is required
An email, phone, social, or website field is missing a form value. Either the field map is missing the form field or whoever filled out the form left the field blank. Two steps to fix this include first ensuring that the field map is set correctly and secondly marking the field as required so that it can’t be left blank.
Filters
The Ninja Forms Insightly Extension has some advanced features that can be set using some simple code snippets. These code snippets can be placed in your theme’s functions.php file. NOTE: Ensure your site has been properly backed up before inserting codes.
Setting Insightly’s API Version
Insightly is updating its API to version 2.2 and it is currently in Beta. Version 2.2 is the default version used by the extension. If you decide you would rather use version 2.1, use this snippet:
if( !defined( ‘INSIGHTLY_API_VERSION’ ) ){
define( ‘INSIGHTLY_API_VERSION’ , ‘2.1’ );
}
Increasing the Number of Records to Return
Insightly returns 100 records maximum by default. If you have more than 100 custom fields, you will not retrieve them all. To increase the number of records to return, add this snippet:
if( !defined( ‘INSIGHTLY_RECORDS_TO_RETURN’ ) ){
define( ‘INSIGHTLY_RECORDS_TO_RETURN’ , 500 );
}
nfinsightlycrm_keep_html_tags
In Ninja Forms 3, text area boxes may have HTML tags that are removed with code. If you do not wish to remove HTML tags before sending, this will stop the code that strips them setting the filter to true.
add_filter(‘nfinsightlycrm_keep_html_tags’,function(){return true;});
Helpful Hints
Requesting Help
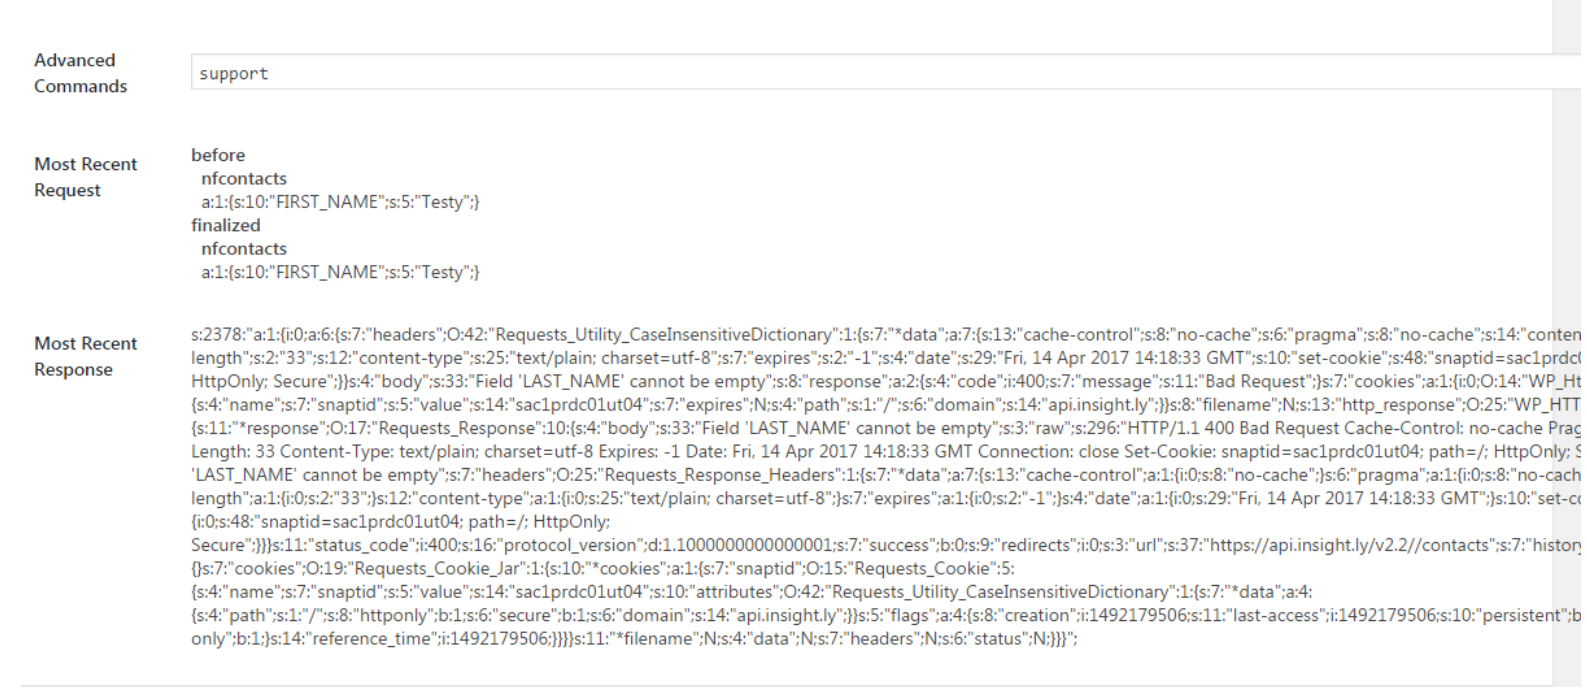
Should you need help and submit a support ticket, do the following to help us find an answer faster for you:
- Type in the word “support” in the Advance Commands box
- Save your settings
- Refresh the page
- Take a screenshot including Communication Status through Most Recent Response
This information can get us working on a solution for you faster.


