The User management add-on needs to be installed and activated to see the features mentioned in this documentation.
With the User Management add-on for Ninja Forms, you can create custom WordPress forms that allow users to register, login, and manage their own user profiles. You can also control who can access and edit your form submissions.
Creating a User Registration Form
A User Registration form allows visitors to register themselves as a user on your WordPress website. Registered users can be viewed under Users>All Users in the WordPress dashboard. Please note: once it is live on a page, this form will only be visible to users that are logged out. If you’re wanting to view this form after it’s on a published page, you’ll need to log out.
To create a user registration form, select the Register User form template. Default form fields can be changed to fit your needs. When the form fields are to your liking, click into the Emails & Actions tab and select the Register User action to open its settings window.
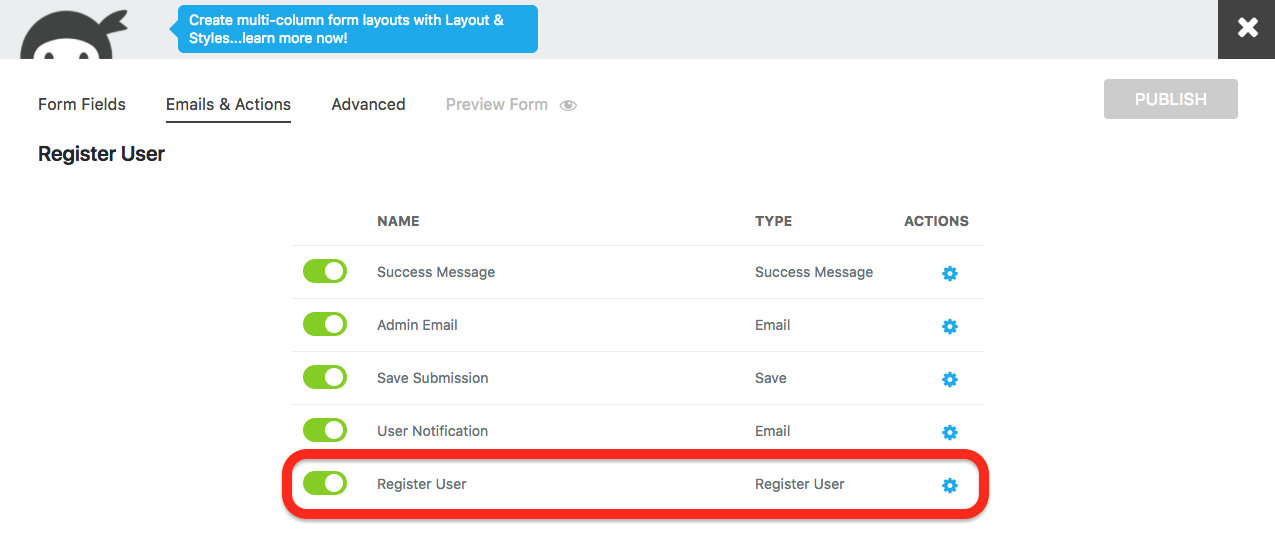
Register User Action Settings
In the default Register User form template, each of the settings in the Register User action is already mapped to the corresponding form field. You will only need to set the Role you wish new users to be registered as. If making a form from scratch or modifying the template, you will need to map settings to fields accordingly by clicking the dropdown arrow in the individual setting and selecting the desired field.
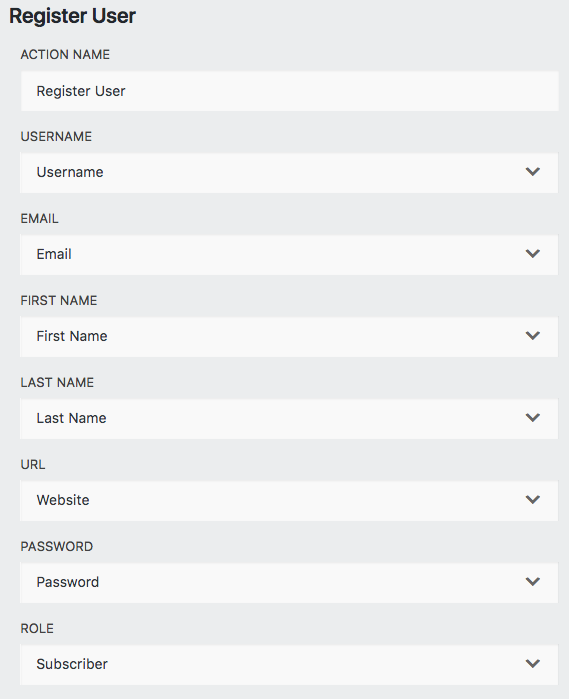
The Role of the new user matches exactly the standard WordPress Roles and Capabilities.
Advanced Settings
Advanced Settings for the Register User action allows you to:
- Toggle on/off logging in a user upon successful registration
- Emailing credentials to the newly created user with a randomly generated password
- This does not require setting up a separate email action, though you may.
- This removes the mapping between the Password setting of the Register User action, but leaves the Password/Confirm Password fields present. They may be removed if desired.
- Map custom user meta to the user meta table.
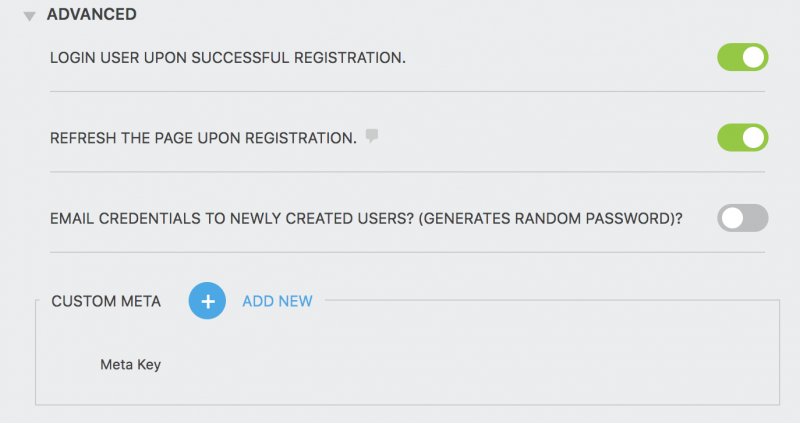
Mapping Custom Meta
Custom Meta can be used to autopopulate fields between Registration and Update Profile forms with user submitted data. For example, if you have a field labeled Pet’s Name in your Registration form, you can have the data from that field autopopulate an identical field in that user’s Update Profile Form. To do so:
1. Add the field (Pet’s Name in this example) to your Registration form and name it.
2. Navigate to the Emails & Actions tab, select the Register User action, and expand the Advanced settings.
3. Under Custom Meta, Add New. In the Meta Key field that appears, enter the Meta Key of your choice. Remember this key as you must use it again on the Update Profile form.
4. For the Meta Value field, click the merge tag icon within the field and select the field you’ve chosen. In this example, the Pet’s Name field.

5. Open your Update Profile form and repeat steps 1-4 but in the Update Profile form itself. In step 4, be certain that you assign the exact same Meta Key in the Update Profile form that you did in your Registration form or this will not work!
Creating a Login Form
A login form allows users to login to your website once they have registered as a user via the Register User form. Please note: once it is live on a page, this form will only be visible to users that are logged out. If you’re wanting to view this form after it’s on a published page, you’ll need to log out.
To create a user login form, select the Login Form form template. Default form fields can be changed to fit your needs. When the form fields are to your liking, click into the Emails & Actions tab and select the Login User action to open its settings window.

Login User Action Settings
In the default Login Form form template, each of the settings in the Login User action is already mapped to the corresponding form field. If making a form from scratch or modifying the template, you will need to map settings to fields accordingly by clicking the dropdown arrow in the individual setting and selecting the desired field.
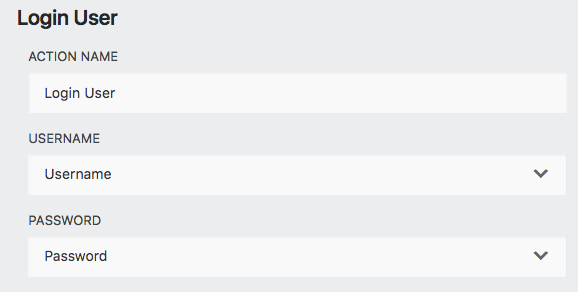
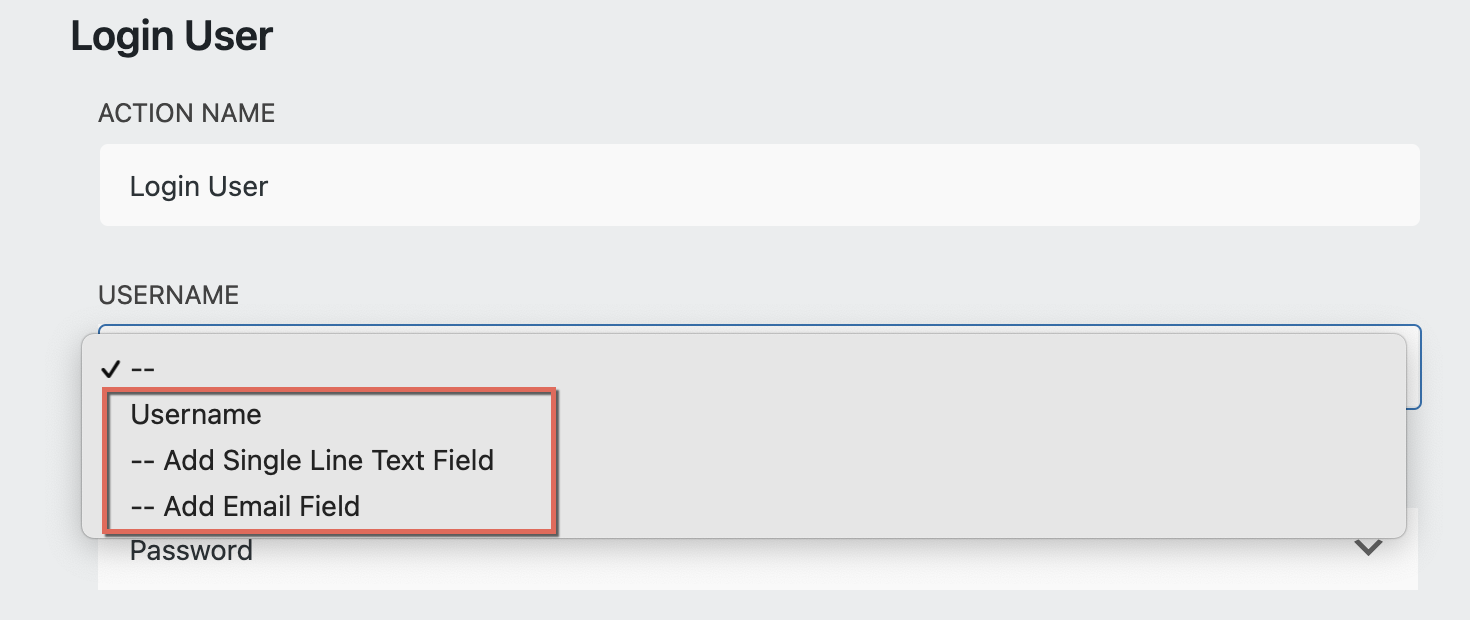
Username
The following fields can be used to create a username:
- Sinle Line Text field
- Email field Version 3.1.0
Password
The following fields can be used to create a password:
- Password field
- Password Confirm
You can add a password reset/forgot password link to your login form by placing an HTML field on the form with the {user_management:password_reset} merge tag.
Creating an Update Profile Form
An Update Profile form allows a registered, logged-in user to update their profile information.
To create an Update Profile form, select the Update Profile form template. Default form fields can be changed to fit your needs. When the form fields are to your liking, click into the Emails & Actions tab and select the Update Profile action to open its settings window.
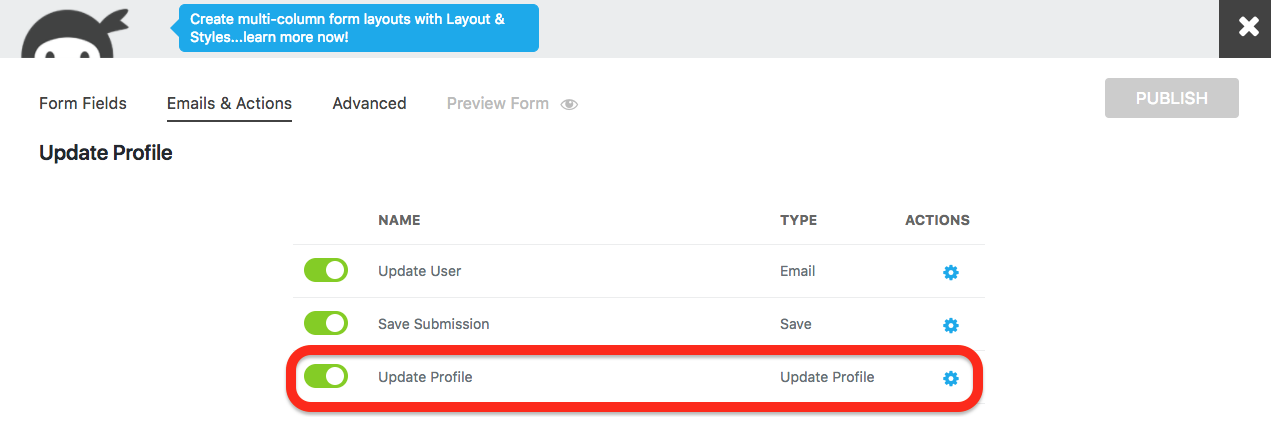
Update Profile Action Settings
In the default Update Profile form template, each of the settings in the Update Profile action is already mapped to the corresponding form field. If making a form from scratch or modifying the template, you will need to map settings to fields accordingly by clicking the dropdown arrow in the individual setting and selecting the desired field.
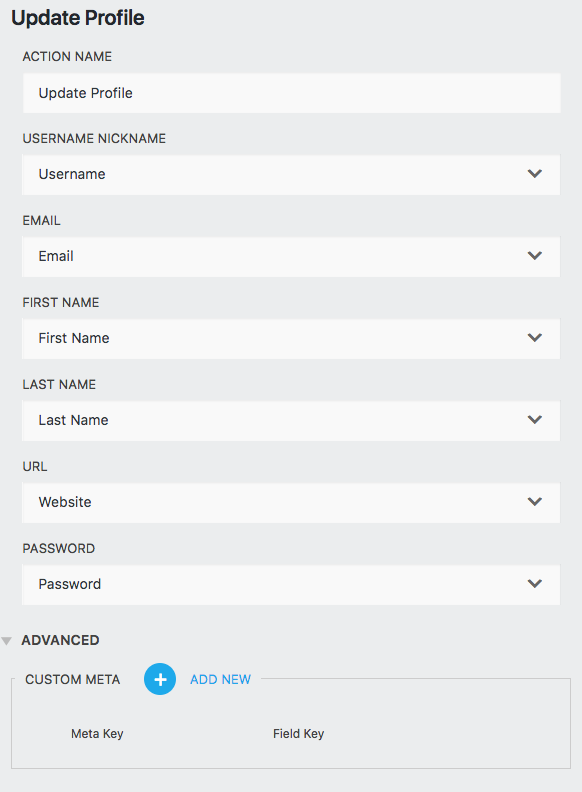
Managing Submission Permissions
User Access settings let you control who can view and edit your form submissions. These settings can be found in your WordPress dashboard under Ninja Forms > User Access.
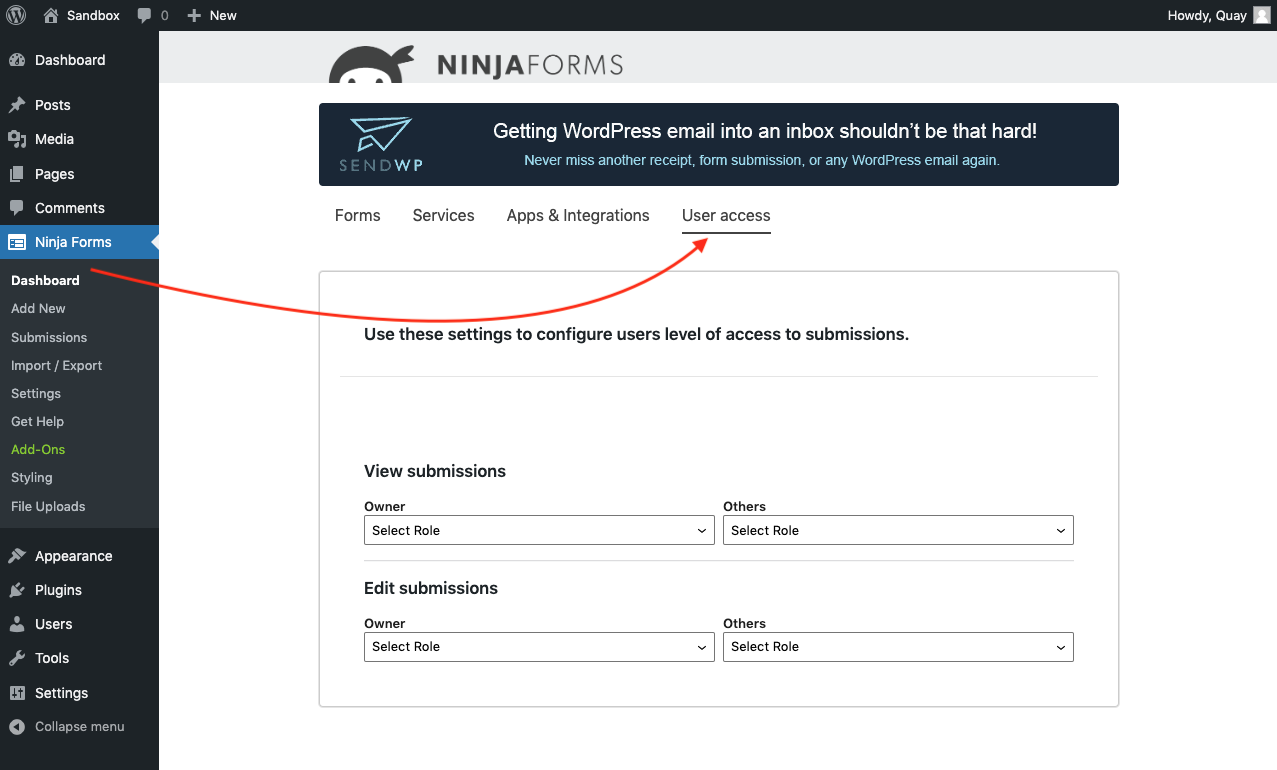
Ordinarily, access to Ninja Forms submissions are restricted to individuals with the Administrator user role only.
User Access features allow you to grant individuals of different WordPress user roles permission to view-only or view + edit submissions. You could, for example, allow all Editors to view and edit submissions, and grant all Authors view-only permissions. Custom user roles are supported.
Note: The “Legacy Submissions Page” setting under Ninja Forms > Submissions > Advanced Settings must also be disabled for non-admin roles to view the Submissions page.
Grant access to view submissions

Grants selected user role(s) permission to view-only form submissions (cannot edit or delete).
Any role selected under Owner will be able to view their own form submissions only.
Any role selected under Others will be able to view all form submissions.
- A role granted Others permission will be granted Owner by default; someone can’t view all form submissions without also being able to view their own.
Grant access to edit submissions

Grants selected user role(s) permission to view + edit form submissions (cannot delete).
Any role selected under Owner will be able to view + edit their own form submissions only.
Any role selected under Others will be able to view + edit all form submissions.
- A role granted Others permission will be granted Owner by default; someone can’t view + edit all form submissions without also being able to view + edit their own.
- A role granted Edit permission will be granted View permission by default; someone can’t edit form submissions without being able to view them.
