The Twilio SMS add-on needs to be installed and activated to see the features mentioned in this documentation.
How to use the Ninja Forms Twilio SMS add-on
The Twilio add-on for Ninja Forms enables Twilio to send text messages using SMS (Short Message Service). This has all sorts of uses, like texting notifications on submission or thank you notes, to name a few.
You’ll need Ninja Forms and the Twilio add-on installed to get started. After that, you’ll also need a Twilio account and a Twilio phone number to send SMS messages from.
Setting up your Twilio account
To begin, you will need to create an account with Twilio. Once you’ve created an account, you need to set up a phone number.
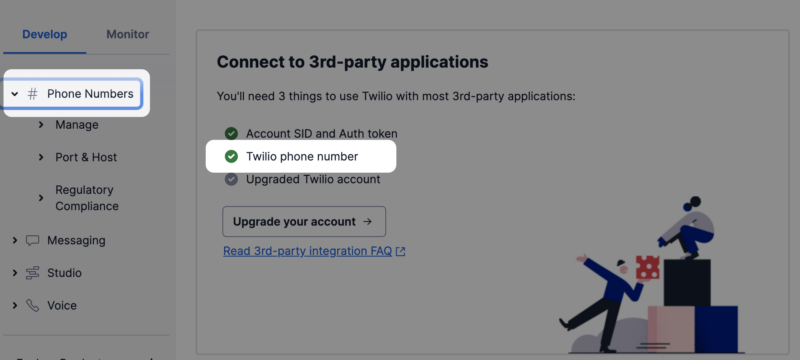
You can find this under the #Phone Numbers menu on the left-hand side of your account dashboard or by clicking the Twilio phone number link in the connect to 3rd party applications window.
- Twilio free trial accounts give you one number for free.
- You can search for any number that suits your needs; just make sure your number has SMS capability.
- Trial accounts include a notification in the SMS that you are using a Twilio trial account. You can upgrade the account to get rid of this.
- You can find more information on Twilio trial accounts here.
- For information on billing and pricing, click here.
Using the Twilio add-on
Step 1: Connecting Twilio
You’re one small step away from creating your Twilio SMS actions, just connect Twilio and Ninja Forms, and you can create SMS-capable forms for many purposes.
- Once the Twilio add-on is installed alongside Ninja Forms, you will have new options under Ninja Forms > Settings in your WordPress dashboard. Head there to begin.
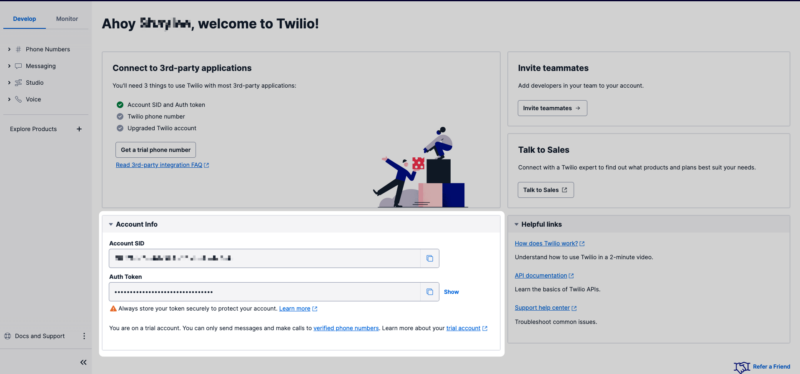
- At the bottom of that page, you will see the required settings to connect Twilio and Ninja Forms. It requires your Twilio Account SID and Authorization Token:

- Click on the Console Dashboard link to get your information, then copy and paste the keys in the fields on the settings page:
Step 2: Adding a Twilio SMS action
1. To add the action to any form, from the Emails & Actions tab click Add New Action and then the Twilio action from inside the Actions Window that opens.
2. Choose your Twilio phone number from the Twilio Phone Number dropdown that should send the SMS. If you don’t see a phone number, make sure you have a Twilio phone number that can send SMS.
3. Next, select the phone number to send the SMS to. Include the country code ( +1 for US and Canada, for example 1-555-867-5309). Merge fields are also supported.
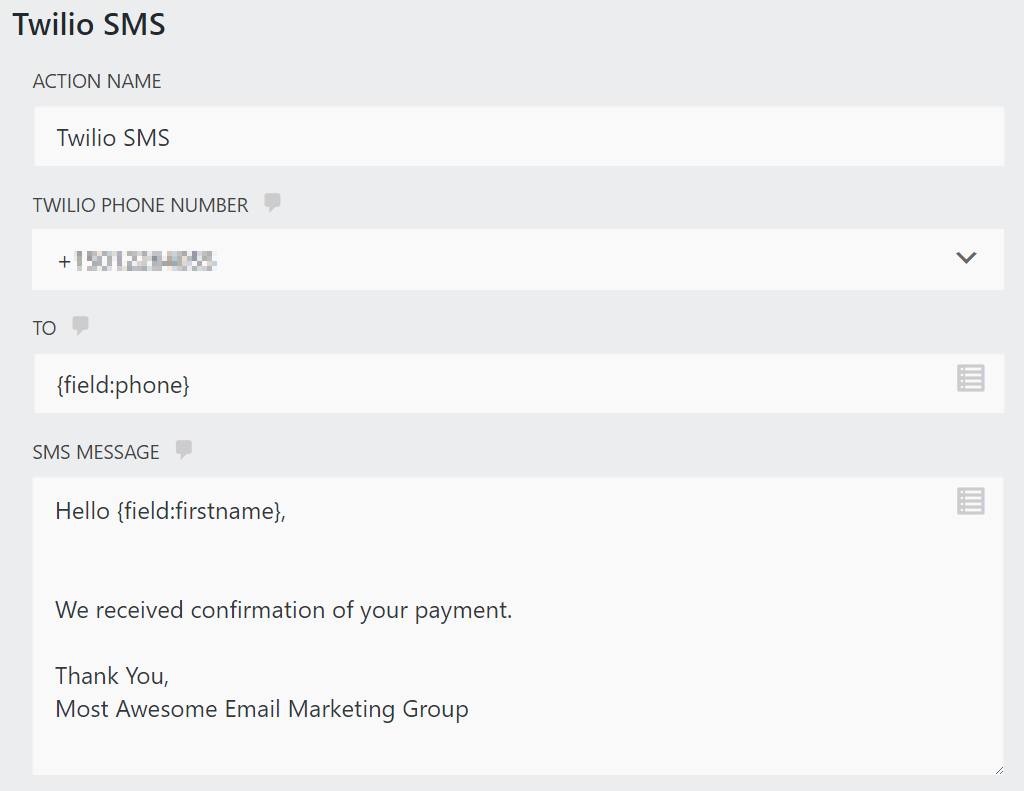
4. Customize the SMS message. You can include merge tags as well, like in the example below:

This image is an example of editing your Twilio SMS actions using merge tags.
5. Save and publish your form. Whenever someone completes the form, Twilio will send an SMS to the specified number.
Please Note
- Phone numbers must include the country code.
- For non-US users, enable your country in Twilio’s settings first.
- Messages larger than 160 characters may be broken into multiple messages. See more details here.
( Troubleshooting ) Message not received?
- Did you enter the number including the country code? Click here for more info.
- Check your SMS log HERE.
- In the United States, SMS usually arrives within a few seconds; in other countries, you may have to wait for a few minutes. (Check the SMS log for status.)


