Adding a New Form
You can begin a new form from either Add New in the WordPress dashboard menu under Ninja Forms, or in your Ninja Forms Dashboard.

Start With a Blank Form or a Template
Once you’ve clicked Add New in either location, you’ll be able to choose to start from a blank form or one of the premade templates.

If you choose to begin with a template, you’ll start out with much of the form already configured for you. Beginning with a blank form starts you out with an almost completely clean slate.
Customizing Your New Form
Form Fields
Adding Fields
Once you’ve made your selection on starting fresh or from a template, the Ninja Forms builder will open. You’ll find yourself on the Form Fields tab of the builder with the Fields Drawer open. A blank form has been selected in this example.

Fields can be added, edited, and removed here. Either click on any field to add it, or drag and drop from the window to the builder space. When you drag and drop into the space, you’ll see a green line appear. Wherever the green line is, that’s where your field will fall when you let go of it.
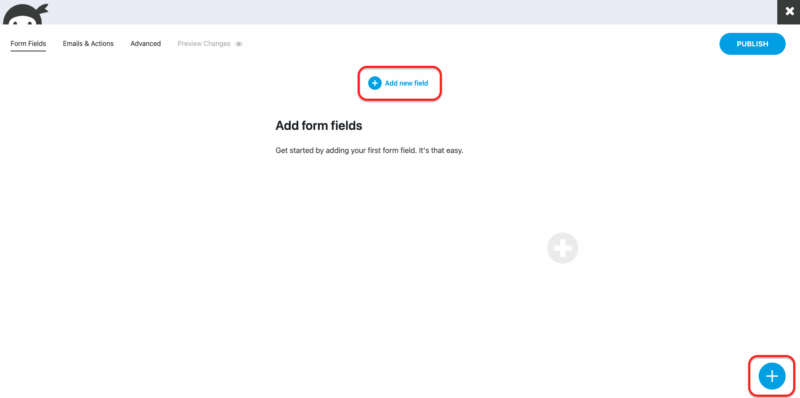
When you first begin a form, the Field Drawer opens for you automatically. Anytime you want to add a new field, you’ll need to either click the + Add new field at the top middle of the form builder or the little plus symbol, +, at the bottom right of the screen.
Editing Fields
All form fields have settings that can be edited to your preferences. Clicking directly on any field in the builder will open the setting window. Here we’ve clicked on the First Name field and changed its Label to say Name. You can see the change reflected in the builder.

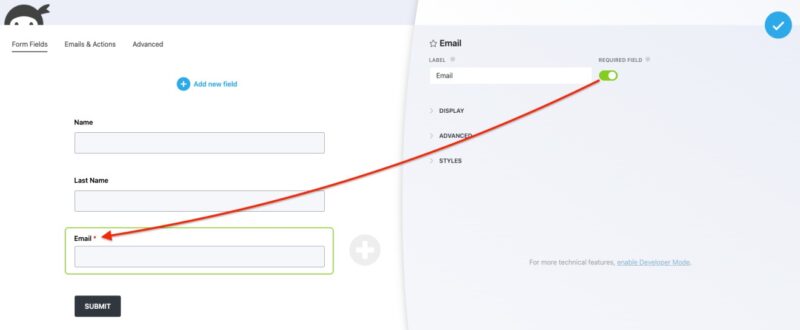
I want to make my email field required, so here I’ve clicked on the Email field and toggled on the Required Field setting. You can see the change reflected in the builder by the red asterisk that appears.
Deleting Fields
With the First Name field being changed to just Name, I no longer want the Last Name field on the form. When you hover over any field, you’ll see a gear icon appear.

Hovering over the gear icon expands it to show three options:
- Gear icon – opens the field settings window
- Trash icon – deletes the field
- Copy icon – duplicates the field

You can click the Trash icon to delete this field.
Emails and Actions
The Emails and Actions tab is where all form actions can be added, edited, and removed.

Form actions are things that happen when the form submits. For example:
- Sending an email notification
- Displaying a success message
- Redirecting the submitter to a new page
Every new form by default has an active Success Message, Admin Email (email sent to the website’s WordPress admin email address), and a Record Submission action.
Any action can be turned off by switching the green toggle off.
Each action can be edited by clicking on it just like you did with fields above. A settings window will slide out from the right.
New actions can be added by clicking the Add New Action button located above the list of actions. The Action Window will slide out from the right.
Advanced Settings
Clicking on the Advanced tab of the form builder takes you to the Advanced Settings screen.

The three settings at the top of the page are available in Ninja Forms core:
When one of these settings is selected a control panel will slide out from the right just like for fields and actions. Full details for each are on their own documentation pages, linked above.
Saving Your New Form

At the top right of every screen of the form builder is a blue button labeled Publish. This button does not publish the form in the way WordPress posts and pages publish to the live website. This button will save your form. Once saved, it will appear in the list of forms in the Ninja Forms dashboard. You can return to the form at any time. If a form is already added to your site, clicking the Publish button will make the changes live.
Previewing Your New Form
To see how your form will look once it’s included to a post or page, click Preview Changes at the top of the form builder.

This will generate a temporary visual of a new page with only your form on it. The appearance of the page and the form will be determined by the theme that you are using for your site. You can interact with the form here to test it out.
Publishing and/or Sharing a Form
Once you’re finished with your new form, it can be either added to a post or page, or shared via a live Public Link. For details on how, please see the documentation for either/both methods:
Navigating Back to Your WordPress Dashboard
Once you have published your form, to get back to your WordPress dashboard, click the X in the top right-hand corner.
