Ninja Forms Integrations: Which Tools Connect and How
You’ve got a form that works, and now you want those leads in Mailchimp, in your CRM, or in front of your team as soon as they come in. So does Ninja Forms work with ActiveCampaign, Capsule CRM, or WhatsApp? What about Streak, or the Postgres database your developer keeps bringing up, and which of these Ninja Forms integrations are real add-ons anyway?
The add-ons page is a wall of logos, and yours may or may not be one of them. Search around and you’ll find “integrations” pages that make every tool sound built in, right up until you go looking for the setting. And the thing you’re dreading is paying for an add-on, wiring it all up, and finding out it was never going to talk to your CRM.
Yes, it’s confusing. But it’s a lot simpler than it looks. Every tool you’d want to connect takes one of three routes, and below is the plain map of which tools have their own Ninja Forms add-on, which ones go through Zapier or Webhooks, and how to connect each one.
What you’ll need
- Ninja Forms (free)
- The add-on for your route: your tool’s own add-on, Zapier, or Webhooks (each sold standalone, or included with memberships)
- An account with the tool you’re connecting, plus a Zapier account if you take the Zapier route
Does Ninja Forms work with your tool? Here’s the whole map
Ninja Forms integrations take one of three routes. If your tool has a dedicated add-on, that’s the one to use. If it doesn’t, the Zapier add-on reaches more than 5,000 apps with no code, and the Webhooks add-on sends your form data to any tool with an API.
Here’s where the popular tools land, grouped the same way you’ll see them in the form builder:
| Category | Tools with their own Ninja Forms add-on |
|---|---|
| Email marketing | ActiveCampaign, AWeber, Campaign Monitor, CleverReach, Constant Contact, EmailOctopus, Emma, Kit, Mailchimp, MailPoet |
| CRMs | Capsule CRM, CiviCRM, HubSpot, Insightly CRM, OnePageCRM, Pipeline CRM, Salesforce CRM, Zoho CRM |
| Notifications and workflow | ClickSend SMS, Help Scout, Slack, Trello, Twilio SMS |
| Everything else | Zapier (no code) or Webhooks (for tools with an API) |
| Ad and campaign tracking | User Analytics, plus the free Google Analytics 4 action built into Ninja Forms |
Looking for a tool that isn’t in that table? You’re not stuck. Here’s the route for a few of the ones people search for most:
| Tool | Its own add-on? | How to connect it |
|---|---|---|
| Streak | No | Zapier, if Streak is in Zapier’s app directory |
| No | Zapier, if your WhatsApp Business tool is in Zapier’s app directory | |
| PostgreSQL | No | Webhooks, sending to an endpoint your developer controls |
| SupportBee | No | Zapier or Webhooks, or an Email action sent to your support inbox |
| Facebook, Google, and Instagram Ads | No | User Analytics to see which ad sent each lead; Zapier to pass leads on to the ad platform |
Is there a tool you’d like a dedicated add-on for? Let us know. Requests like that shape our direction and our priorities, and the more people who ask for something, the higher it moves up the list.
Find all the Ninja Forms integrations inside your form builder
You don’t have to dig through the add-ons page to find out what connects. Every form has an Actions window that lists every integration Ninja Forms offers, grouped by category, including the ones you haven’t installed yet.
- Open any form in the builder.
- Click the Emails & Actions tab.
- Click the blue (+) icon to open the Actions window.
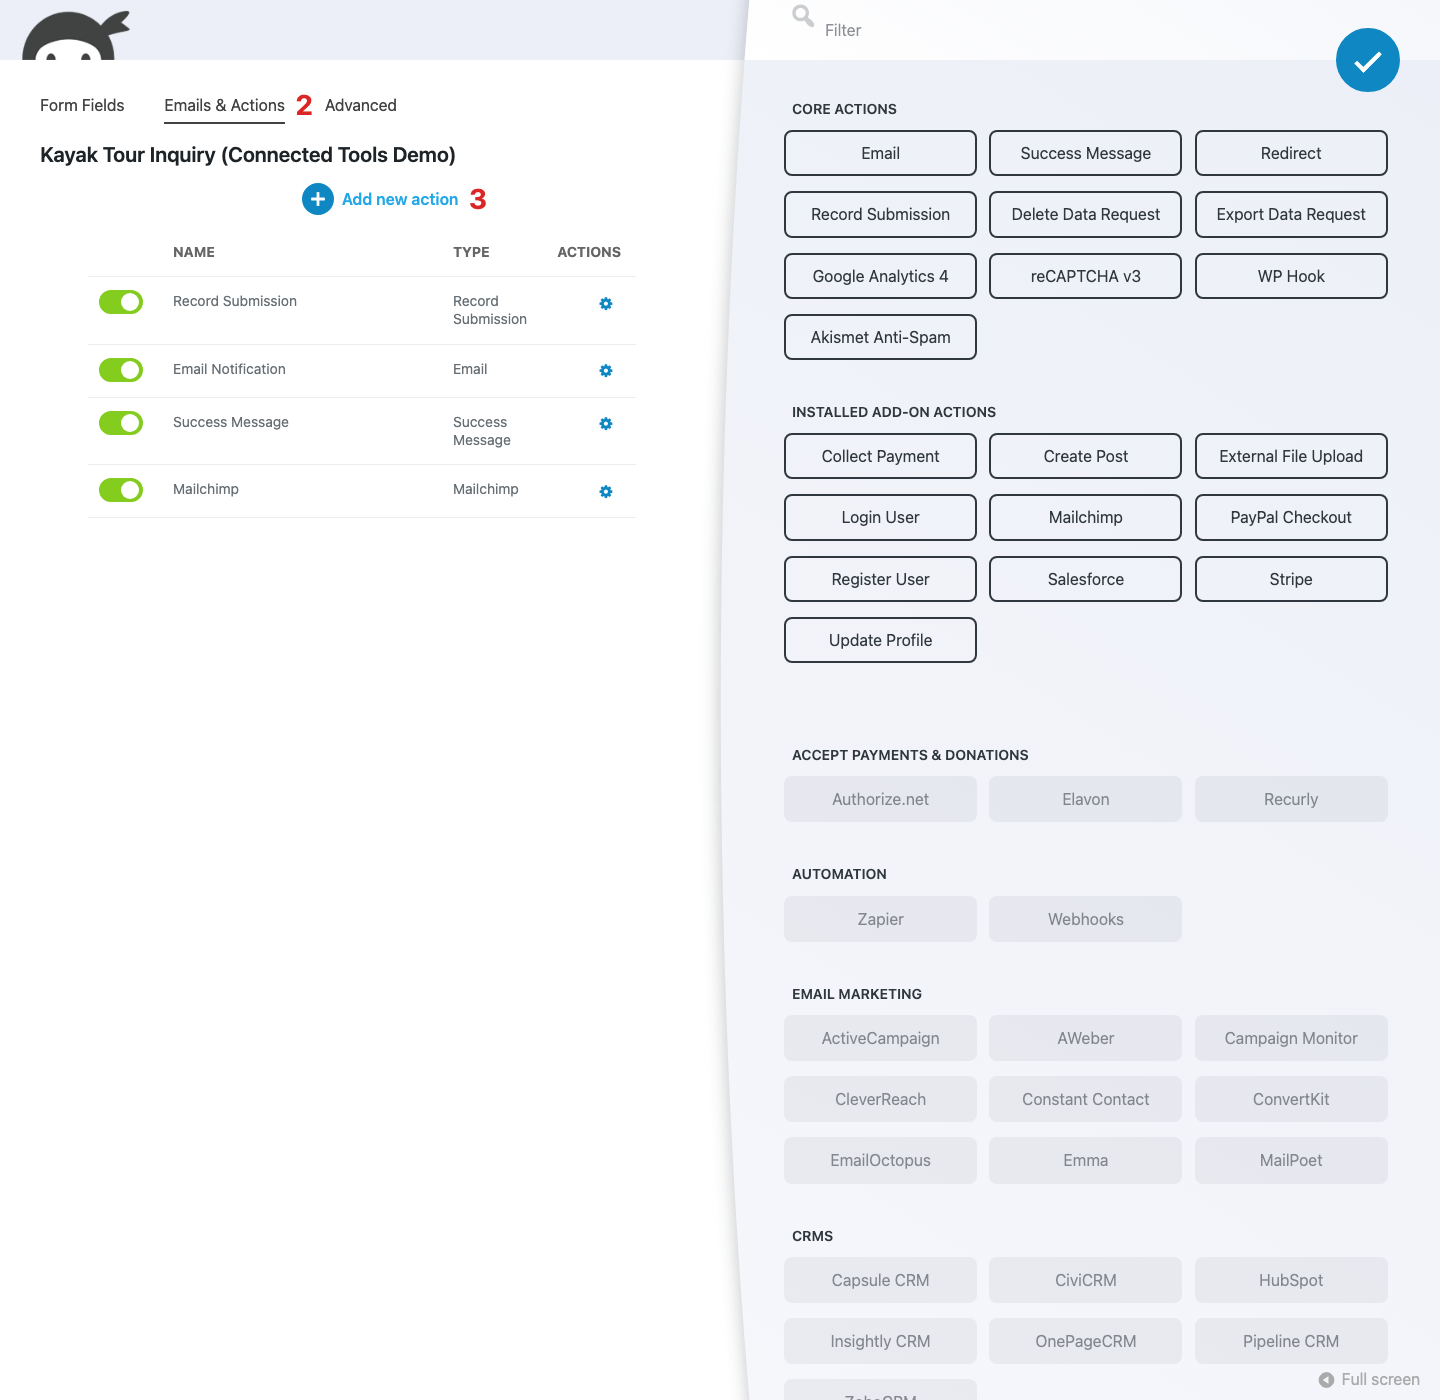
At the top you’ll see Core Actions, the free ones every form gets. Below that, Installed Add-on Actions shows anything you already own, followed by a heading for each category you don’t have yet: Accept Payments & Donations, Automation, Email Marketing, CRMs, and Notifications & Workflow.
Zapier and Webhooks live under Automation. One heads-up so you don’t go hunting: Kit still shows up there as ConvertKit, and Zoho CRM as ZohoCRM.
Your tool has its own add-on? That’s the easiest way across
A dedicated add-on is the simplest way to connect Ninja Forms to another tool. You connect your account once, add the add-on’s action to your form, and match up the fields. There’s no third service in the middle and no extra monthly bill.
We’d pick a dedicated add-on over Zapier every time it’s an option. Here’s how it goes with Mailchimp on a kayak tour inquiry form, and the other add-ons follow the same steps with their own settings (each one’s documentation has the specifics, like the Mailchimp docs).
- Install and activate the add-on, then enter its license key under Ninja Forms > Settings, on the Licenses tab.
- On the Settings tab of that same page, find the section named after your tool and connect your account. For Mailchimp, paste your API Key into the Mailchimp section and click Save Settings.
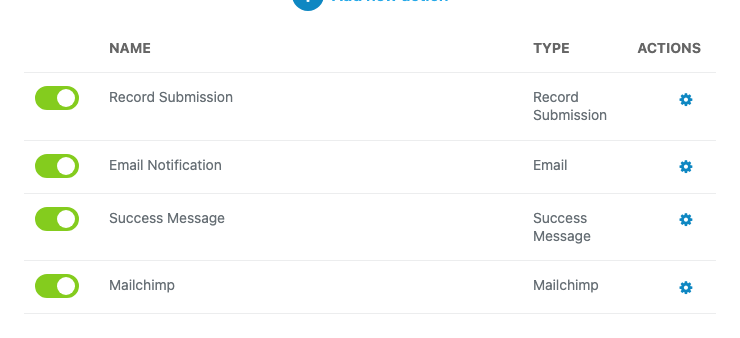
- Open your form, click Emails & Actions, then click the blue (+) icon. Your add-on now sits under Installed Add-on Actions, so click it to add it.
- In the action’s settings, pick where new contacts should go (Mailchimp calls it List) and match each form field to its spot in your tool.
- Publish the form, submit a test entry with your own email, and check that it shows up in your tool.
Don’t skip that test entry. If a key is wrong or a field isn’t mapped, your visitor still sees the success message and the entry still saves, so a quick test is how you’ll know it’s working.
Collecting newsletter sign-ups too? Add the Mailchimp Opt-In field from the Fields window, under Common Fields. Anyone who leaves it unticked can still send the form, and they just won’t be added to your list.
That’s all there is to it. No add-on for your tool? That’s what the next two sections are for.
No add-on for your tool? Zapier connects it with no code
The Zapier add-on sends each submission to Zapier, which can pass it along to more than 5,000 other apps. If your tool is in Zapier’s app directory, this is the no-code way to connect it. You’ll need a Zapier account, and Zapier’s own pricing applies as your volume grows.
- Install and activate the Zapier add-on.
- In Zapier, start a new Zap with Ninja Forms as the trigger, then copy the webhook URL Zapier gives you.
- Back in your form, click Emails & Actions, then the blue (+) icon, and add the Zapier action. Paste the URL into it, click Done, and Publish.
- Submit a test entry, then click Test Trigger in Zapier so it learns your fields.
- Finish the Zap by choosing the app the entry should go to and what it should do there.
If you change your form’s fields later, run Test Trigger again so Zapier picks up the new ones. Want to watch the whole thing start to finish? Our walkthrough on connecting WordPress forms to Google Sheets uses this exact route, screenshots and all.
Have a developer or an API? Webhooks sends your form data straight to it
The Webhooks add-on sends your form data to a URL of your choice every time someone submits. It’s the route for tools that have an API but no Zapier app, and for custom setups like saving entries to a PostgreSQL database through a small endpoint your developer controls. There’s no third-party bill, but you’ll need the receiving tool’s API docs to know what to send.
- Install and activate the Webhooks add-on.
- In your form, click Emails & Actions, then the blue (+) icon, and add the Webhooks action.
- Enter the Remote URL, and set Remote Method to POST.
- Under Args, click Add New for each value. Set Key to the name the receiving tool expects, and Field to the form field that fills it.
- If the tool expects JSON, expand Advanced and turn on Encode ARGS as a JSON string.
Not getting through? Turn on Run in Debug Mode, also under Advanced, and the remote service’s response shows up after you submit, which usually points right at what’s missing. The Webhooks docs cover every setting.
So which should you pick? If you’re not a developer, go with Zapier. If you are one, or have one, Webhooks skips the middleman and the monthly bill.
Using a helpdesk like SupportBee? Check whether it turns incoming email into tickets. If it does, point a regular Email action at your support inbox and you’re set, no add-on required.
Developers who’d rather write to their own database from PHP can skip both add-ons and use the free WP Hook action instead.
Facebook, Google, or Instagram Ads: track which ad sent each lead
Ninja Forms doesn’t have an add-on that connects directly to Facebook, Google, or Instagram Ads. What most people searching for that want to know is which ad brought each lead in, and that’s the job of the User Analytics add-on. It adds hidden fields that save the campaign details from your ad link with every submission.
- Install and activate the User Analytics add-on.
- In your form, click the Form Fields tab, then the blue (+) icon to open the Fields window.
- Scroll to User Analytics Fields and add UTM Source, UTM Medium, and UTM Campaign.
- Tag your ad links with UTM parameters, like
?utm_source=facebook&utm_medium=paid_social&utm_campaign=fall_tours.
That’s it. Your visitors never see these fields, and every entry under Ninja Forms > Submissions now shows where it came from. When we sent a test visit through that tagged link, the entry saved facebook, paid_social, and fall_tours, while a visit with no tags saved n/a.
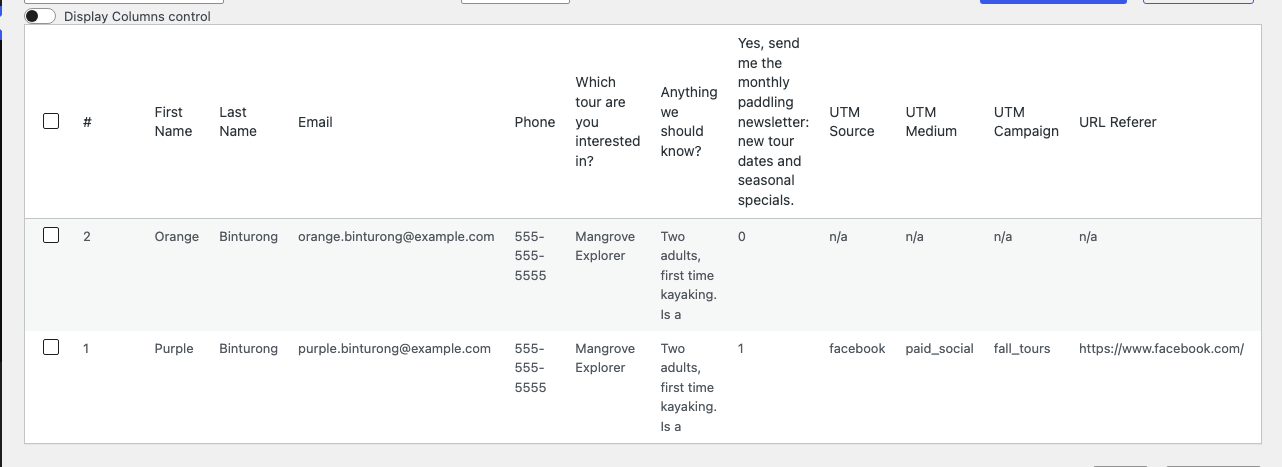
Seeing n/a on every entry, even from tagged links? Some hosts’ page caching strips UTM parameters before the form can read them, so ask your host to exclude utm_ parameters from the cache. Our guide to tracking UTM parameters on your forms goes deeper on campaign tracking.
Want submissions counted in Google Analytics too? The free Google Analytics 4 action, under Core Actions in the Actions window, sends an event each time the form is submitted, as long as your site already sends data to GA4. Here’s how to track form submissions in Google Analytics.
Connect your form to the tools you already use
Like we said at the top, figuring out which Ninja Forms integrations fit your tools shouldn’t feel like guesswork. You now know the three routes: your tool’s own add-on when it has one, Zapier when it doesn’t, and Webhooks when there’s an API and someone to wire it up. And like we said above, if your tool has a dedicated add-on, use it, because one less service in the middle is one less thing to break.
Find your tool on the map above and pick up its add-on. Not on the list? Grab the Zapier add-on and connect it without writing a line of code, or get the Webhooks add-on if you’ve got a developer on hand.
Try Ninja Forms Today
Always free, with premium features available through our memberships.