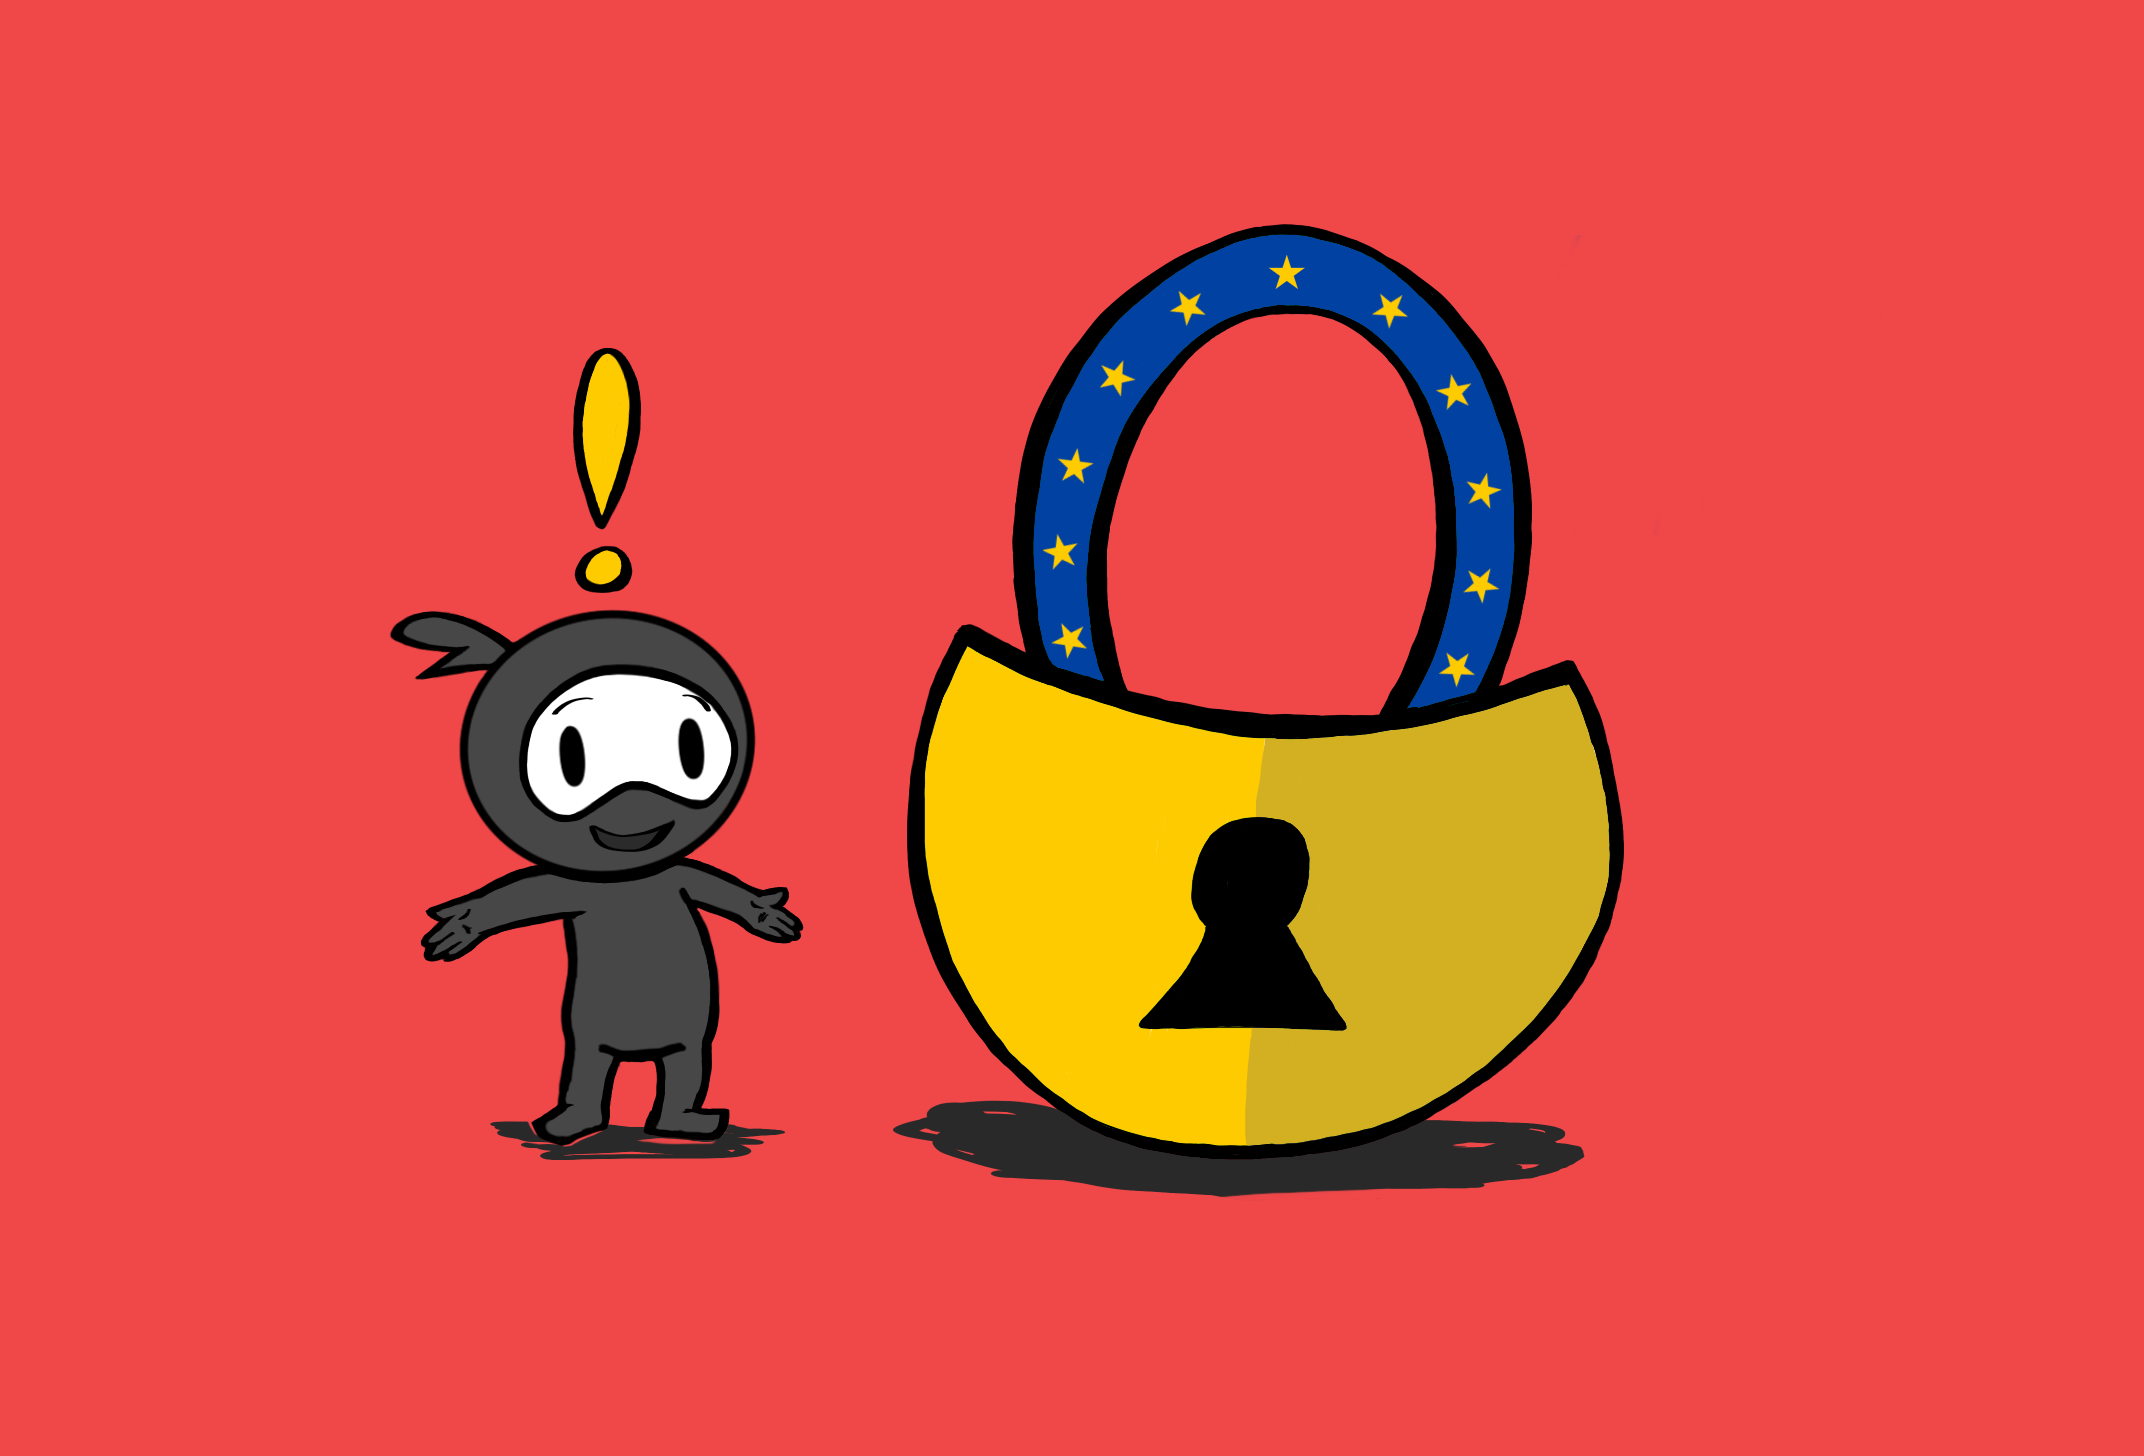
GDPR Compliance and WordPress Forms: Everything You Need to Know
Change is on the horizon with the approach of the GDPR (General Data Protection Regulation), the EU’s sweeping new suite of data privacy regulations. As it applies to data collection that impacts any EU citizen, whether you’re based in an EU country or not, the reach of the GDPR does affect you. These new regulations take effect on 25 May 2018, meaning we have less than a year remaining to prepare for GDPR compliance.
Are you ready? Have questions? Hundreds of thousands of Ninja Forms users put their WordPress forms to work every day collecting information about their users that falls under the scope of the GDPR. We want you to be comfortable and prepared for the new regulations so that you don’t have to worry. To that end, we’re providing this article as your go-to resource for GDPR compliance where WordPress forms are concerned.
We’ll hit three major topics for you:
- What is the GDPR?
- What is the scope and impact of the GDPR?
- How can I be compliant with Ninja Forms?
GDPR compliance for Ninja Forms users is 100% free and requires no additional plugins!
We’ll be keeping this article updated with any new changes as we move closer to the regulations taking effect, so keep checking back! **UPDATE** Click here for recent GDPR feature additions!
A Quick Word Before We Get Started…
First, an obligatory disclaimer so that our lawyer doesn’t throw me out a metaphorical window: we’re not lawyers and what follows isn’t legal advice. We have a vested interest in your success under the GDPR, but if you need concrete legal counsel, talk to a lawyer.
Now that we have that out of the way, a bit of perspective: new regulation can be scary. There’s already a fair bit of anxiety out there about the GDPR and the usual mix of misinformation and misunderstanding that accompanies new regulations on this scale.
We can speak with a high degree of certainty where data collection through your forms is concerned. The GDPR isn’t looking that scary. The EU’s intention largely looks to be a paradigm shift in the way the world thinks about and treats privacy and data collection. Enforceability is probably going to look very similar to VAT. Corporations and government agencies will likely be expected to comply immediately, and that will create a ripple effect that sets a new standard for how we handle data worldwide. It’s extremely unlikely that the EU authorities are going to start dropping noncompliance fines on small businesses in Montana fresh out of the gates next May.
In that light, it’s a cause that we can get behind 100%. Safeguarding your personal data, and helping you to safeguard your users’, is extremely important to us. Using Ninja Forms, compliance shouldn’t be difficult. Let’s begin exploring the GDPR and how to make this transition as painless as possible in the months ahead!
What is the GDPR?
The General Data Protection Regulation (GDPR) is the replacement for the Data Protection Directive 95/46/EC. Originally enacted in 1995 while the internet was still young, they’re definitely due the update. The change is much more than a simple update/upgrade of existing policy, however. At its core, the GDPR is a move towards enshrining control of your personal data as a fundamental human right.

The GDPR gives EU citizens control of their digital data by empowering them with the right to know when personal data is being collected, what data is being collected, access to that data, and to purge it on request. And that’s just a general overview; we’ll get into the nitty-gritty of the details below.
In short, the GDPR is a data privacy regulation that modernizes and normalizes data privacy laws across Europe and applies to any organization collecting data on EU citizens.
Impact and Scope of the GDPR
The GDPR makes several key changes to privacy law and introduces basic data subject rights for all EU citizens. We’ll look at each in turn below.
Increased Territorial Scope
The reach and applicability of the GDPR are not limited to the EU, but instead, impacts any website/organization that handles the personal data of any EU citizen. This means that essentially any WordPress website must comply with the GDPR no matter where in the world the servers or administrators are physically located. If you accept traffic from the EU and collect information from EU citizens, GDPR compliance matters.
In technical terms, the GDPR applies to any processing of personal data by both controllers and processors of that data. Article 4 defines controllers as anyone that is involved in determining how personal data is handled regardless of whether they directly collect that data or not. Processors are defined as anyone who actually processes personal data on behalf of the controller. This is a key point to note as it broadens the scope of the GDPR to anyone involved in not just the collection but the handling of personal data as well, including cloud services.
Explicit Consent Requirement for Data Collection
Strengthened consent requirements are the core of the new regulation. If you collect or manage any EU citizen’s data, you must:
- Request the explicit consent of every user before any data collection takes place. Requests must be in clear, plain, easily understandable language free of legalese. It also must stand alone from other matters or requests and not be buried in other texts.
- Have a clear and accessible privacy policy that informs users how collected data will be stored and used.
- Have a means for users to request access and view the data you have collected on them.
- Provide users with a way to withdraw consent and purge personal data collected on them; i.e. the “Right to Be Forgotten”.
Penalties and Fines
Penalization for noncompliance comes in the form of tiered fines that scale to the severity of the violation. Fines cap at 4% of annual turnover or €20 million, whichever is greater.
Data Subject Rights
In plain English, a data subject is any EU citizen from which you are collecting personal data. GDPR compliance requires data subjects to be granted certain rights. What follows is not an exhaustive list, but those rights that are relevant to the collection, processing, and storage of personal data on your WordPress website.
Right to Access. Data subjects must be able to request and obtain confirmation that data is or is not being collected on them, and if so exactly what data is being collected, how, where, and for what purpose. That data must also be provided to them in an electronic format free of charge on request.
Right to Be Forgotten. Data subjects must be provided a quick and painless way to withdraw consent and have collected data purged.
Data Portability. Similar to the Right to Access, Data Portability requires that data subjects are able to request, obtain, and/or transfer possession of collected data at any time.
Breach Notification. If a breach/unauthorized access of personal data takes place that is likely to “result in a risk for the rights and freedoms of individuals”, the notification must be made within 72 hours of becoming aware of the breach.
GDPR Compliance and Ninja Forms
Forms exist to collect data offered by your visitors, guests, and members. How can you maintain GDPR compliance while using Ninja Forms? Let’s dive into the details of what this new regulation means for you and your WordPress website specifically.
**UPDATE** Click here for recent GDPR feature additions! …or find them below!
What Forms Do We Need to Worry About?
First, not all your forms are necessarily going to be impacted by the GDPR. Running an anonymous survey? Quiz? If you’re not collecting personally identifiable information on users, your form’s not impacted. However…
Are you asking for a name? Email? Address? Phone? The GDPR impacts that form. If you’re using any email marketing or CRM extensions in a form, it’s affected. Save Progress? It’s affected. Most likely any form that deals with commerce of any type through Stripe, Paypal, or Recurly is affected. If you’re collecting any personally identifiable information whatsoever, GDPR compliance becomes important. So, how to comply?
How Can We Comply?
It’s actually not that burdensome to make your WordPress forms compliant if you’re a Ninja Forms user. We have several avenues to explore here, so let’s take a look at options.
To Store or Not to Store?
Drop dead easy way to comply: if you don’t need a record of the data collected via your forms, then simply don’t store the data. This eliminates any question of GDPR compliance. Just zip on over to the Emails & Actions tab of the form and toggle off (grey) the Store Submission action and make sure that if you’re using an email action the email doesn’t include form fields with personally identifiable data.

Now this obviously isn’t going to work for most of us. Many of us use our forms expressly for the purpose of collecting data, and having a record of submissions is mission-critical. Let’s look then at how we can collect data and still comply.
1. Request Consent
Explicit consent has to be obtained before data collection can take place. In other words, before the user submits the form. They must be made aware that this form is collecting personal data with the intent to store that data. You’re also responsible for letting the user know how that data will be stored and used. Don’t sweat, it’s easier than it sounds.
First, you need a privacy policy. The Right to Access states that a user must be informed if data is being collected, what data is being collected, how, where, and for what purpose. That’s a load of info. To keep things simple and easy in your form, use your privacy policy to fully disclose your data collection and storage practices, and then link to that privacy policy from the form when we request consent.
Informing the user that a form is going to be collecting personal data and requesting consent is as simple as two fields: the humble HTML and Single Checkbox fields.
Enter informational text & link to your privacy policy in the HTML field:

Request consent in the Checkbox field and make it a required field:

The user eye view:

This setup prevents data from being submitted unless consent is explicitly granted. If for any reason you would want the form to submit without consent being granted (the checkbox field not being required) you can do so and still remain compliant. Just use Conditional Logic to toggle on the Store Submission action only if the checkbox has been ticked. Data won’t be stored unless consent has been granted. Fringe use case perhaps, but still there if you need it.
2. Make User Data Organized and Accessible
Ninja Forms can collect and store data in 2 ways: submissions and email. What we’re about to cover here is applicable to both forms of stored data.
You must:
- Be able to provide a user with all personal data you have on them on request
- Be able to purge all personal data you have on them on request
The responsibility of being able to associate submitted data with the submitter falls to you. There are probably a number of ways to pull this off. Our recommendation? The simplest means would likely be to always collect an email address when you collect personal data of any type. Submissions can easily be searched by email address:

This will allow you to easily pull together submissions from a given user and either provide an export or delete them on request. Emails can similarly be searched and dealt with. You should probably also state somewhere (privacy policy?) that this is how you’re handling things for transparency’s sake.
3. Have an Open Channel for User Requests
GDPR compliance requires that you be reachable and responsive to user requests for data that you’ve collected on them either to view or delete. There are a number of ways to handle this also, but obviously, we recommend a form!
A simple consent withdrawal/request to view form on your privacy policy page (which is linked to by any form which collects personal data) will do the trick nicely. If you’re a Conditional Logic user, one form would easily serve both purposes. From there it’s just up to you to be responsive. We recommend setting up an email action that notifies you each time this form is submitted.
If you’re extra paranoid about missing one of these, we have a number of extensions that will add an extra layer of peace of mind, pinging you by different means when a form submits: Zapier (to use a notification service of your choice), Slack, Twilio, and ClickSend.
UPDATE: Automate Export and Delete Requests Using Recently Added WordPress + Ninja Forms Features!
Complying with data subject requests for exporting or deleting data is a fundamental part of GDPR compliance. With the recent release of WordPress 4.9.6, you now have baked-in options that allow you to meet these requests.
New WordPress Export/Erase feature allows you to pull all personal data associated with an email address
Under Tools in the dashboard, you’ll now see two new options: Export Personal Data & Erase Personal Data. The two screens are virtually identical:

Simply input a username or email address into the field there, and WordPress will find all personal data associated with it for you.
This is fantastic, but there’s no good way to allow data subjects to actually make these requests. As-is, the process would look a little something like this:
- The user finds a way to reach out to you with the request
- You manually input the email address
- WordPress sends a confirmation email to that address (Requester status set to Pending)
- The user confirms the email address (Requester status set to Verified)
- You check in and grant the request for the verified email address
This process requires your time and attention from start to finish. Keep reading below for a much simpler solution! 🙂
You can simplify and automate the Export/Erase request feature using your WordPress forms!
The most recent Ninja Forms update provides a front-end form (and a new action) to field these requests. The form (or action) allows users to make the request directly. To properly associate users with their submitted form data, we’ve also upgraded the Store Submission action.
Together, these two upgrades mean your time and attention are only required at the very end of the above process. All you’ll have to do is periodically check the admin for new verified requests!
Associate every form submission with a user email address using this new feature
To help you organize user data for automated compliance with export and erase requests, we’ve upgraded the Store Submission action. Check it out under your Emails & Actions tab.
You’ll now find a setting within this action that will link the submitter’s email address to the form submission when using the new export/delete data request forms introduced in the next section.

Just map the email field of the form to the Designated Submitter’s Email Address. You have the option to map it to other fields if necessary, but we recommend associating by email. With this done, the feature described below will fully automate export and erase requests!
New Export/Delete Data Request forms and actions
The newest update to Ninja Forms (3.3) introduces 2 stock WordPress forms and actions:
- Delete Data Request
- Export Data Request
The forms can be found under Ninja Forms > Add New:

And the actions can be found under the Emails & Actions tab of any form:

When a user submits one of these forms, or a form containing one of these actions, Ninja Forms communicates that request to the new WordPress Export/Erase feature. The Requester email address is submitted for you and a confirmation email is sent.
All that’s left for you to do is periodically check into the admin to scout for new, verified requests. Granting them for a any user is as simple as clicking the Download or Delete button on the admin page.
UPDATE: Mark any field as Personally Identifiable Data, easily anonymize that data when Delete Data Requests are processed
Each field now has a toggle to mark that field as Personally Identifiable Data. It’s on my default for certain obvious fields, and can be toggled on for any field:

Delete Data Requests can now be set to anonymize personal data rather than delete it. Any field marked as Personally Identifiable Data will be anonymized. All other fields will be left intact.
The anonymize option can be toggled on under the Advanced settings of the Delete Data Request action:

UPDATE: You can now toggle data storage OFF per field
In the time since this article initially published, many of you have asked for a way to toggle off data storage on a per-field basis. As of the 3.3 update, this is now a standard feature. You can now select which fields will be saved to the database, and which will not.
Under Emails & Actions of any form, locate your Store Submission action and give it a click!

You can use the Except section there to exempt fields from data collection with Save All selected. Conversely with Save None selected you can specify which fields will be saved to the database.
UPDATE: Submission data can now be set to expire
Per your request, we have added functionality that will force submission data to expire after a set number of days. You can find this feature under the Store Submission action on your Emails & Actions tab:

Just expand the Advanced settings of the action and toggle it on. By default submissions are set to expire after 90 days. You can adjust that as needed. Expired submissions will be sent to Trash under Ninja Forms>Submissions, so be mindful to take out your trash regularly if you don’t want that data present at all.
Coming Soon: Upcoming WordPress GDPR Compliance features for your WordPress forms!
We’ve been working hard to field your requests and implement features to make WordPress GDPR compliance easier for you. If you’ve been checking back with this article over time, you’ll have noticed that several features have already been moved from this section to the implemented processes described above.
This section is getting shorter and shorter! We monitor the comments you leave below and, of course, our support queue. What other features would make GDPR compliance easier for you?
Global submissions search
Currently searching submissions for an email address or other bit of data requires a manual search through each form’s submissions. If you have a lot of forms, that’s a big pain. We realize that and are very close to having a shippable global search feature to release. Look for it to be ready in the near future.
We Know You Have Questions…
Our intention here is to inform you. We want each and every one of our Ninja Forms family to transition into the GDPR landscape as effortlessly and as painlessly as possible. We’ve done our absolute best to parse these new regulations and provide the most accurate information as possible. We’ll also continue to update as the regulation moves towards implementation in its final form in May of 2018. Continue to check back with us here for those updates. **UPDATE** Click here for recent GDPR feature additions!
We can and will address your questions to the best of our ability. We certainly don’t have all the answers, but there’s a lot we can tackle with a high degree of confidence. Especially as relates to your forms. What questions do you have about the GDPR? Fire away!
Try Ninja Forms Today
Always free, with premium features available through our memberships.
Typical EU regulation stuff. Are you required to collect the same consent though when the users send you an e-mail themselves? I mean, when you display your e-mail address on your contact page?
Norbert,
I can’t imagine the GDPR would apply to routine email exchanges/conversations. Technically their email address would be stored by the email client you’re using, but that would seem a stretch to call data collection on your part.
Cheers,
Quay
That sounds relieving for some of us. Thanks for being so proactive!
If you, as a business, organisation, charity etc, provide a means of communication which may mean the ‘processing’ of personal data, then the GDPR will apply. The email client in this regard would have to be compliant. Ensure that you evalutate your organisations collection of personal data and craft your unique privacy policy (‘Fair Processsing Notice’), to allow visitors to your site the choice. Processing of personal data under the GDPR has to be fair, lawful and transparent.
In particular relation to forms, even with the ‘do not store’ option, you have to be able to demonstrate that the receiving system/organisation is compliant with the GDPR. So additionally check the hosting provider and how they are preparing for the GDPR as they will be data processors (by hosting your site), and you will no doubt be classified as the data controller. Remember under the GDPR if there any data breaches, both parties could be liable.
Excellent article, really clarifies it all thanks. Cant seem to find any practical tips for web developers out there to comply, about what we actually need to physically do! It seems quite simple really now, despite all the scaremongering out there!
Just wondering would the same methods above suffice for ecommerce sites storing order & customer data (using WooCommerce + Ninja Forms addon for example ) by simply adding an extra checkout filed with description & checkbox?
Thanks again!
John
John,
Hey! I don’t think you’d even need to add an extra checkout. As long as you meet the criteria laid out in the article somewhere in your normal checkout process, you should be good.
– state that you’re collecting data, let them know what data, and request consent in an obvious, explicit, and plainly spoken fashion
– make certain you’re storing that data in such a way as that it can be linked back to that user for future deletion on their request
– provide an easy way for them to request that you no longer collect data on them, delete collected data, or provide a copy of collected
data
Cheers,
Quay
Great article!
Something I’m still not 100% clear on.
If someone uses your website form to contact you to get a quote/ find out more about your services, are you able to call/email them back without infringement? Does the fact that they filled out the form imply consent?
Shea,
Thanks! It’s my understanding that you must explicitly request and acquire consent no matter the intended purpose of the form. If personal data of any sort is being collected, implied consent is not enough to satisfy the requirement.
Cheers,
Quay
If the form is a contact form for potential customers inquiring about a product, and they get sent a copy of what they submitted at the time they submit (along with consenting for their data to be stored for response and newsletter purposes) does this satisfy the access to data requirements, for that piece of data at least?
Sophia,
To the best of my knowledge, no. You need to be able to comply with any future request by that user to provide them with all personal data you have stored on them.
Cheers,
Quay
What about if you name an individual on your website in a testimonial?
Does this constitute the collection of personal data?
Do I need their explicit consent?
David,
Hey! If you’re using a quote from someone as a testimonial on your site I would definitely get their consent to do so first, but I would not think that would constitute personal data collection under the GDPR… however, that’s a better question for a legal professional than myself, unfortunately.
Cheers,
Quay
Yes you do. ANY information that can be directly related to a person must comply with GDPR (picture, ip address, name, phone number, email address,…)
Not just consented, but stored safely, available for them to read, and in simple way to view, download and request deletion.
If forms are hosted in the US but are embedded in your website hosted in the UK. If a user uses the form and submits the data, does that count as you sending their data out of the EEA? Or, because the user did it themselves does it count as them sending their own data out of the EEA and then the form platform sends it back into the EEA when you collect it? If I just had a statement under the form on the website that said “by clicking submit and ticking this box you consent to sending your data to a third party located outside of the EEA.”, would that cover us?
Any organization offering services to EU citizens MUST comply with GDPR. It’s not about where you come from, it’s about who you offer to.
Thanks for the article! As I understand it, consent is NOT always required. There are 6 legal bases for processing data, one of which is consent. Another is ‘Contract’, which would be appropriate if someone has requested a quote through your website – in this instance, a consent checkbox is NOT required.
Quoting from the ICO website:
“The GDPR sets a high standard for consent. But you often won’t need consent. If consent is difficult, look for a different lawful basis.”
“Avoid making consent to processing a precondition of a service.”
ICO website: https://ico.org.uk/for-organisations/guide-to-the-general-data-protection-regulation-gdpr/lawful-basis-for-processing/
Article I wrote on GDPR for WordPress websites (NB I’m not a lawyer!): https://hexagonwebworks.com/gdpr-wordpress-websites/
Thanks Sarah! That’s a really helpful addition to the conversation! 🙂
Cheers,
Quay
Your article is super helpful for formulating a plan of attack, Sarah – thank you!
Hello,
With regards to GDPR and things like anonymization or pseudonymization, how does that impact reporting/dashboard views? i.e. if a WordPress user has access to a view that list submissions they will be able to see PII.
Assuming that the user is “authorised” to view does this means that kind of data needs to anonymized in anyway?
Does data need to be stored encrypted etc in order to meet any technical requirements?
Thanks,
Andrew
Andrew,
Only individuals with Administrator level permissions can view Ninja Forms submissions.
To the best of my understanding after reading the text of the GDPR, data encryption is recommended as a best practise but not mandated for compliance.
Cheers,
Quay
Can you force the user to check the box to agree to marketing before the form submits?
You could hide the Submit button via Conditional Logic pending the box being checked, yes.
https://ninjaforms.com/extensions/conditional-logic/
Cheers,
Quay
Maybe a silly question here . . .
How does a web form logically validate an “EU Citizen” segment vs anyone else on the planet? Or should the form simply treat all users with the same opt-in dialog and backend processing?
There’s entire federal agencies that struggle to determine citizenship or residency.
Not silly at all!
There hypothetically are ways to validate where a user is located when form loads, for example with User Analytics by capturing IP. That would almost never be foolproof however. A visitor using a VPN for instance may not have their true IP captured by any tool you might employ.
The most direct route would be blanket application of the new guidelines, rather than trying to only focus on EU citizens. That’s a more effective approach that takes less work on your end, and you might just earn the appreciation of your non-EU users, too. Knowing that your website/organization/etc respects user privacy and personal data certainly won’t be taken as a negative by much of anyone 🙂
Cheers,
Quay
You can’t and that’s tricky part. Indirectly they made us all comply to “respect someone’s privacy” regulation.
Thanks for a helpful article!
I thought I read somewhere that it is important that the data stored is encrypted and even ‘separated’ eg. name is encrypted and stored separately from email address, date of birth or other sensitive data?
Also, I notice this comment form does not have a checkbox asking for our consent to store data. I guess you’re not feeling the need to comply just yet, or do you feel that this isn’t needed here?
Thanks again.
Glad you found it helpful!
– I’ve not read about the encryption/separation point. I do not believe that’s an aspect of the GDPR, but I am not legal counsel 🙂
– We’re still hammering out the finer points of implementing GDPR compliance ourselves! WordPress stores your name and email each time you comment, and that will definitely fall under the realm of the GDPR. Something along the lines of a consent request checkbox will probably be implemented in the future, and WordPress allows you to search and delete comments to comply with a user’s request to delete that data. That’s just thought spaghetti at this stage; as I said we’re still working through the details of everything we need to do before May as well!
Cheers,
Quay
Great article. We’ve been working hard on building a All in one GDPR plugin for WordPress to help website owners become compliant. Our plugin has an integration with Ninja Forms, to make this process even easier.
Check out the plugin here: https://gdprplug.in/
This article is misleading and wrong.
GDPR is not about websites it’s about user privacy. Follow me through:
I’m writing this text here and I am going to send it so you can all read it. I need to enter my name & email but there is no consent of mine that:
– states for which purpose I am giving my data (so “I consent to having ACME Inc collect my name and email” just wouldn’t be enough)
– there is no way for me to see my data, download and/or request deletion (to comply with the regulation those functions need to be made in SIMPLE way – not writing to NinjaForms an email, so they can copy-paste in their reply when they feel they have time – eg: there should be a place where I can enter my email and they should send me a link where I can see my data, download them and request deletion).
Next we have offline businesses; If you are not storing your submission forms online you are still using personal data from your forms to deliver goods or services to your customers – that storing and processing still counts. and needs to be recorded, consent, available to download and to request deletion.
Ranko,
I’m sorry you feel that way about the article, but I’d respectfully say that you’re misinterpreting our position here. I agree with you 100% that the GDPR is more about respecting user privacy that a technical manifesto. In fact, I’ve written an article that addresses exactly that point which we’ll be publishing soon.
The GDPR is a call for businesses around the world to step up and show a greater respect for the people they serve every day. We’re behind that completely, and are in the process of assessing and modifying so that our site meets those standards more thoroughly ourselves. I encourage you to check back with us soon to read more on our position.
Cheers,
Quay
I might also point out that this article is an overview of the GDPR. As a WordPress form builder product we are not trying to explain compliance in every area that the GDPR touches. We are trying to explain how you can be GDPR compliant with your use of Ninja Forms. As a product company, this is our chief concern for our users.
Thanks very much Quay.
Thank you so much Quay! We use WordPress for our blog and this definitely does help. I’ve been researching on the regulations for a while now and most guidelines are quite vague, at least to me. This does help a lot.
Glad to hear it!
The main issue with GDPR is the same issues we faced with the Cookie law a few years ago. In short, the people enforcing the law are unable to put into very plain language what is required. First I think the article is a good start, but there are some additional things to think about. So the first is that your compliance is as weak as your worse behaving Plugin or Theme. In other words what personal data (including ip) is being stored as a whole in the WordPress database. And more important than the consent aspects you need to access the risk in the case of a breach. Simply getting people to agree to store their data is not good enough. And the final part is anytime any part of WordPress, Plugins or Themes are updated, you have to go through the process all over again. The safest route is to take the attitude of only using the Plugins you absolutely need to. Also avoid any Plugins which are not absolutely transparent with how they work.
Thanks for your thoughts, Mark!
“The safest route is to take the attitude of only using the Plugins you absolutely need to.” stands out as very solid advice, particularly. Not just for the sake of the GDPR, but for a variety of reasons. General security not the least amoung them 🙂
Cheers,
Quay
Does Ninja Forms have an option to automatically delete captured data from the submission database after a set period of time?
As per the ICO’s Principle 5, which states: retain personal data no longer than is necessary.
This suggests that if a general inquiry has been dealt with it would be good policy to delete the data, this could be done via the deletion of the email but Ninja Forms also stores the data – can this be set to delete permanently after a set date?
We don’t, but after reading your comment and looking into the ICO a bit, I’ve submitted a formal feature request for this to our development team to consider. Thanks for your feedback!
Hi! How about if you don’t use a plugin for your enquiry forms and you simply receive an email with the inputted information? Do you need to change the way that works or does that fall under legitimate interest? Thanks!
Hello. Thanks for the article. I have a not unique use case in that we collect, store and pass our information via webhooks to a lead distribution platform that then sells leads to partners.
I am yet to find a truly useful article that clarifies how and if I am liable for how the information is used after it has left me (considering I was the original data holder).
Also, I use ‘Salient Theme’ and have major issues with the compatibility of the single checkbox field. It is either totally hidden (with one function of the theme selected) or such a small circle that its hardly seen and certainly not clickable.
Is there any support I could get for this to make sure I can continue using NFs.
Thanks
What happens to attachments? Are the encrypted on the server?
All data in your WordPress database is saved as plain text by default. That’s a WordPress-wide default. Database encryption is something you’ll need to implement if it’s needed/desired.
Thank you. Is there a plug-in or tool specific to NINJAForms available that encrypts the attachments that are uploaded by users of the specific forms?
Unfortunately, no. File Uploads stores uploaded files in your database unless you have it set up to save to an external source (and then it just ‘passes through’ the db en route to that source). Any database encryption should cover any of these files as well, but encrypting the WordPress database is a larger task than what fits within the scope of a forms plugin 🙂 … I wish I had some tools to recommend you. Something worth looking into in the future!
Hi,
I believe submissions received before the 25th May will also need to be re-consented if explicit consent was not given originally.
Is there an easy way of doing this with Ninja Forms?. Unfortunately I have already turned off store submissions and deleted submissions as mentioned in this article.
However, although the submissions are no longer stored in the WordPress database, the emails generated/sent from those submissions are likely still available in my Gmail. So is Gmail still considered ‘storing’ PII data and therefore I still need to add a opt-in checkbox for this even though I have ‘store submissions’ turned off?.
Andy,
Hey! I’m honestly not sure about ‘re-consenting’ previously collected data, but I’d think not. For sure though you’d still need a way to provide/delete previously collected submission data on request.
For email, with the caveat that I’m not legal counsel, to the best of my understanding email addresses in an inbox are not considered stored data on your part. Having a form that sends an email to a provided address but with storage disabled would qualify you as a processor under the GDPR since you re handling the data, but not a controller since you aren’t storing it (again, to the best of my knowledge).
Cheers,
Quay
In order to comply with the “right to know” and “forget me”.
Are you considering attaching to each field two bits of information .
1) this is a personal data field, 2) this is an email address field
Then it would be possible for you to implement the WordPress core filters that report and delete GDPR data.
Two obvious solutions to acquire the two bits of information
1) An admin page that lists all existing fields with two checkboxes
2) Add the check boxes to the Administration section for each field where you get the “field_key”
We’ve actually just released an update that leverages the WordPress Export/Erase features. The article’s now updated to reflect this. Thanks for your thoughts!
Cheers,
Quay
You say that simply not storing the data is the easiest way to comply, but if the content of the contact form gets sent to the company inbox, doesn’t that mean you’re storing the information there? The info I found online is a bit vague about this. Can I assume that a contact form that only sends info to an inbox doesn’t require GDPR consent?
Fred,
To the best of my understanding with the scenario you describe, the company is a processor of the data but the email existing in an inbox is not qualified as storage on your part. I’d like to be very careful to point out here that I’m not qualified legal counsel, but it appears to be a fair assessment that you’re acting as a processor rather than a controller in this regard.
The benefit to not storing the data is that you won’t have to worry about collecting it for export or deletion requests.
Cheers,
Quay
Is Ninja Forms content such as user name and email, accessible to google analytics? Can they “see” this information when the form is being submitted?
Lauren,
Not to be cheeky, but I would assume Google “sees” everything haha- regardless though, anything Google Analytics might pick up should not count as stored data on your part. That is of course to the best of my understanding as a non-attorney 🙂
Cheers,
Quay
Hi, This is one of the best articles I’ve found so far but I think you’d need at least 2 consent options because what if someone wants a reply to a specific question about a product or service, but doesn’t want to be added to an email list for remarketing purposes. I appreciate it’s probably a given they do want to hear from you, but the example you give doesn’t really cover this.
Giles,
Hey! If you’re going to be using data collected under one premise (requesting a response to a question about a specific product or service) to target for remarketing, then you absolutely need to be transparent about that, provide info on how the data will be handled and used (tos, privacy policy links, etc), and request explicit consent for that.
To the best of my understanding, if the data is only going to be used for the stated purpose of the form and tos/privacy policy is linked to explaining handling/use etc, then additional explicit consent is not required. Submitting the form for the stated purpose with transparency on handling provided should be sufficient.
Here’s an ICO resource on consent that may help with the details of when consent is necessary, and when it isn’t: https://ico.org.uk/for-organisations/guide-to-the-general-data-protection-regulation-gdpr/lawful-basis-for-processing/consent/
Cheers,
Quay
Hi, great article and information, many thanks.
Like most, I have a ‘Contact us’ form on my websites which sends me an email. Other than responding to that email (by email or phone) I have no reason or desire to store that person’s data. Is there any reason why I can’t just have a simple paragraph like this next to the submit button on my form?
‘General Data Protection Regulations (GDPR). By submitting this enquiry form you are agreeing that the data you have completed can be used by {{COMPANY NAME}} to reply to your enquiry. Your details will be received as an email and will not be stored for any future marketing, promotion, newsletters or passed to any third party.
Jason,
That sounds good for expressing how the data will be used and acquiring consent. Linking to an actual privacy policy might be a cleaner option than housing that on the form, and is generally a good idea to have one anyway, but that’s up to your discretion to the best of my knowledge.
Since it sounds like you’ll be storing at least an email address (unless you’re using email actions to respond rather than storing?), you’ll need to be able to provide a channel for users that want to request what data you have on them and delete that data as well, as described in the article.
Cheers,
Quay
If we want to automate export but don’t want to delete request then what should we do?
Alex,
Hey! These appear as 2 separate actions within the form builder: Delete Data Request, and Export Data Request. Just use one and not the other 🙂
Cheers,
Quay Morgan
Hey, thanks for the updates, this is very helpful.
Question – I’m trying to complete my privacy policy, section Contact forms.
I have a very simple form that only requires name and email and I’ll set the submissions to expire after 90 days. This is what i got so far:
Thru the contact form, (website name) does collect the personal data you provide us with (specifically your name and email address). We store and retain this data for a period of 90 days. The information collected thru this form we may use to:
• to send you administrative communications, such as administrative emails, confirmation emails, technical notices, updates on policies or security alerts;
• to respond to your comments or inquiries;
• to provide you with user support;
• to protect, investigate, and deter against unauthorized or illegal activity.
Is that all I should mention? Does Ninja Forms collects any other data I don’t know about?
Thanks.
Yoka,
Using the Erase Personal Data feature will delete all pii associated with that address collected via Ninja Forms. Nothing will remain anywhere after that.
What you’ve written sounds good for communicating data usage in your privacy policy, with the caveat that I’m not legal counsel by any stretch of the imagination 🙂
Cheers,
Quay
Do you have to store the data in a database or in an encrypted location ?
Hi,
The data does not have to be saved within the database. Within your Ninja Form, you can delete/disable the Store Submission action to ensure that no data is saved to the database after submission.
Best regards,
Curtis
Thank you so much Quay for this informative article! We use WordPress for our blog and this definitely does help. This does help a lot.