Is your WordPress Media Library is overflowing, or are you simply looking for a better solution to store uploaded files from your forms? If you are looking for a way on how to upload a file to Amazon S3 from your WordPress website, no need to look further.
In this article, we’ll quickly show you how can you easily transfer your files to your Amazon S3 in two steps without tearing your hair out. So let’s dig in!
Send files directly to Amazon S3 in 2 simple steps!
Allowing users to upload a file to your Amazon S3 bucket from WordPress is super easy using your WordPress forms. You only need our free core Ninja Forms plugin and the File Uploads add-on. Let’s take a look at how it’s done!
1. Connecting to Amazon S3 via File Uploads settings
Before you can set up the connection to Amazon S3 in Ninja Forms, you have to get your Access Key and Secret Key from your S3 account. If you don’t have an Amazon S3 account, you need to sign up for an AWS account first. Your AWS account will sign you up for all services in AWS including Amazon S3.
When you have the credentials from your S3 account, you will finish the setup on your WordPress website. Follow these steps:
- Open the IAM console within your Amazon S3 account
- In the navigation pane, choose Users. Then choose your IAM user name.
- Choose the Security Credentials tab and then choose Create Access Key.
- To retrieve your Access Key and Secret Key, choose Show User Security Credentials.
- Choose Download Credentials, and store the keys in a secure location.
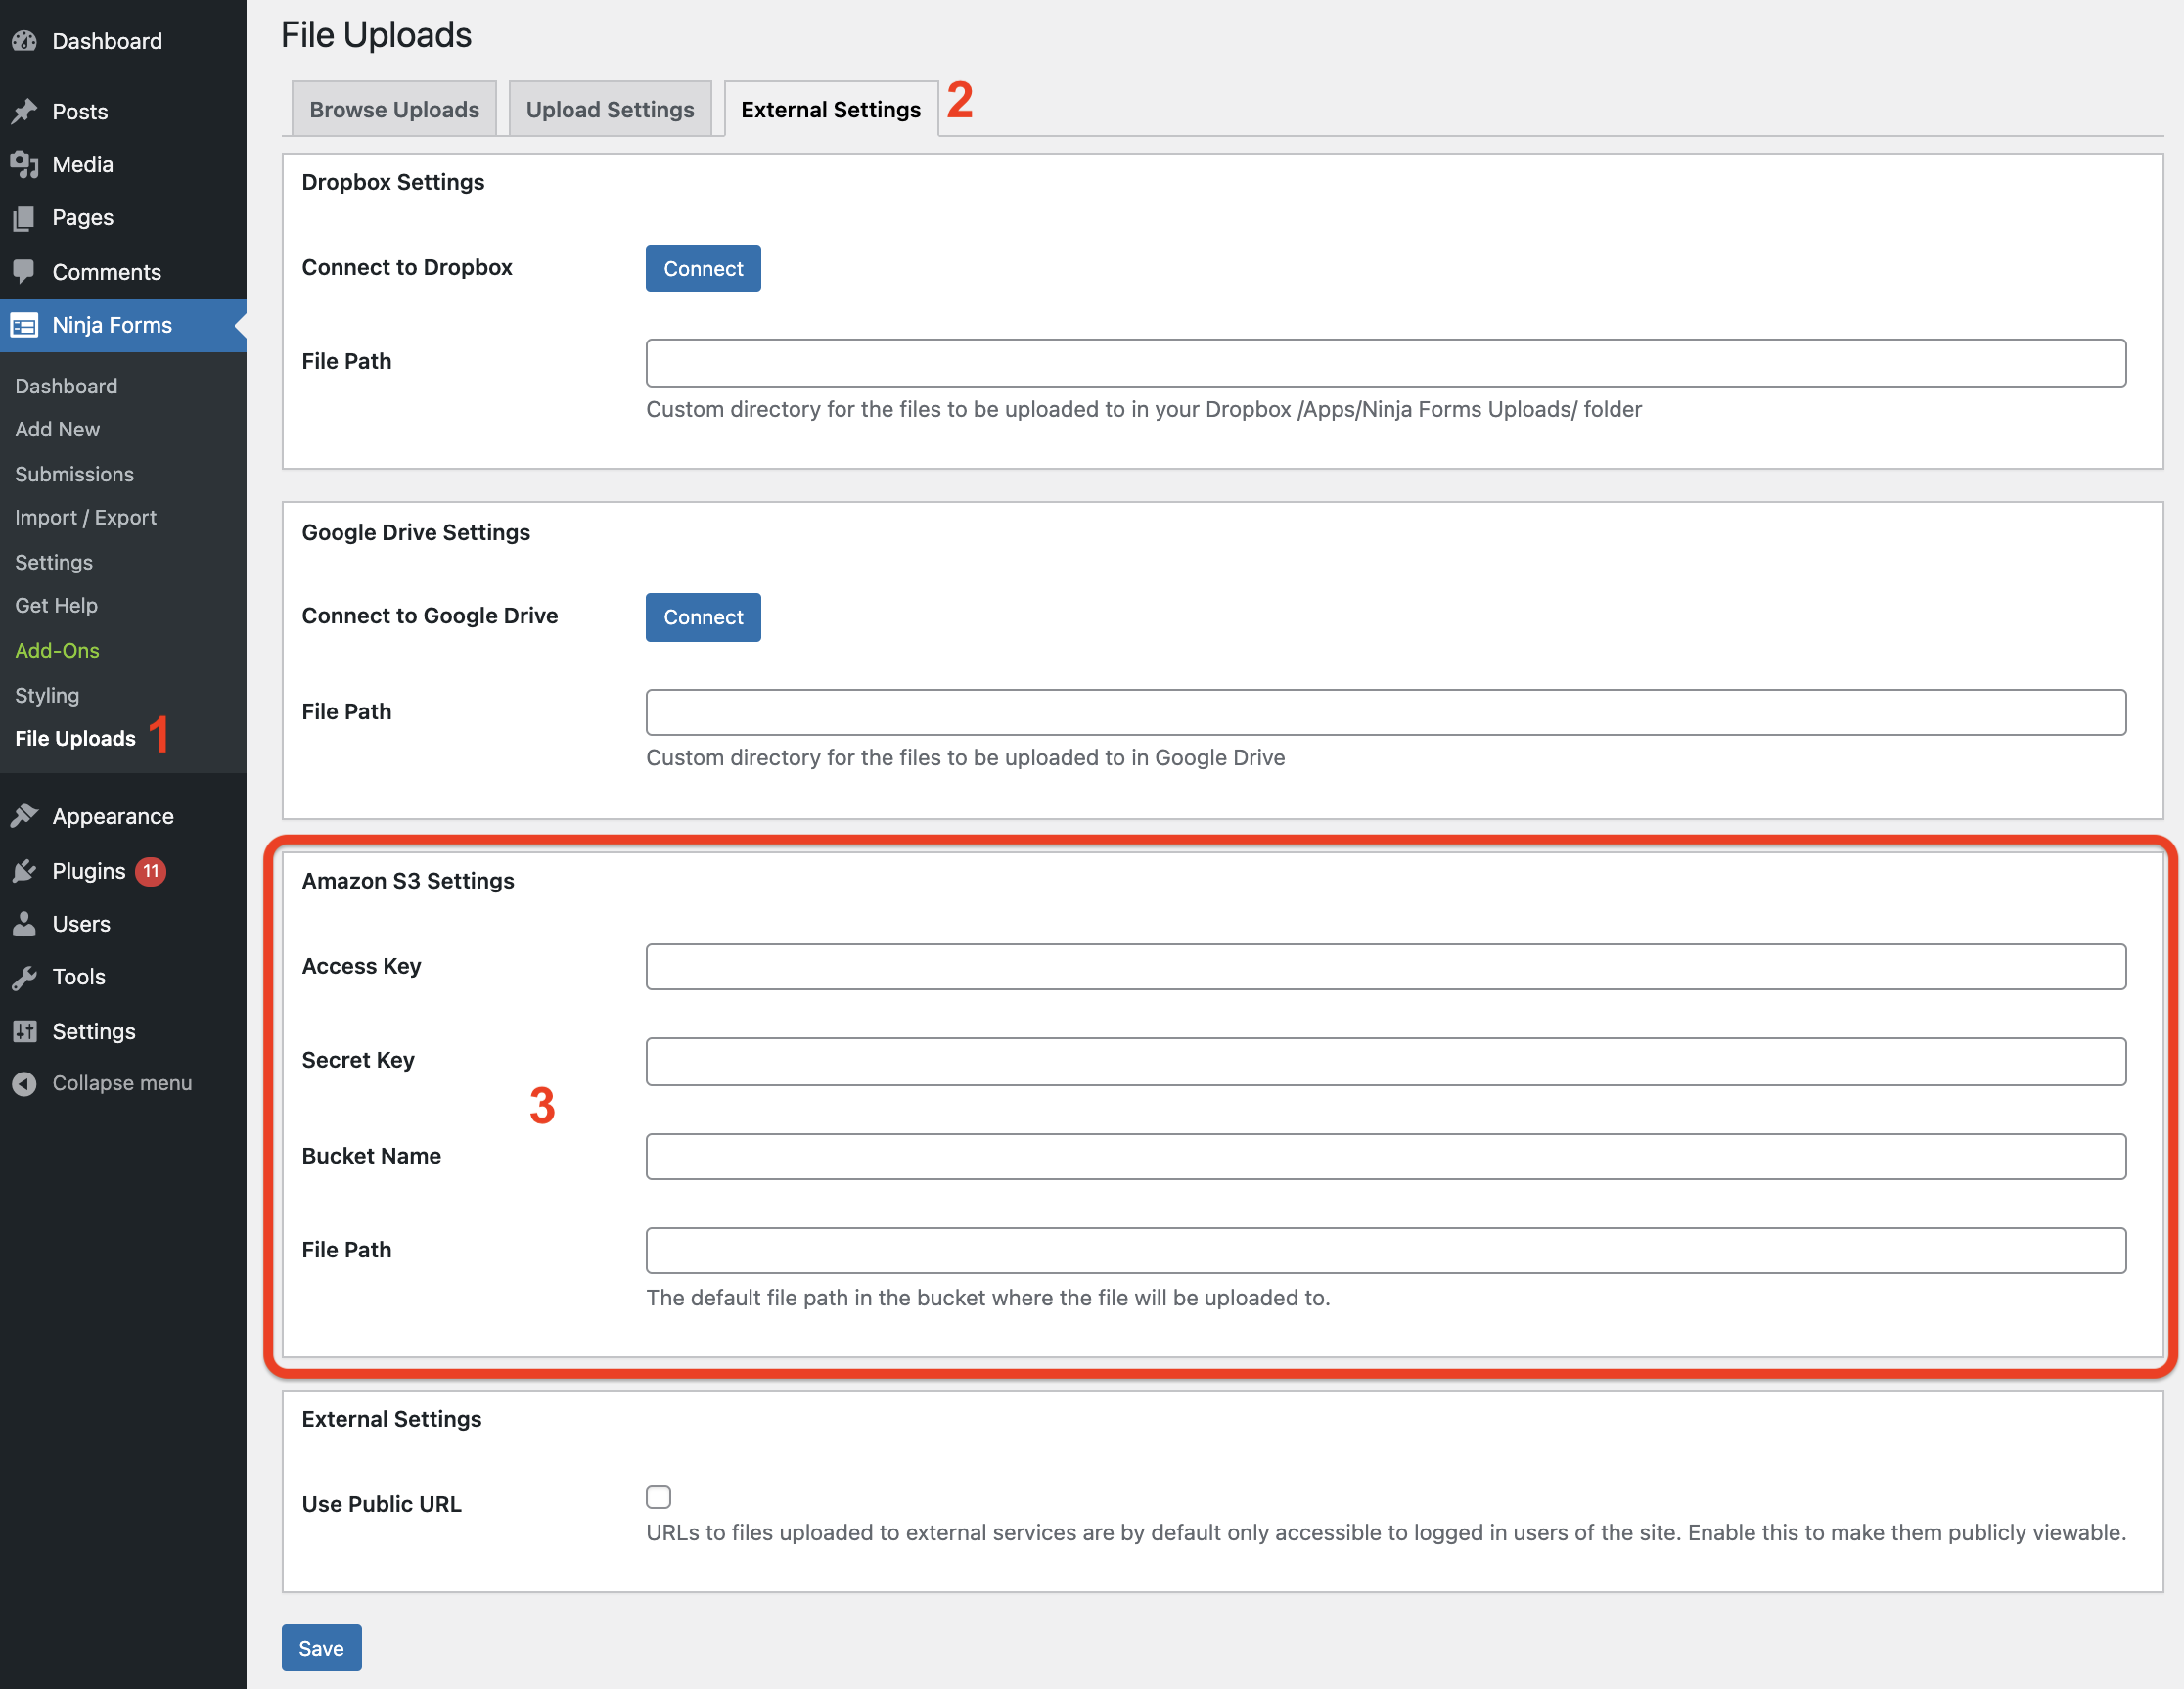
- Go to Ninja Forms > File Uploads > External Settings tab and enter your Access Key ID and Secret Access Key, Bucket Name, and file path.

Alternatively, you can define your Access Key ID and Secret Access Key as constants in wp-config.php:
define( 'NF_FU_AMAZON_S3_ACCESS_KEY', 'xxxxxxxxxxxxxx' );

define( 'NF_FU_AMAZON_S3_SECRET_KEY', 'xxxxxxxxxxxxxxxxxxxxxxxxxxxx' );
Once you installed your File Uploads add-on and connected it to your Amazon S3 via File Upload settings, you should be able to see the File Uploads field in the list of fields that can be added to your form. You will also see another action available under the Emails & Actions tab called External File Upload.

2. Add and enable External File Upload action
Navigate to the Emails & Action tab and click the blue plus icon to add a new action called External File Upload. (You will only see this action available if you add the File Upload field to your form.)
If you connected to Ninja Forms via File Upload settings, once you click on the action, you should see the Amazon S3 and the File Upload. You only need to toggle on the Amazon S3 File Upload option and that’s it!
It’s worth mentioning that if you are transferring your files to any external storage solution, the files will transfer only once the user clicks the Submit button.
Also, if you are using one of our CRM add-ons whether it is Salesforce CRM or Zoho CRM, for security reasons the files are not sent to your systems. Only the URL for where the file is located using the merge tag for the File Uploads field is transferred.
When I use the File Upload field to upload to my S3 account, will it bypass the file size limit of my server?
This is one of the questions our users ask very often. Sometimes, you might experience timeout issues when you are sending large files over to your cloud-based storage solution.
Luckily, using our File Uploads add-on we developed an option for background upload, which will bypass your server uploads settings. All you need to do is create a new action called External File Uploads once you install the File Uploads add-on.
Navigate to the Advanced Settings of this action and toggle on the Background Upload. This will help you avoid timeout issues and bypass your server upload settings.

Upload your files to Amazon S3 quickly with our File Uploads!
Accepting files on your WordPress site does not have to be a pain! Use our File Uploads add-on, and improve the management of your files by automating file transferring directly to Amazon S3.
Are there other storage services you would like to connect with? You also have the option to send your files directly to Google Drive or Dropbox with, or without an option to save files to your server. Eager to learn more about customers’ favorite File Uploads add-on? Check our complete guide to adding a File Upload field to your form!


