The Complete Guide to Ninja Forms File Upload Fields
Someone needs to send you a resume, a signed contract, a photo of a receipt, or a portfolio file. Your WordPress form has a name field, an email field, and a message box, but nowhere to actually attach the thing. So you ask them to email it separately, and now you’re matching up two messages by hand instead of working from one clean submission.
That back and forth is exactly the friction a form is supposed to remove. WordPress doesn’t accept file uploads through a form by default, but a WordPress file upload form doesn’t take much to build once you know where to look.
Once people can attach files, a new set of questions shows up. What file types should you allow? How big can a file be before it clogs your server? Can someone attach more than one file at once? And if someone’s filling out your form on their phone, can they upload a photo straight from their camera?
This guide covers all of it. You’ll start with a Ninja Forms file upload field working end to end in a few minutes, then tour the rest of what the File Uploads add-on can do: custom file naming, cloud storage, email attachments, and more. Ninja Forms itself is completely free to install; accepting file uploads specifically requires the File Uploads add-on, which is available on its own or bundled into any membership.

What you’ll need
To follow along, you’ll need Ninja Forms (free) and the File Uploads add-on (included with memberships or available as a standalone add-on). No third-party account is required for the basic setup below; a cloud storage account only matters if you use the optional cloud storage section later on.
How do you add a Ninja Forms file upload field to a WordPress form?
Add a Ninja Forms file upload field from the Common Fields section of the form builder, then set the allowed file types, maximum file size, and file limit in the field’s Restrictions settings. Publish the form and it’s ready to accept files. Files save to your own WordPress server by default, so no third-party account is needed for this basic setup.
- Open your form in the builder. With the Form Fields tab active, click the blue plus icon to open the Fields window.
- Under Common Fields, click File Upload to add it to your form.
- Click the new field to open its settings window, then expand Restrictions settings.
- Set Allowed File Types to a comma-separated list of extensions, such as pdf, jpg, jpeg, png, doc, docx.
- Set Maximum File Size in megabytes.
- Set File Limit above 1 if you want visitors to attach more than one file per submission.
- Click the checkmark in the field settings panel to save your changes, then click Publish in the top right of the builder.
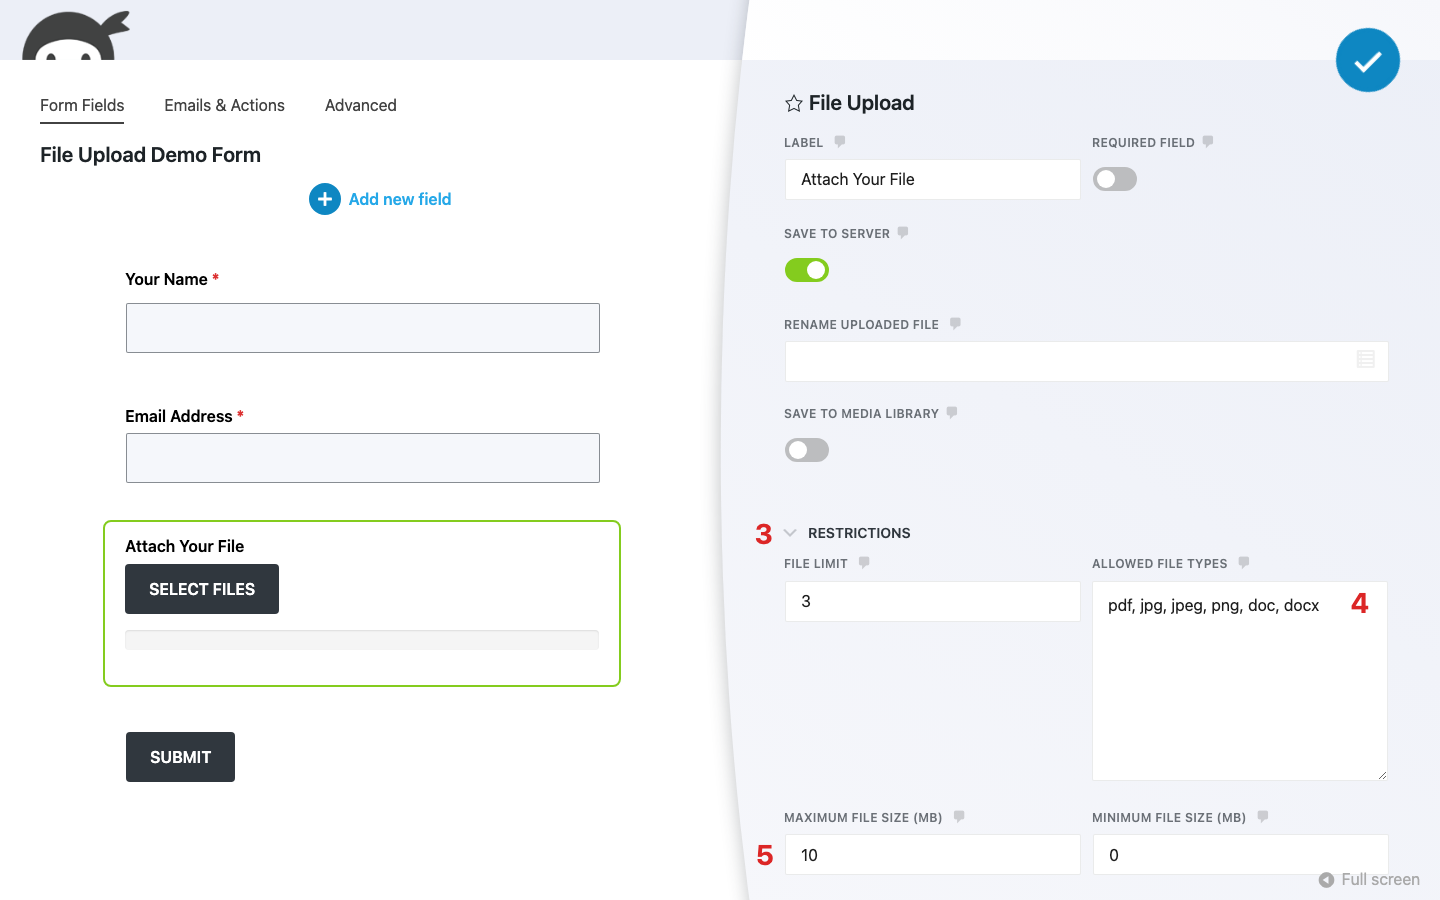
Leaving Allowed File Types blank doesn’t allow every file type through. It falls back to Ninja Forms’ own default list instead, so it’s worth setting explicitly if you know exactly what you want to accept.
Minimum File Size sits right next to Maximum File Size in the same accordion and defaults to 0. Most forms can leave it alone unless you specifically need to reject suspiciously small or empty files. Whatever you set in Allowed File Types, Ninja Forms also always blocks a fixed list of more than 40 extensions that could run as code on your server, like executable and script file types, no matter what your own settings allow.
What happens after a visitor submits a file?
Visitors click Select Files, choose one or more files from their device, and watch a progress bar until the upload finishes. Ninja Forms checks the file against your Restrictions settings the moment it’s selected, before the visitor even clicks Submit, so problems surface immediately instead of after they’ve filled out the whole form.
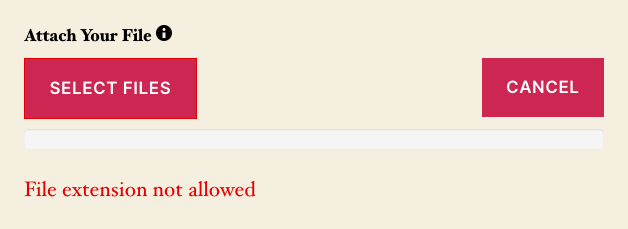
- If the file type isn’t allowed, an error like “File extension not allowed” appears right under the Select Files button before Submit is clicked.
- If the file is bigger than your Maximum File Size setting, the visitor sees a similar rejection right away, naming the size limit you configured.
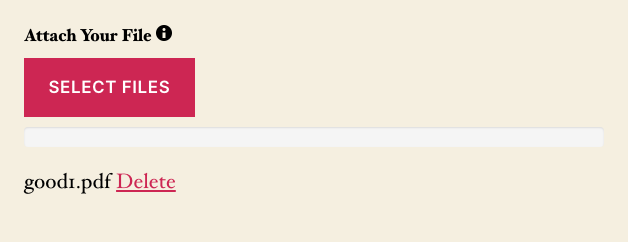
- Once a file passes both checks, its filename appears with a Delete link next to it, so visitors can remove and reselect a file before submitting.
Where do the files go after someone submits them?
By default, Ninja Forms saves uploaded files to your own WordPress server and records a link to each one in Submissions. Open Ninja Forms, then Submissions, choose your form from the dropdown, and look at the file field’s column: each row shows the uploaded file’s direct link.

Worth knowing before you rely on server storage: files saved to your server this way are publicly accessible at that direct link by default, the same as any other file in a public folder on your site. If you’re collecting anything sensitive, that’s worth addressing before you launch the form. Our file upload security guide covers locking that down in detail, and routing files to cloud storage instead (covered below) flips that default to private.
Rename uploaded files automatically
The Rename Uploaded File setting lets you rename files as they come in, using merge tags to build the new filename dynamically. It sits at the top of the File Upload field’s settings window, above the accordions, so it’s easy to miss if you go straight for Restrictions.
Renaming files avoids collisions when two people both upload “resume.pdf,” and makes files easier to identify once they land in your uploads folder. You can even use a forward slash in the pattern to sort files into subdirectories automatically. See the File Uploads documentation for the full list of supported merge tags.
Save uploaded files to your WordPress media library
Save to Media Library is a toggle in the same top-level settings area as Rename Uploaded File. Turning it on also saves each uploaded file as a WordPress Media Library attachment, alongside your regular saved-to-server copy.
That’s handy if you want to reuse uploaded images or documents elsewhere on your site through the familiar Media Library interface. It’s off by default, and it’s worth leaving off for sensitive document collection: it makes files easier to find across your site, not harder.
Send uploaded files straight to cloud storage instead of your server
The File Uploads add-on can route files to Dropbox, Google Drive, or Amazon S3 instead of, or alongside, your own server. Connect the service you want under Ninja Forms, then File Uploads, then the External Settings tab, where each service has its own connection section. Once it’s connected, add the External File Upload action to your specific form from the Emails and Actions tab.
Beyond keeping files off your own server, cloud-routed files are private by default, the opposite of server-stored files. A Use Public URL toggle lets you make them shareable when you actually want that. If public-by-default was the part of server storage that gave you pause, this is the option that solves it. See the File Uploads documentation for setup details on each service.
Store every form’s uploads in a custom directory
If you’d rather organize uploads across your whole site instead of field by field, the Custom Directory setting under Ninja Forms, then File Uploads, then the Upload Settings tab changes where every form’s files land. It supports tokens for the form title, date, username, and more, so you can build a directory structure that fits how you actually manage files.
This is a plugin-wide setting, so it’s worth deciding on a structure once rather than reconfiguring it per form. See the File Uploads documentation for the full token list.
Control how uploaded files show up in your emails
By default, an uploaded file just sits in Submissions until someone goes looking for it. If you’d rather have it land directly in your inbox, Ninja Forms can attach files to notification emails or link to them inside the email body, depending on what you set up.
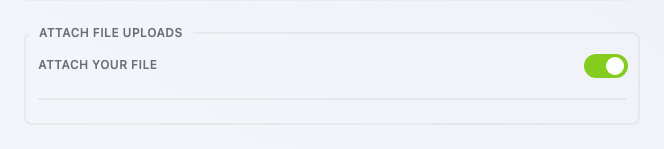
To attach a file to an email notification, open the Emails and Actions tab, click into your Email action, and expand its Advanced settings. In the Attach File Uploads section, turn on the toggle for your file field, labeled with that field’s own name.
If you’d rather link to the file than attach it, add the file field’s merge tag to your email body with a format modifier on the end. Appending :link renders a clickable link, :url renders the raw address, :embed displays an image inline, and :filename shows just the file’s name. These modifiers only work when Save to Server stays on for the field, which is the default. See the merge tags documentation for the complete syntax.
Your forms are already ready for mobile uploads
You don’t need to configure anything extra for visitors to upload a photo from their phone. The File Upload field is a standard file input, and every major mobile browser already gives visitors the option to take a photo or choose one from their library the moment they tap it. Your form is already mobile-ready.
From a working field to a full upload workflow
You’ve now got a working Ninja Forms file upload field, an understanding of what your visitors and your Submissions screen show along the way, and a map of the rest of what the File Uploads add-on can do, from custom naming and cloud storage to email attachments. Start with the basic setup, then layer in whichever of these fits how you actually collect and manage files.
Try Ninja Forms Today
Always free, with premium features available through our memberships.