WordPress File Upload Security With Ninja Forms
Every time someone uploads a file through a WordPress form, that file lands somewhere on your server, and by default, that somewhere is public. That’s the core problem behind WordPress file upload security: job applications, client contracts, and event photos all get stored in a folder that anyone with the right web address can open, whether you meant to publish them or not.
File upload fields are also a favorite target for attackers. A form that accepts any file type is a form that will eventually get tested with something worse than a resume, and the wrong extension slipping past validation can hand someone a way to run code on your server.
WordPress core doesn’t ship a “protect these uploads” switch. If you’re using Ninja Forms with the File Uploads add-on, though, a meaningful amount of protection is already built in, and the rest is a handful of settings away. Here’s exactly what’s automatic, what you need to configure yourself, and how to close the public access gap.

What you’ll need
To follow along, you’ll need Ninja Forms (free) and the File Uploads add-on (included with memberships or available as a standalone add-on). No third-party account is required for the setup covered in this article. A cloud storage account (Google Drive, Dropbox, or Amazon S3) is only needed if you choose that option below.
What Ninja Forms blocks automatically
The File Uploads add-on maintains a block list of 44 dangerous file extensions and rejects them automatically, before you configure a single setting. That list covers the file types attackers reach for most: every PHP variant, server-side scripts, executables, and server configuration files.
Specifically, the block list stops:
- All PHP variants, including .php, .php3, .php4, .php5, .php7, .php8, .phtml, and .phar
- Server-side scripts, including .asp, .aspx, .jsp, .sh, .bash, and .csh
- Executables, including .exe, .bat, .cmd, .msi, .com, .ps1, and .vbs
- Server configuration files, including .htaccess and .htpasswd
This check runs twice: once when the file is selected, and again when the form is submitted. Even a request crafted to slip past the first check still gets caught at the second. WordPress’s own file type validation adds a third layer, checking a file’s actual contents against its extension, which catches a dangerous file that’s simply been renamed to look safe. A .php file renamed to .jpg still gets flagged.
None of this requires any setup on your part. It’s the baseline every File Upload field starts with, and the first layer of WordPress file upload security you get for free, before you restrict anything else.
Give Ninja Forms a try today!
Ninja Forms is free! Optional premium features available with any membership.
How to restrict file types and size in Ninja Forms
The block list above stops the most dangerous file categories, but it still leaves the door open to plenty of file types your form has no reason to accept. If your form only needs resumes, there’s no reason to also allow video files or spreadsheets through. Restricting exactly what’s allowed, and how large it can be, is the next layer.
To set this up:
- Open your form in the builder, then in the Form Fields tab, click the File Upload field to open its field settings window.
- Expand the File Upload field’s Restrictions settings accordion.
- In Allowed File Types, enter a comma-separated list of extensions, such as pdf, jpg, png.
- In Maximum File Size (MB), enter your limit, then save your form.
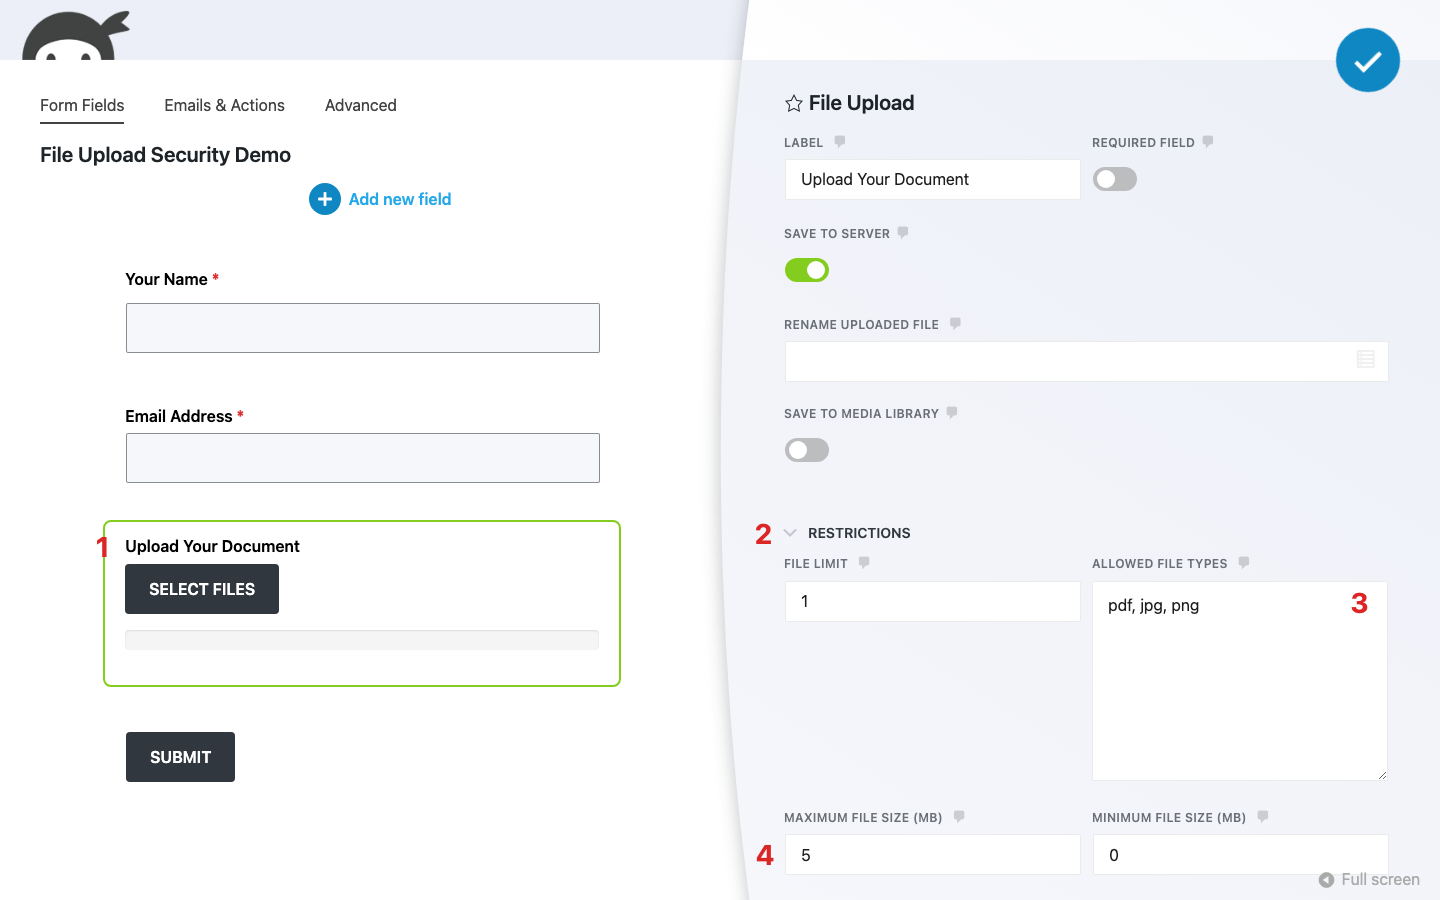
A few behaviors are worth knowing before you rely on this setting:
- Leaving Allowed File Types empty does not mean “allow everything.” It falls back to WordPress’s own built-in safe file type list, which already excludes code, archive, and other risky categories.
- Allowed File Types is an allow list, not a block list. Entering pdf means only PDF files are accepted, nothing else.
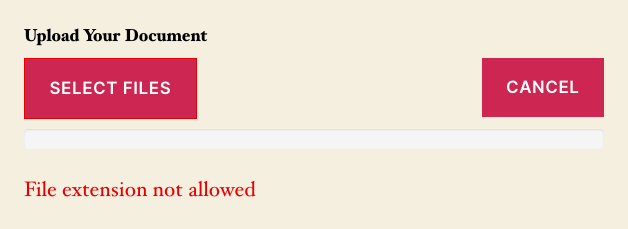
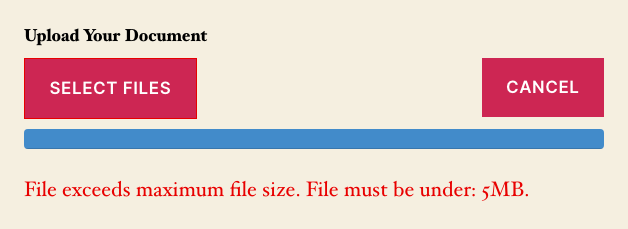
- Errors appear immediately, before the visitor even clicks submit: “File extension not allowed” for the wrong type, and “File exceeds maximum file size. File must be under: 5MB” for a file over your configured limit.
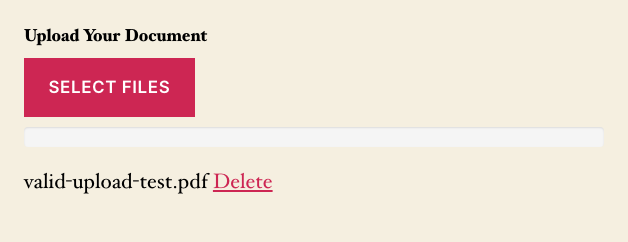
Here’s what each of those looks like on the front end of a form configured with a 5 MB limit and pdf, jpg, and png allowed.
Restricting file types and size keeps the wrong files out. It doesn’t change where accepted files end up once they’re on your server, and that’s the next question worth asking.
Are your uploaded files publicly accessible?
Yes, by default. Ninja Forms stores uploaded files in a publicly accessible folder on your server, and nothing restricts direct access to that folder. Anyone who has a file’s direct link can open it in a browser, no login required.
That’s fine for plenty of forms. A logo upload or an event photo isn’t sensitive. But if your form collects resumes, contracts, or anything else you wouldn’t want indexed by a search engine or found by a stranger, closing this gap is the other half of WordPress file upload security that file type restrictions alone can’t fix. You have two reliable options.
Route files to cloud storage (the easiest fix)
The simplest way to close the gap is to never let files land in that public folder in the first place. Ninja Forms can send uploaded files straight to Google Drive, Dropbox, or Amazon S3 instead of storing them on your server at all.
To set this up:
- Connect your storage service first: go to Ninja Forms > File Uploads > External Settings tab and configure the relevant section (Google Drive Settings, Dropbox Settings, or Amazon S3 Settings).
- Back in your form’s builder, click into the Emails & Actions tab and add the External File Upload action.
- Choose the service you connected, then save your form.
Uploaded files now go directly to your chosen service instead of your server. For most site owners without server administration experience, this is the cleaner path, and it’s the one worth trying first.
Restrict access at the server level (advanced)
If you’d rather keep uploads on your own server but block direct browser access to them, that’s possible too, with two caveats worth knowing before you start.
This isn’t a beginner-friendly option. A misconfigured access rule can take your entire site offline, and because this configuration happens outside Ninja Forms, it’s not something we’re able to offer support for. If you’re not comfortable editing server configuration files, the cloud storage option above is the safer choice.
For readers comfortable with server administration, the standard approach is restricting access through your site’s .htaccess file. That resource covers the syntax, where the file lives, and how to back it up safely before editing. The exact rule you need depends on your hosting environment, so it’s worth adapting from there rather than copying a rule written for a different setup.
If editing server files yourself isn’t something you want to take on, restricting access to a specific upload folder is a routine request for hosting support teams, and most hosts handle it without issue. If you’re comfortable with server paths but want a Ninja-Forms-specific option instead, the Custom Directory setting (Ninja Forms > File Uploads > Upload Settings tab) can redirect uploads to a folder outside your public web root entirely.
Whichever fix suits your setup, the goal is the same one final layer can reinforce.
Add filename obfuscation as an extra layer
One more setting is worth turning on, though it supplements the options above rather than replacing either of them. The Rename Uploaded File setting, found directly in the File Upload field’s settings window, lets you rename incoming files using merge tags like %date% and %username%. A pattern like %date%-%username% turns a predictable filename into something like 2026-08-14-jsmith.pdf.
This won’t stop someone who already has a direct link, but it does raise the bar against casual URL guessing. Pair it with cloud storage or a server-level restriction. Don’t rely on it alone.
Putting WordPress file upload security together
Ninja Forms and the File Uploads add-on already block the most dangerous file types before you touch a setting. Layer on the file type and size restrictions your form actually needs, close the public access gap with cloud storage or a server-level rule, and add filename obfuscation on top, and you’ve built protection suited to exactly what your form collects.
Try Ninja Forms Today
Always free, with premium features available through our memberships.