Create a WordPress Job Application Form With Resume Upload
You posted the job, and now your inbox is the hiring system. One resume arrives as a PDF, another as a link you can’t open, and a third is an email that says “see attached” with nothing attached. Which job was that one for, anyway?
A contact form doesn’t save you. Name, email, and a message box tell you next to nothing about a candidate, and building a proper application from a blank page sounds like an afternoon you don’t have.
It’s a mess. It’s also a quick fix. Below, we’ll put together a WordPress job application form that asks real questions, won’t submit without a resume, and lands every application in your inbox with the resume attached.
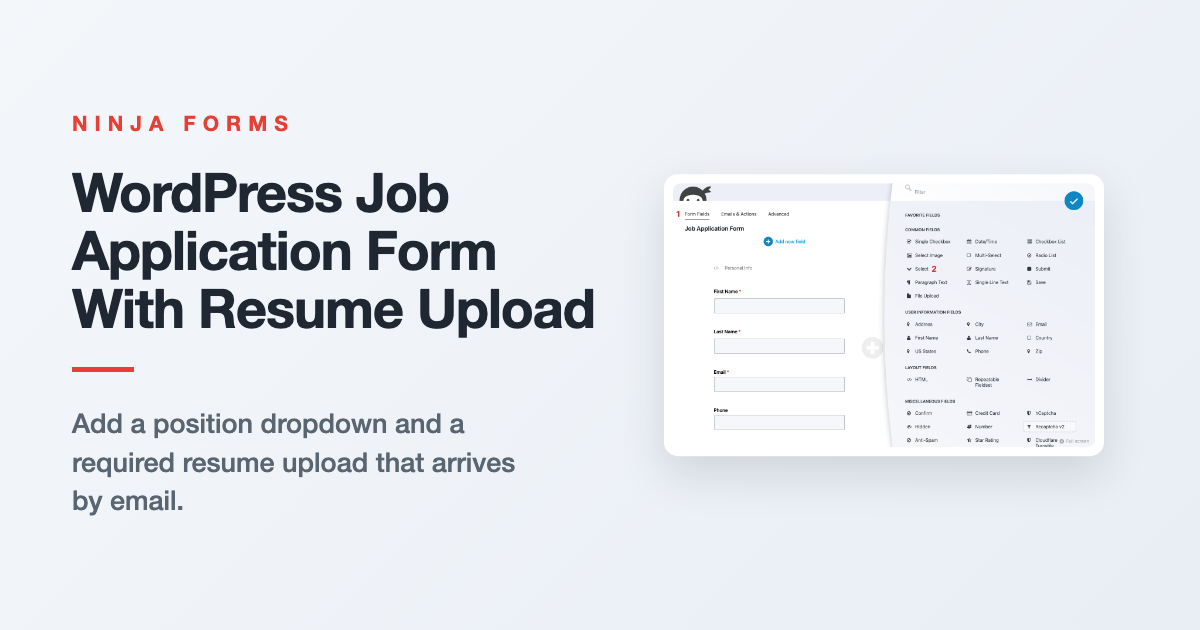
What you’ll need
- Ninja Forms (free)
- The File Uploads add-on for the resume upload (standalone, or included with memberships)
Your WordPress job application form is already built. Start with the template
Ninja Forms includes a Job Application template in the free plugin. It gives you a complete applicant form, a success message, an email notification, and saved submissions, all wired up before you touch a thing. Whether you’re filling a staff opening, a seasonal role, or an internship, you don’t have to start from a blank page.
Getting it onto your site takes three steps.
- In your WordPress dashboard, go to Plugins > Add Plugin, search for Ninja Forms, then click Install Now and Activate.
- Go to Ninja Forms > Add New.
- Click the Job Application template.
The form builder opens with everything in place. Here’s what you get:
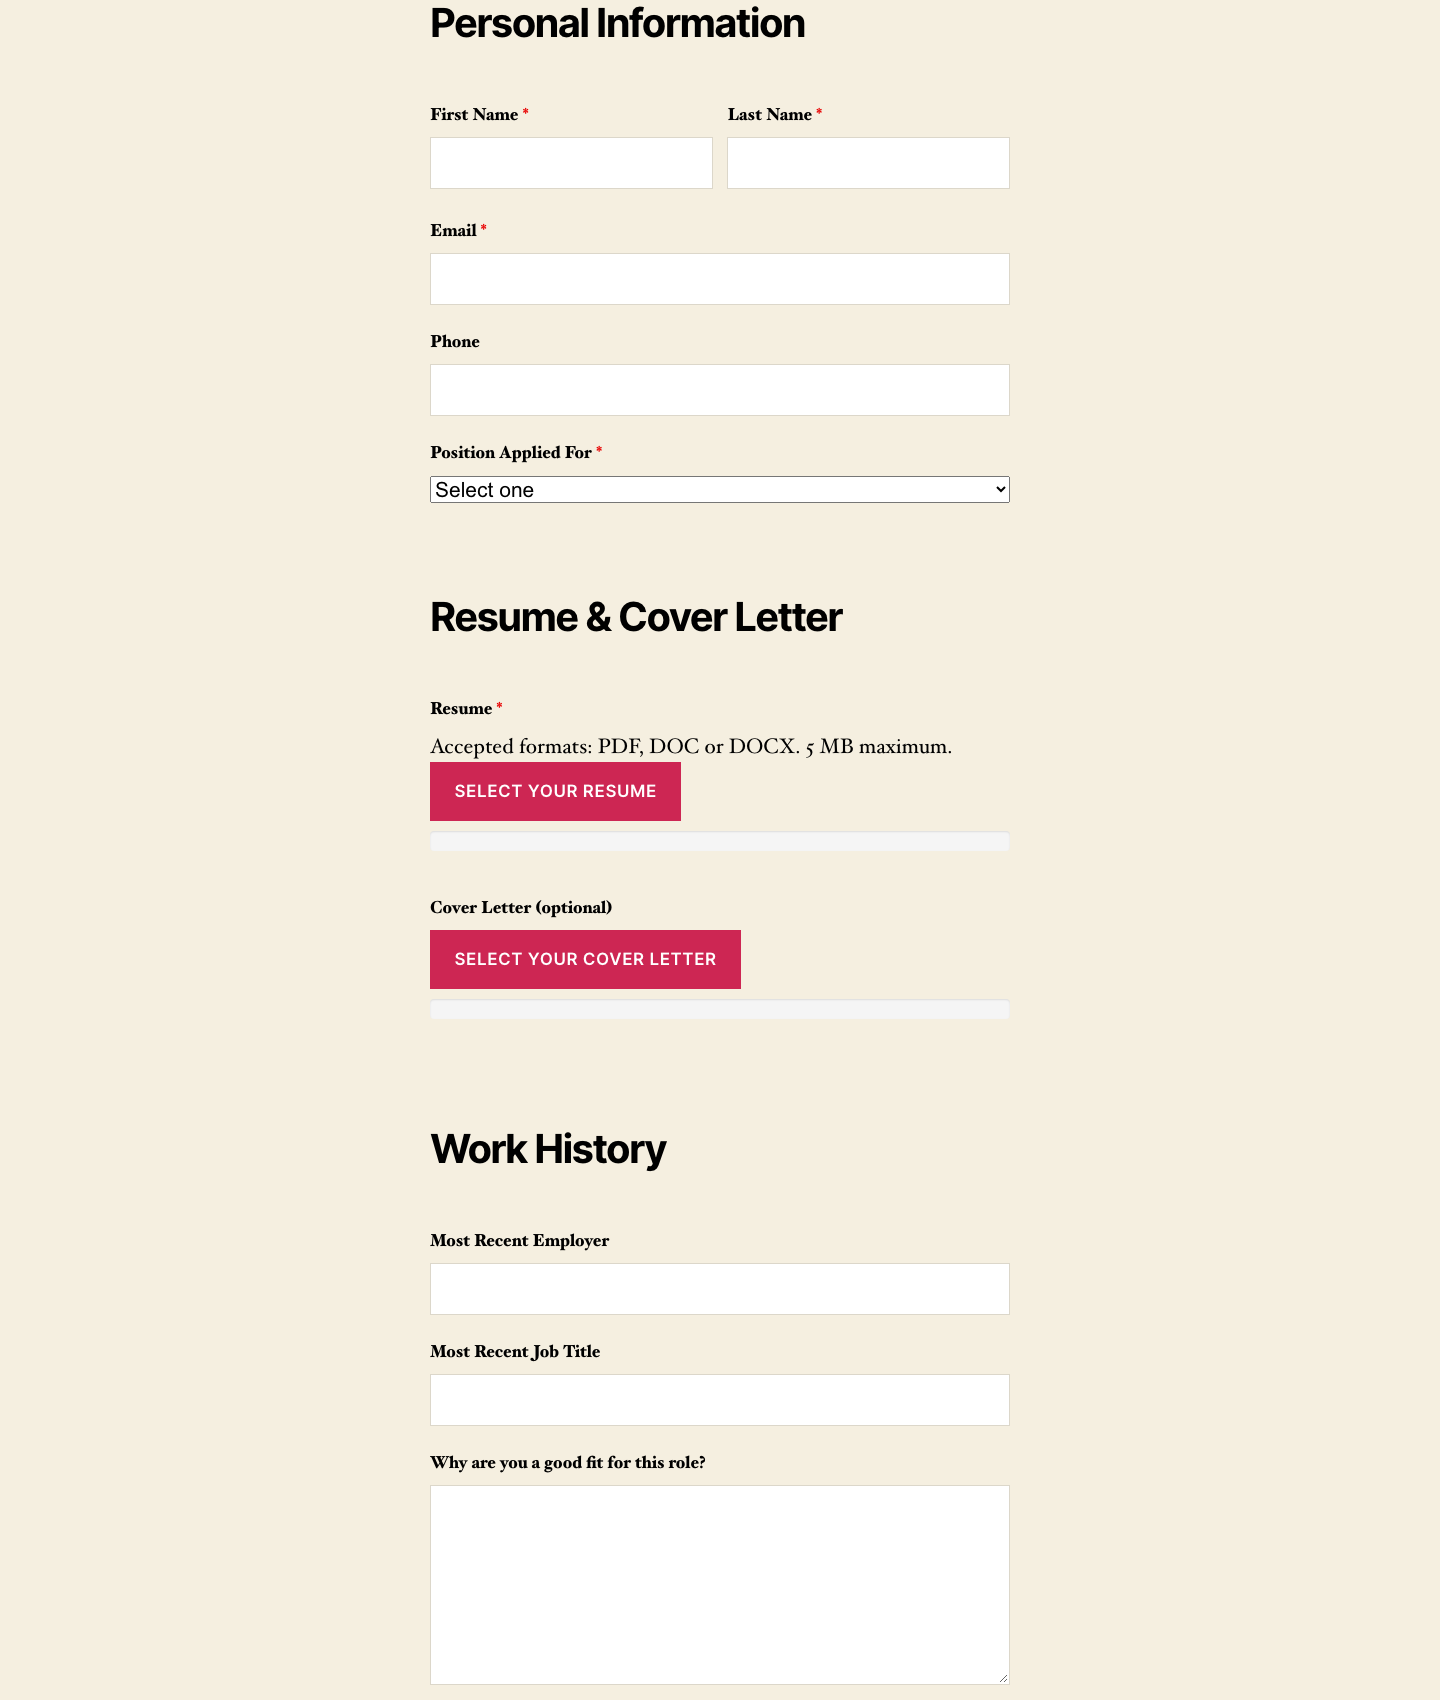
- Personal info: first and last name, email, phone, and a full mailing address.
- Work history: previous job title, start and end dates, and a description of the job.
- References: three slots, each with a name and a phone number.
- Actions: a Success Message for the applicant, an Admin Email for you, and Record Submission, which saves every application on your site.
Want a look before you install anything? The Job Application template page shows you the form.
Do three fixed reference slots feel cramped? A repeater field lets applicants add as many past jobs or references as they have, and it’s in the free plugin too.
That’s a working application form in three clicks. Don’t publish it yet, though. There’s a catch, and it’s the very next section.
Make the fields you need required
Every field in the Job Application template arrives optional. Out of the box, someone can click Submit on an empty form, and you get a blank application. The fix is one toggle per field.
- On the Form Fields tab of the builder, click a field to open its field settings window. Start with Email.
- Switch Required Field on.
- Repeat for every field you can’t make a hiring decision without.
Now an applicant who skips one of those fields sees “This is a required field.” and the form won’t submit until it’s filled in.
Our advice? Be picky about what you require. Name, email, and phone are the obvious ones, but every extra required field is one more reason for a good candidate to give up halfway.
Which job are they applying for? Add a position dropdown
The template doesn’t ask which job the applicant wants, so add a Select field (that’s a dropdown) listing your open positions. Only ever hiring for one role at a time? Skip on down to the resume section.
- On the Form Fields tab, click the blue (+) icon to open the Fields window.
- Under Common Fields, click Select, or drag it to the spot in the form where you want it.
- Click the new field to open its field settings window, and change the Label to Position Applied For.
- In Options, add one row for each open job.
- Make the first row’s Label “Select one” and leave its Value empty, so the form doesn’t pre-pick a job for anyone.
- Switch Required Field on.
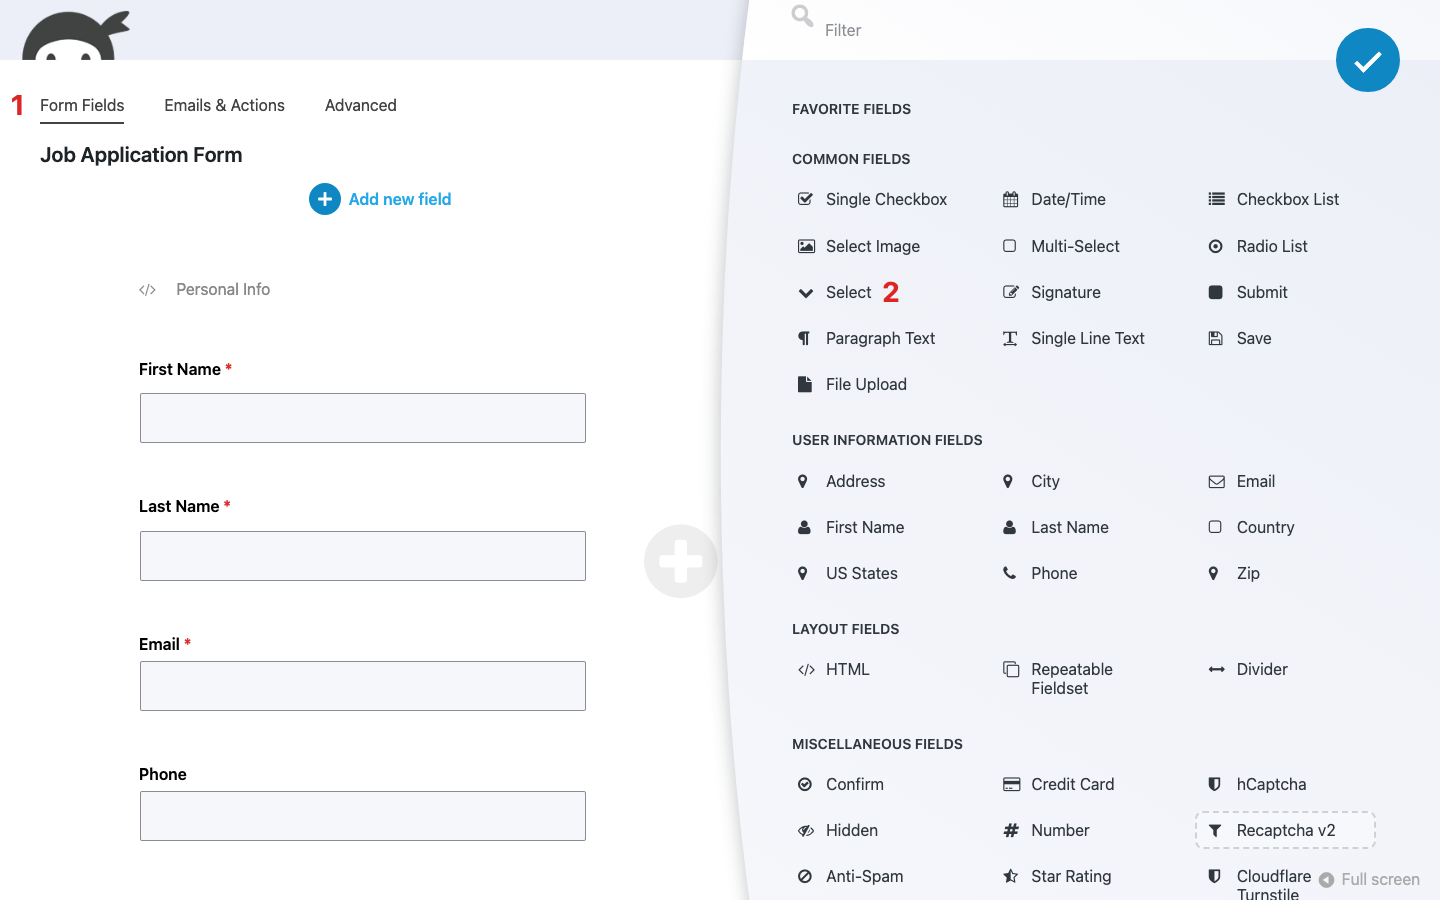
Each option row has a Label and a Value. The applicant sees the Label, and you see the Value in your submissions. If a row’s Value reads program-assistant, that’s what shows up next to the applicant’s name, so type the real job title into both columns.
That’s everything the free plugin needs from you. Now for the resume.
Give Ninja Forms a try today!
Ninja Forms is free! Optional premium features available with any membership.
How do applicants attach a resume? Add a File Upload field
Applicants attach a resume through a File Upload field, which the File Uploads add-on adds to Ninja Forms. You decide which file types it accepts, how large a file can be, and whether the form will submit without one.
Sounds like the technical part, right? You have it easy. It’s one field and a handful of settings.
- Open the Fields window again (pictured above) and click File Upload under Common Fields.
- Click the new field, change the Label to Resume, and switch Required Field on.
- Leave Save to Server switched on. The email attachment in the next section depends on it.
- Expand the Restrictions settings accordion. In Allowed File Types, enter
pdf,doc,docx. - Set Maximum File Size (MB) to 5.
- Expand the Display settings accordion and use Description to tell applicants the rules, something like “PDF, DOC or DOCX, 5 MB maximum.”
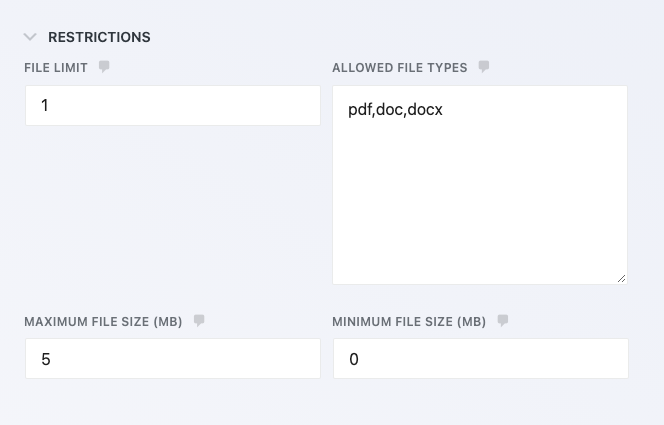
File Limit already defaults to 1, which is what you want for a resume. From here the form polices itself. An applicant who picks a file type that isn’t on your list sees “File extension not allowed” and the file never uploads.
And when two people both send a file called resume.pdf? No worries. The second one is saved as resume-1.pdf, so nobody’s resume gets overwritten.
Need a cover letter, a transcript, or a certification too? Add another File Upload field the same way, give it its own label, and leave Required Field off if it’s optional.
A resume is personal, so give the file a name that’s hard to guess
Uploaded files are saved to a folder on your server. Like other WordPress uploads, a saved file can be opened by anyone who has its web address. The Rename Uploaded File setting, in the same field settings window, accepts merge tags, so your file names stop being easy to guess.
That’s a first layer. For the stronger ones, you can send uploads to cloud storage or restrict access on your server.
Get every application in your inbox with the resume attached
The template’s Admin Email action already emails you each application. Out of the box it goes to your site’s admin email address, and the resume isn’t attached. A few small changes turn it into a hiring inbox.
- Click the Emails & Actions tab, then click the Admin Email action to open its settings.
- In To, enter the address that should receive applications.
- In Reply To, insert the form’s Email field as a merge tag, so hitting Reply writes straight to the candidate.
- In Subject, type “New application:” and insert the Position Applied For field as a merge tag.
- Expand Advanced, find Attach File Uploads, and switch Resume on.
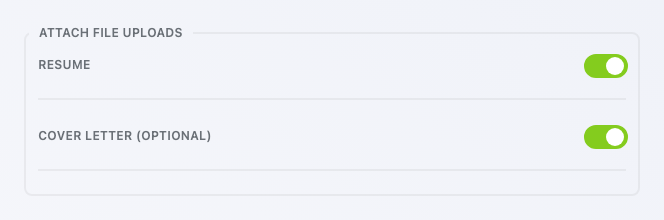
Attach File Uploads only shows up once the form has a File Upload field, and you get one toggle per upload field. If you added a cover letter, switch that one on too.
That’s all there is to it. Sort your inbox by subject and you have a pile per position, with every candidate one Reply away.
Hiring across departments? You can send a conditional email so each position’s applications go to that job’s manager. It takes the Conditional Logic add-on, so save it for when you need it.
Put the form on a page and start taking applications
Click Publish in the builder to save your WordPress job application form. Then get it in front of applicants. Here are two easy ways.
- Block: edit your careers page, open the block inserter, search for Ninja Forms, and pick your form.
- Shortcode: copy the form’s shortcode from the Shortcode column under Ninja Forms > Dashboard and paste it into any page or post.
Before you post the job, fill the form out yourself and attach a test resume. If the email never shows up, walk through the email troubleshooting steps first. You want to find that out before a real candidate does.
Where do the applications end up?
In your inbox, and also under Ninja Forms > Submissions. Pick your form from the “Select a form” dropdown and every application is there, with each answer and a link to the resume.
Want just the files? Ninja Forms > File Uploads lists every uploaded file along with the form it came from.
Post the job and let the form do the sorting
Like we said at the top, an inbox makes a lousy hiring system. If you’ve walked through the sections above, you now have a WordPress job application form that asks real questions, refuses to submit without a resume, and hands you each candidate in one tidy email.
You don’t need an applicant tracking system to hire well on a small team. You need every application to show up complete and in one place, and now it will.
The resume upload is the one piece that isn’t in the free plugin. Pick up the File Uploads add-on, add the field to your form, and go post that job!
Try Ninja Forms Today
Always free, with premium features available through our memberships.