Want to Accept E-signature in WordPress Form?

Sometimes simple checkboxes and agreement statements on your form won’t do and you need to create legally binding contracts or agreements that accept e-signature in your WordPress forms.
This can definitely present challenges. The paperwork itself is never fun, not to mention taking a step further into digital, signed documents that have to be properly formatted.
Luckily, the process to include a signature field on your WordPress form and make sure you are compliant with e-signature is not that technically challenging.
Read on and learn how your users can digitally sign documents using one of the most popular software in 3 simple steps!
Here’s how to collect digital signatures in the form by connecting to DocuSign
- Collect any customer data you need to be included for a contract or legal agreement from the convenience of your WordPress forms
- Send that data into the DocuSign service to generate a contract
- Have the document electronically signed, and have that e-signature be legally binding
1. Get set up with Zapier.
The Ninja Forms Zapier add-on is the tool that establishes the link between WordPress and the application you want to send data to. First, get Zapier installed and activated on your website.
Next, create an account with Zapier themselves. Now you’re ready to get started!
2. Make a Zap!
Integrations between applications handled by Zapier are called Zaps. We’ll be creating a Zap that will connect Ninja Forms with your target service. It’s super simple. Just log into your Zapier account and click “Create Zap”!

Please note that the number of zaps you can make depends on your Zapier plan, but the number of zaps you’ll be able to integrate with Ninja Forms using the Zapier add-on is unlimited.
3. Setup your zap to connect any WordPress form with DocuSign
Just search Ninja Forms in the Choose App & Event search bar to find us:

Leave “New Form Submission” set as the Trigger Event and Continue. You’ll now be shown a webhook:

Copy the webhook URL, then head back to WordPress and into the Emails & Actions tab on your form. Add a Zapier action and paste the webhook into the Zapier Webhook field:

Now Publish (save) the form, Preview the form, enter test data into each field (do not skip this step!), and Submit the form preview. Now head back to Zapier, and Continue.
You’ll now be prompted with a few options to proceed. We recommend to Test & Continue to make sure the webhook has succeeded in establishing a connection. If anything goes wrong, Zapier will give you troubleshooting steps.
On a successful test, it’s now time to connect to DocuSign. Same as before, search and select them:
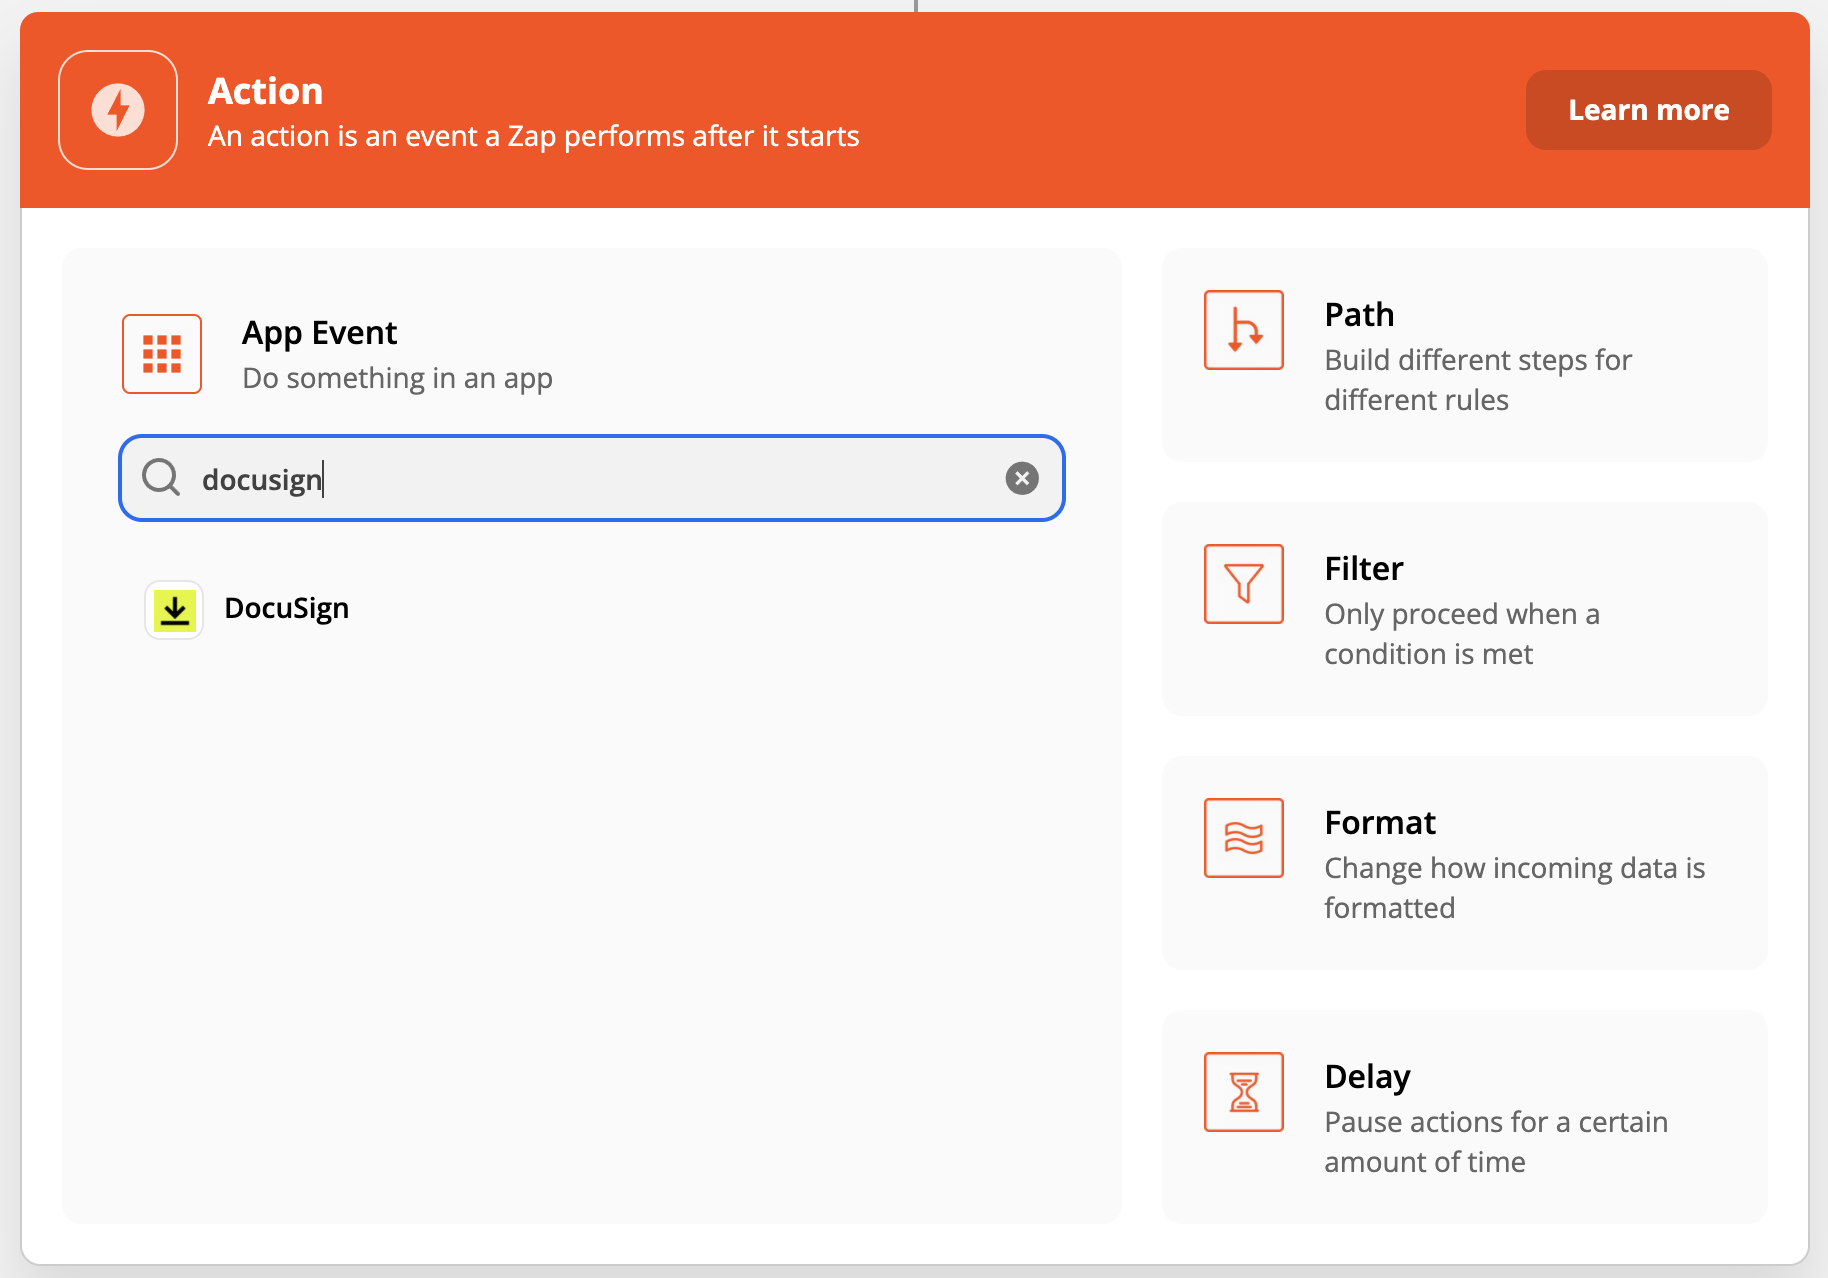
Now you can select the only existing option, Create Signature Request.

If you do not have a DocuSign account, take a moment to create one now. The next step is to create or upload a template in DocuSign. The form submission will then populate the document. DocuSign will then email the populated document to the person that needs to sign it (the user who submitted your form)
Continue and you’ll be prompted to sign in to your DocuSign account. Click Continue again.
Back in your Zap, you’ll now be able to select your Template and provide additional information such as email subject line, copy of the email, and recipient information. You can have multiple recipients even though those fields are not pictured below.
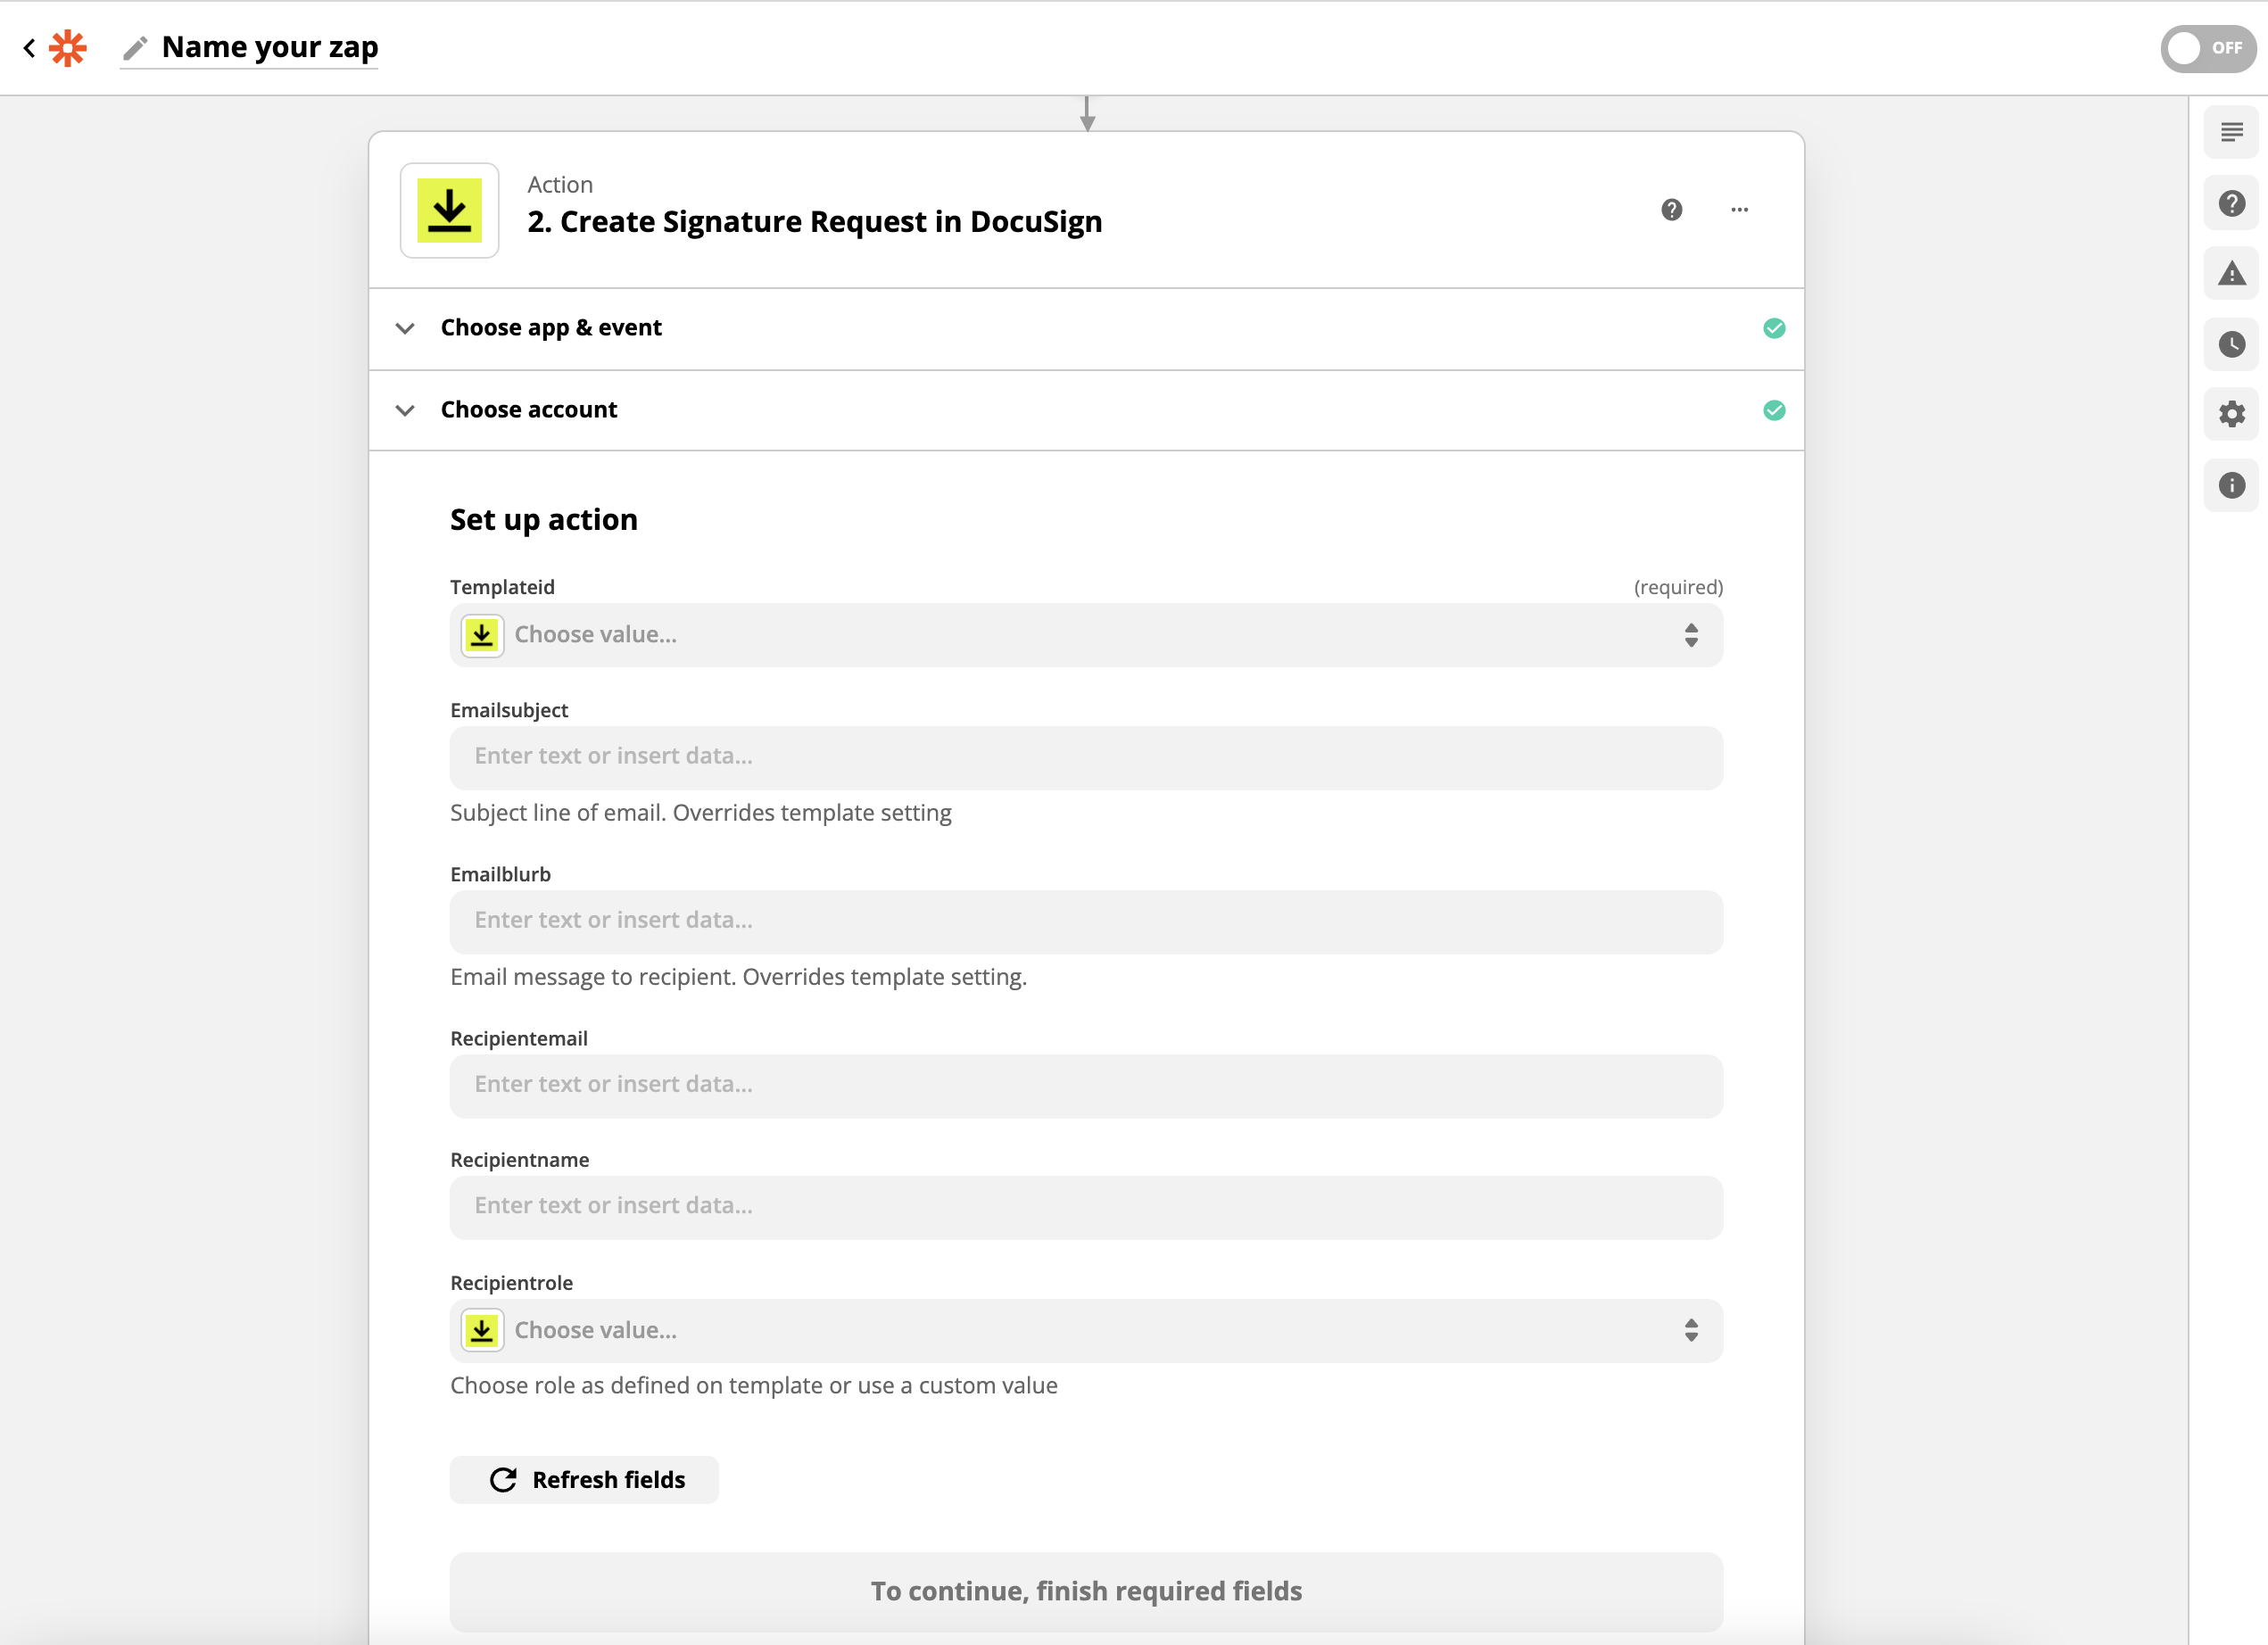
Note that Recipient name, email, etc. can be populated directly from form fields on your WordPress form. The email that sends the contract can also be customized here.
Additionally, you have plenty of options so make sure to take some time moving through this carefully and make sure everything is set up the way you want it to be. Test and Continue now, and that’s it! You are done!
That’s it! Now you can accept digital signatures in your WordPress forms!
See? If you wish to have a signature field on your WordPress form, it is not that hard! Whether you want to connect to DocuSign or other electronic signature software, Zapier lets you make the connection in minutes!
All you need is to have an active account with Zapier service, a DocuSign account, and use our Zapier add-on that is part of our Professional Membership. The great news is you can also purchase it individually if that is the only extension you need!
Would you like us to have a signature add-on in the future? Give us a comment below and check out our other add-ons and membership options for more features!
Try Ninja Forms Today
Always free, with premium features available through our memberships.