Compared to other email marketing services, Mailchimp (recently acquired by Intuit) is widely popular among WordPress users who like to connect it with their online forms.
For that reason, we put together a perfect guide, with all you need to know when you are integrating Mailchimp with your WordPress forms. In this article, we’ll show you how to do the following:
- Add a user to the Mailchimp list via a sign-up checkbox
- How to sign up new users to different newsletter lists
- How to add subscribers to Mailchimp interest groups
- Bonus: Adding tags to the Mailchimp contacts
So let’s dive into three essential things you want to know when using Mailchimp with your online forms. To get started, you’ll need:
- Free Ninja Forms plugin
- Mailchimp add-on
- Conditional Logic add-on (some cases)
How to add a sign-up checkbox to your WordPress form
Want to grow your email list? Give users the option to join your mailing list on your form with the Mailchimp sign-up checkbox and conditional logic!
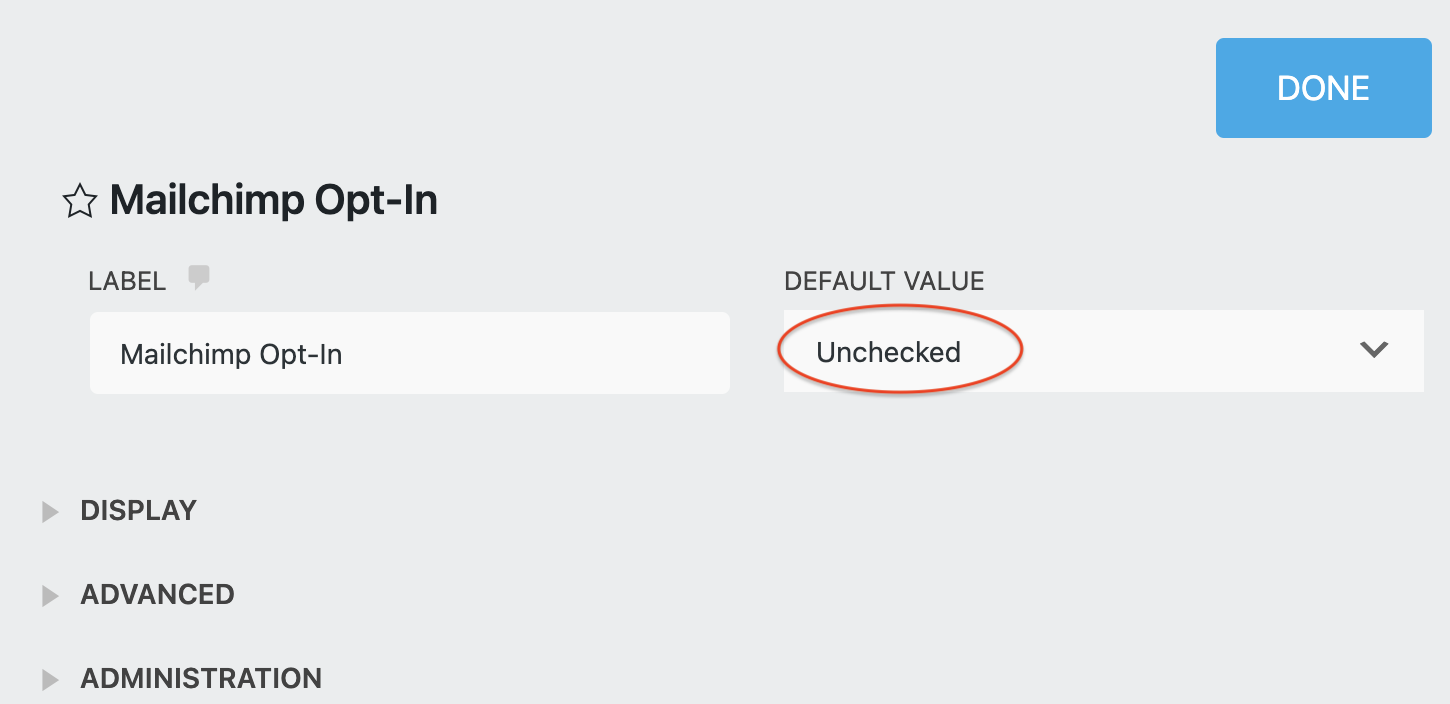
- From the list of fields, select the Mailchimp Opt-In field and drag it to your form. Make sure you leave the default value Unchecked. Pre-checked boxes are not allowed as they are not considered to be valid consent under GDPR.
- Navigate to Emails & Actions within your form, click the blue plus sign button, and add Mailchimp action. Select the mailing list where you want to add your user.

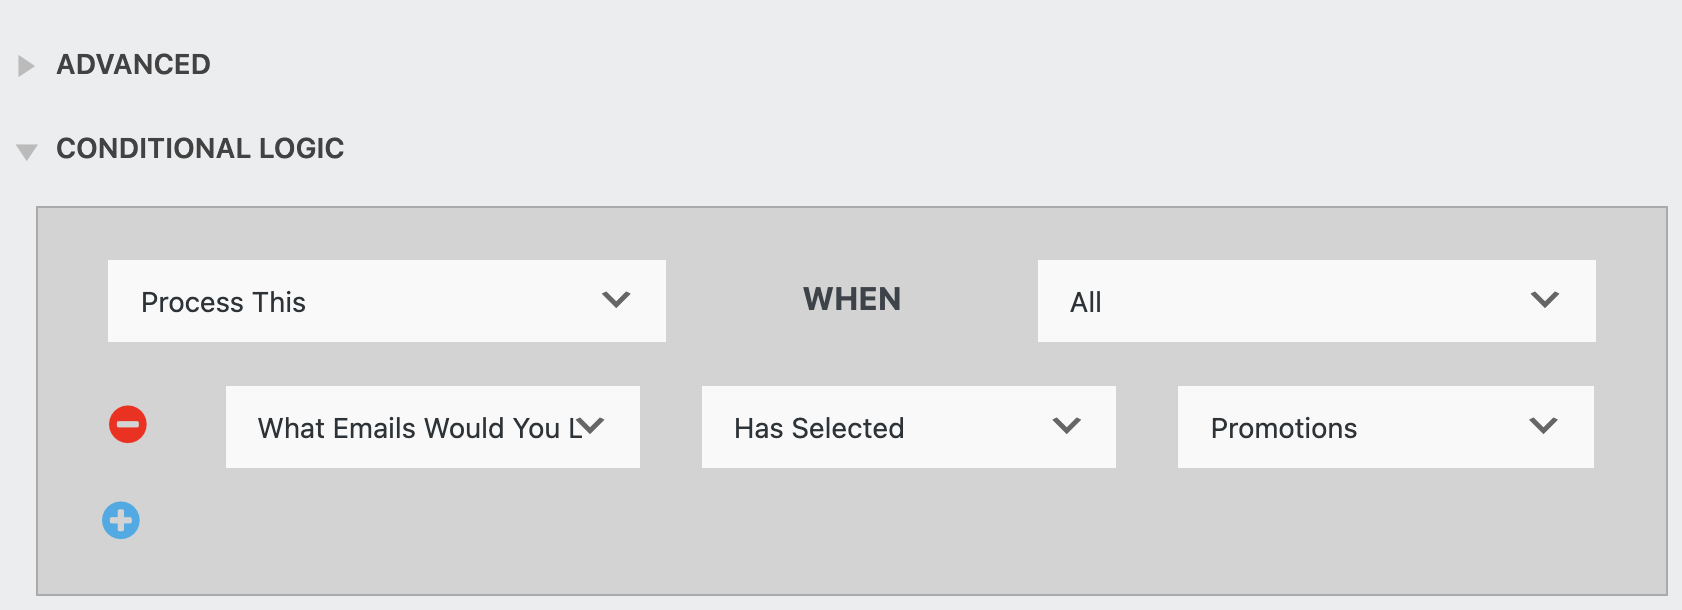
Please note that if a field is required in Mailchimp, it MUST be mapped to a Ninja Forms field, or your contact will not be added to the list. - The last thing you need is to set your condition, so the action triggers as it supposes to. Now if your contacts check the box, they will be sent to your email list automatically!

Did you know you can also send custom data from your form to Mailchimp? Read this blog post and learn how to give your campaigns a boost without asking users to fill out more fields!
How to signup new users to different newsletter lists
Need to signup new users to different newsletter lists based on how they fill out the form? Smart move! Segmentation allows you to take more control over your audience, sending them messages and offers they are actually interested in.
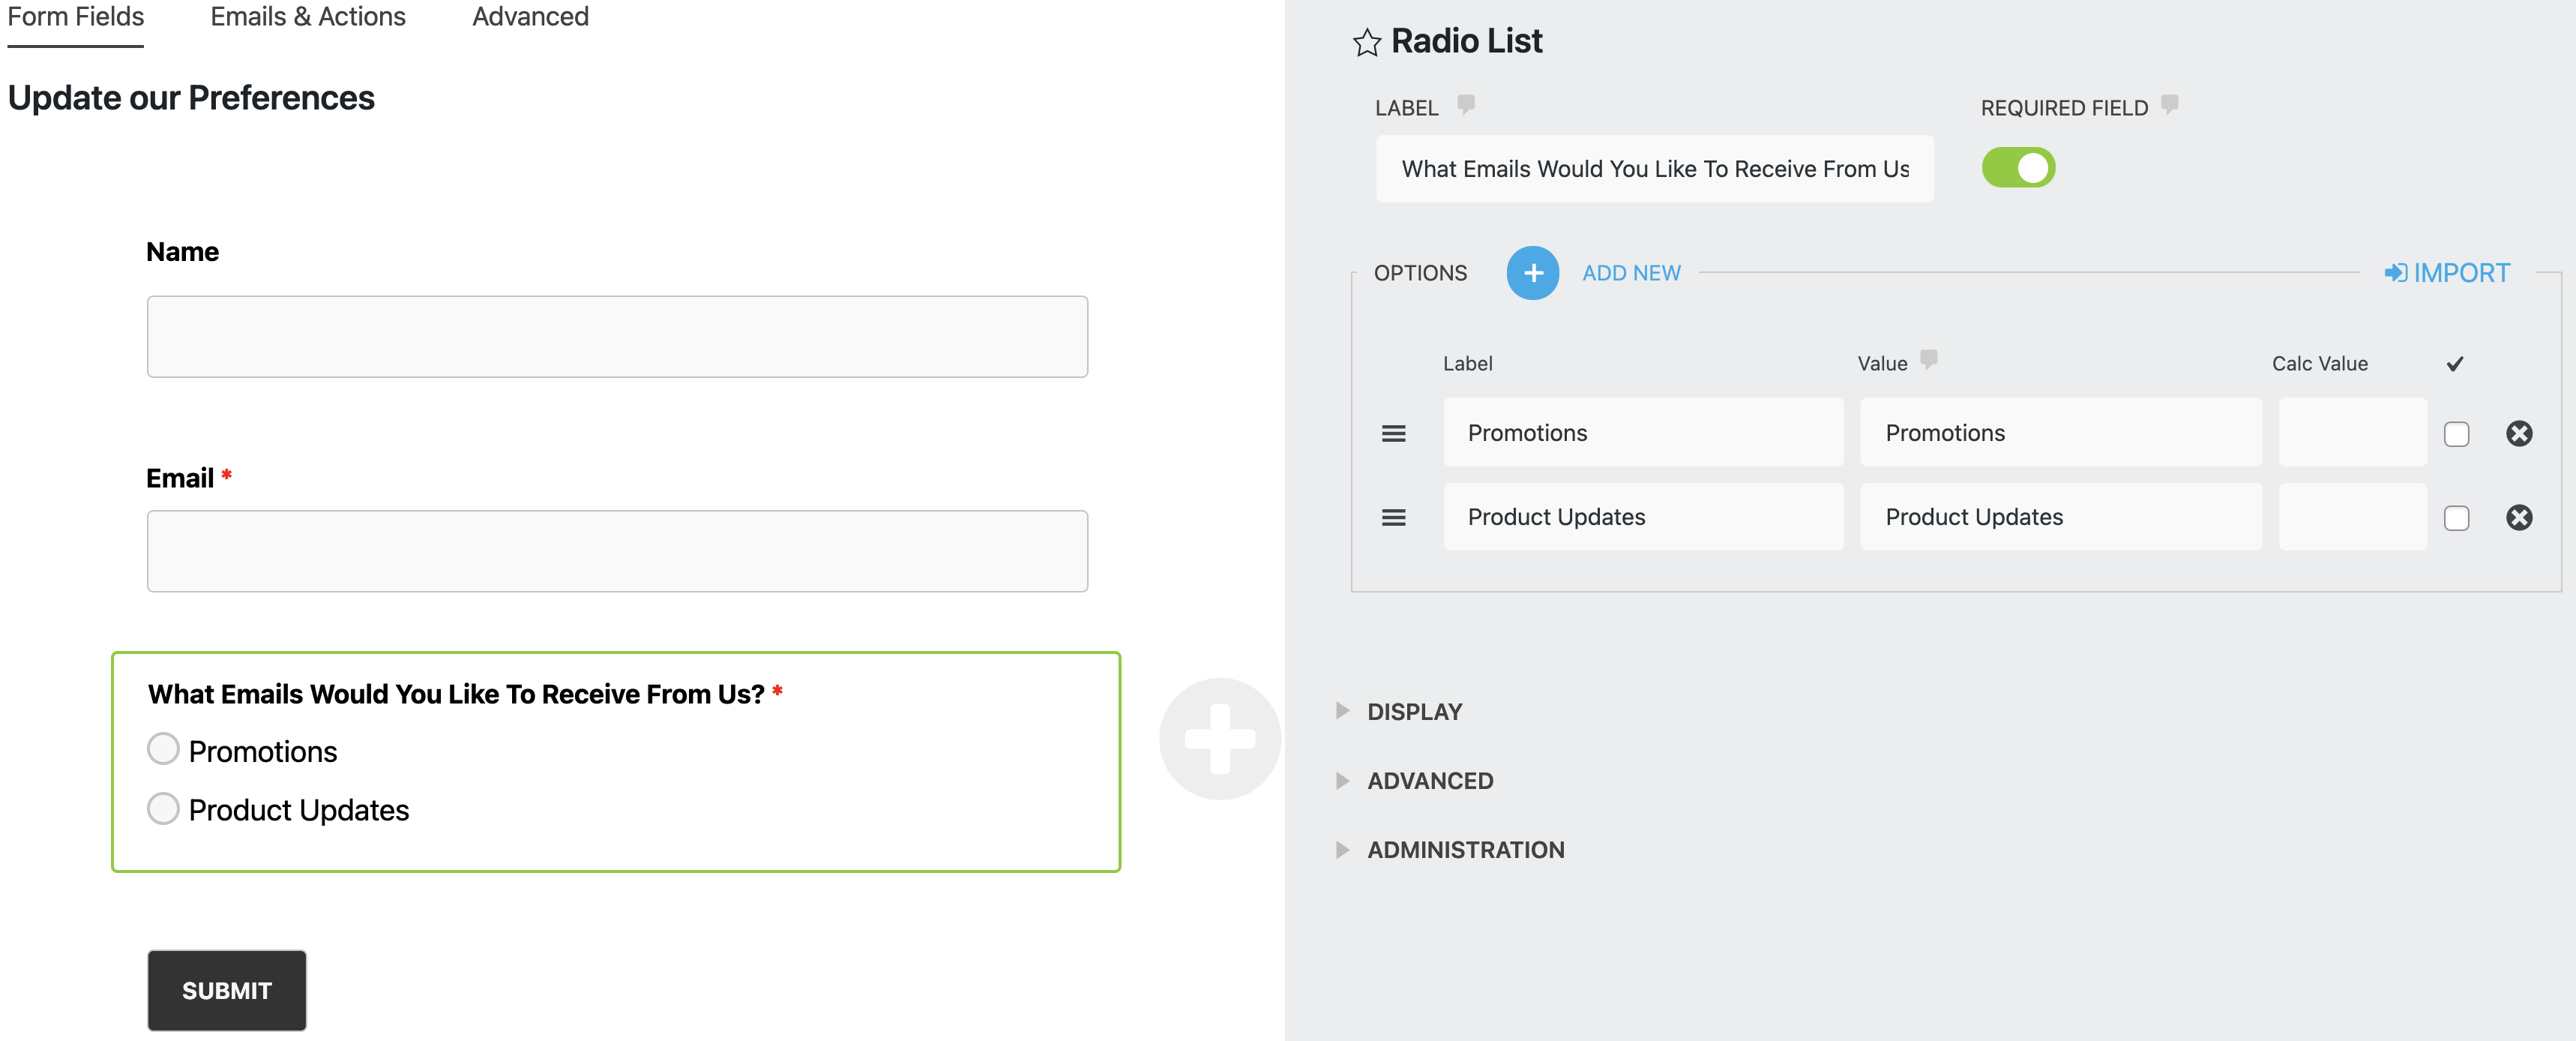
With a simple Checkbox List field/Radio List field and conditional logic, you can give customers the option to select which list they want to subscribe to, leading to a higher engagement rate. Additionally, you will save yourself hours of manual labor!
First, you need to create a list selection using our Radio/Checkbox/Select list field:
Second, you want to make sure every list is assigned correctly to your action along with conditions. If you are having multiple email lists, you have to create multiple Mailchimp email actions for each list. See the example below:
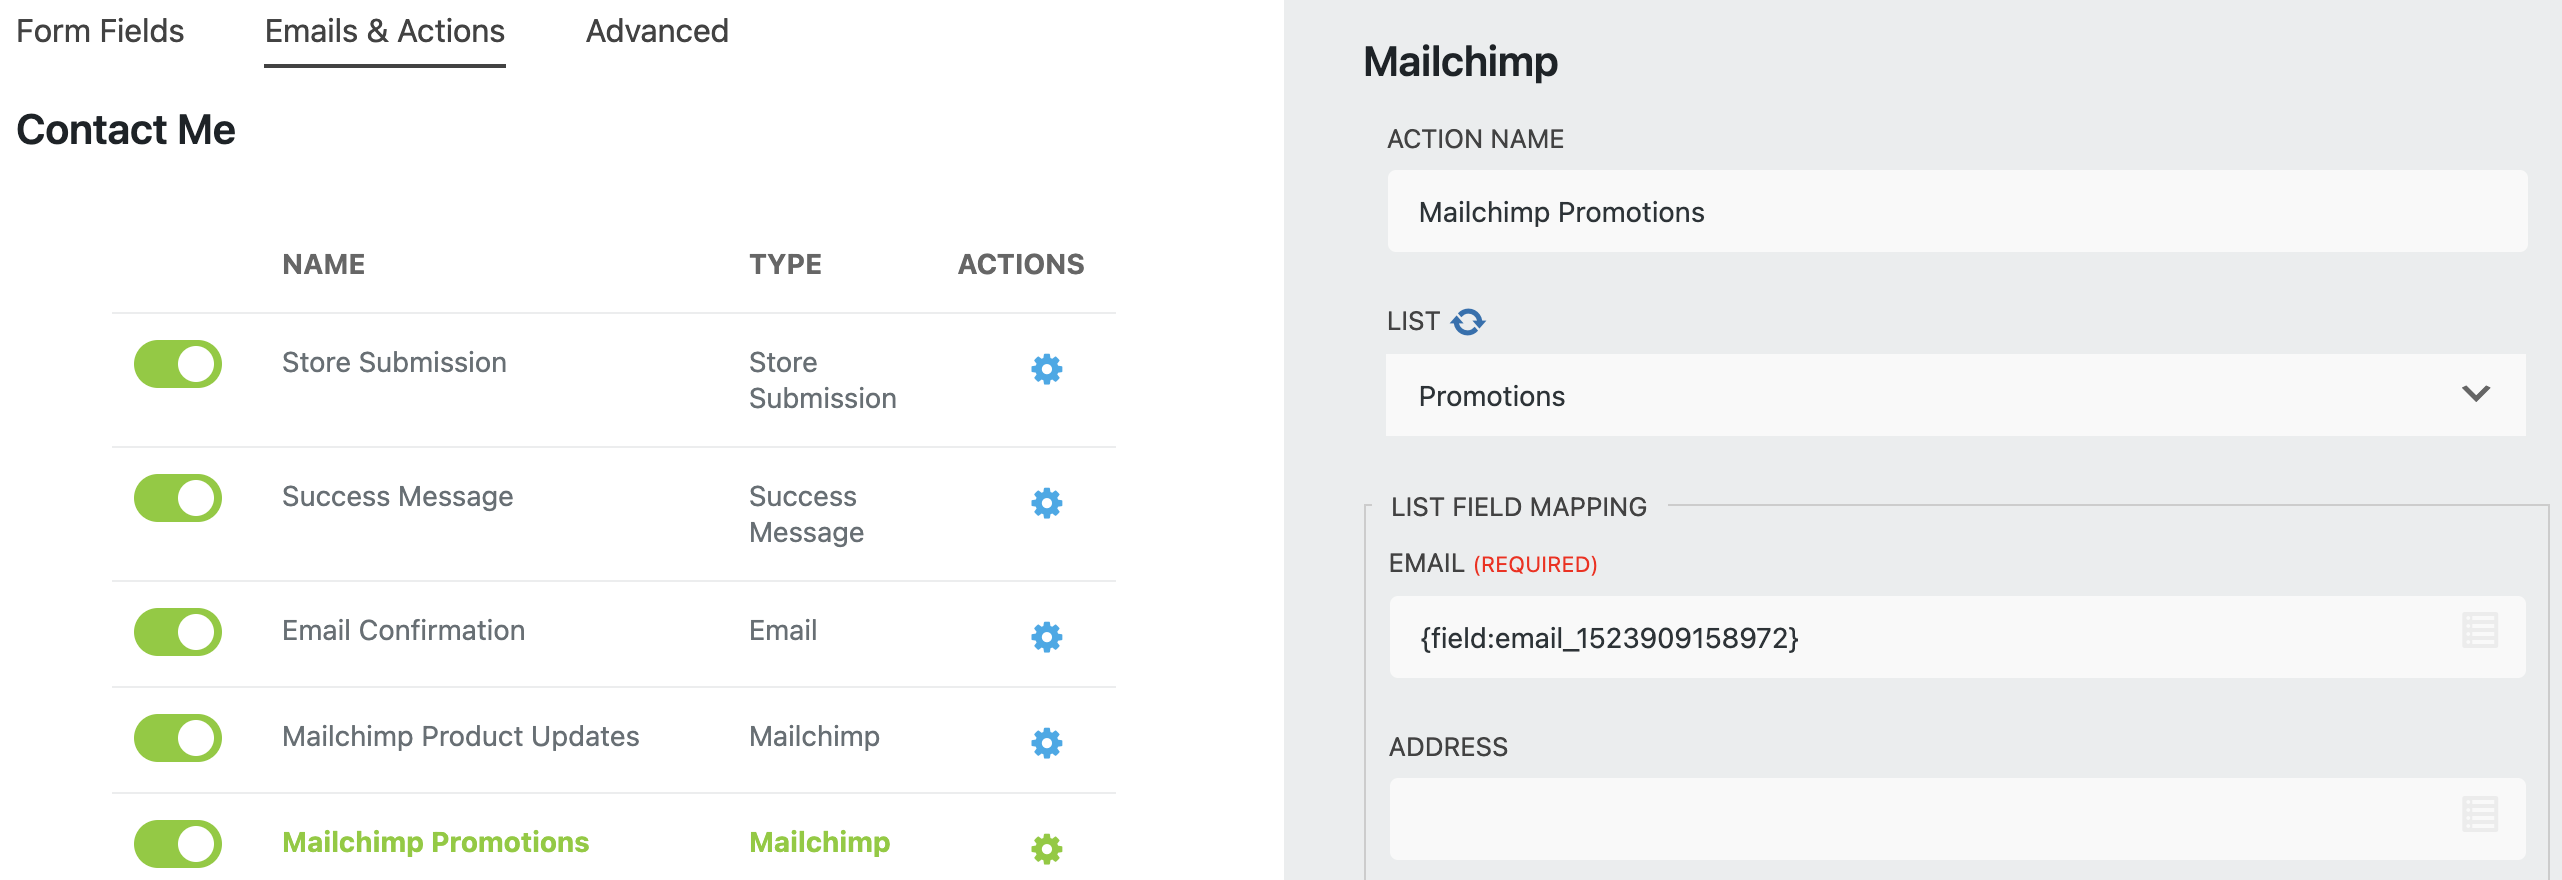
If you want to send users to the list Promotions, you need to select the Promotions list. Once you have your existing list, your List Field mapping section will display fields. Here you can map the proper fields, so the data is sent to your Mailchimp account correctly. Just remember, you’ll want to create for each list/audience an individual Mailchimp action.
That’s it! After following the steps, your new signups will be automatically categorized to the list or audience of your choice!
How to add subscribers to Mailchimp interest groups
Groups are an excellent way how to manage diverse contacts in the same Mailchimp audience. But before your users can pre-select their interest groups, you need to have existing Groups already created in your Mailchimp account. If you don’t, you can easily do so under the Audience > Manage Contacts > Groups > Create Group.
You want to make sure the group options you set in your Mailchimp account match the options on your form.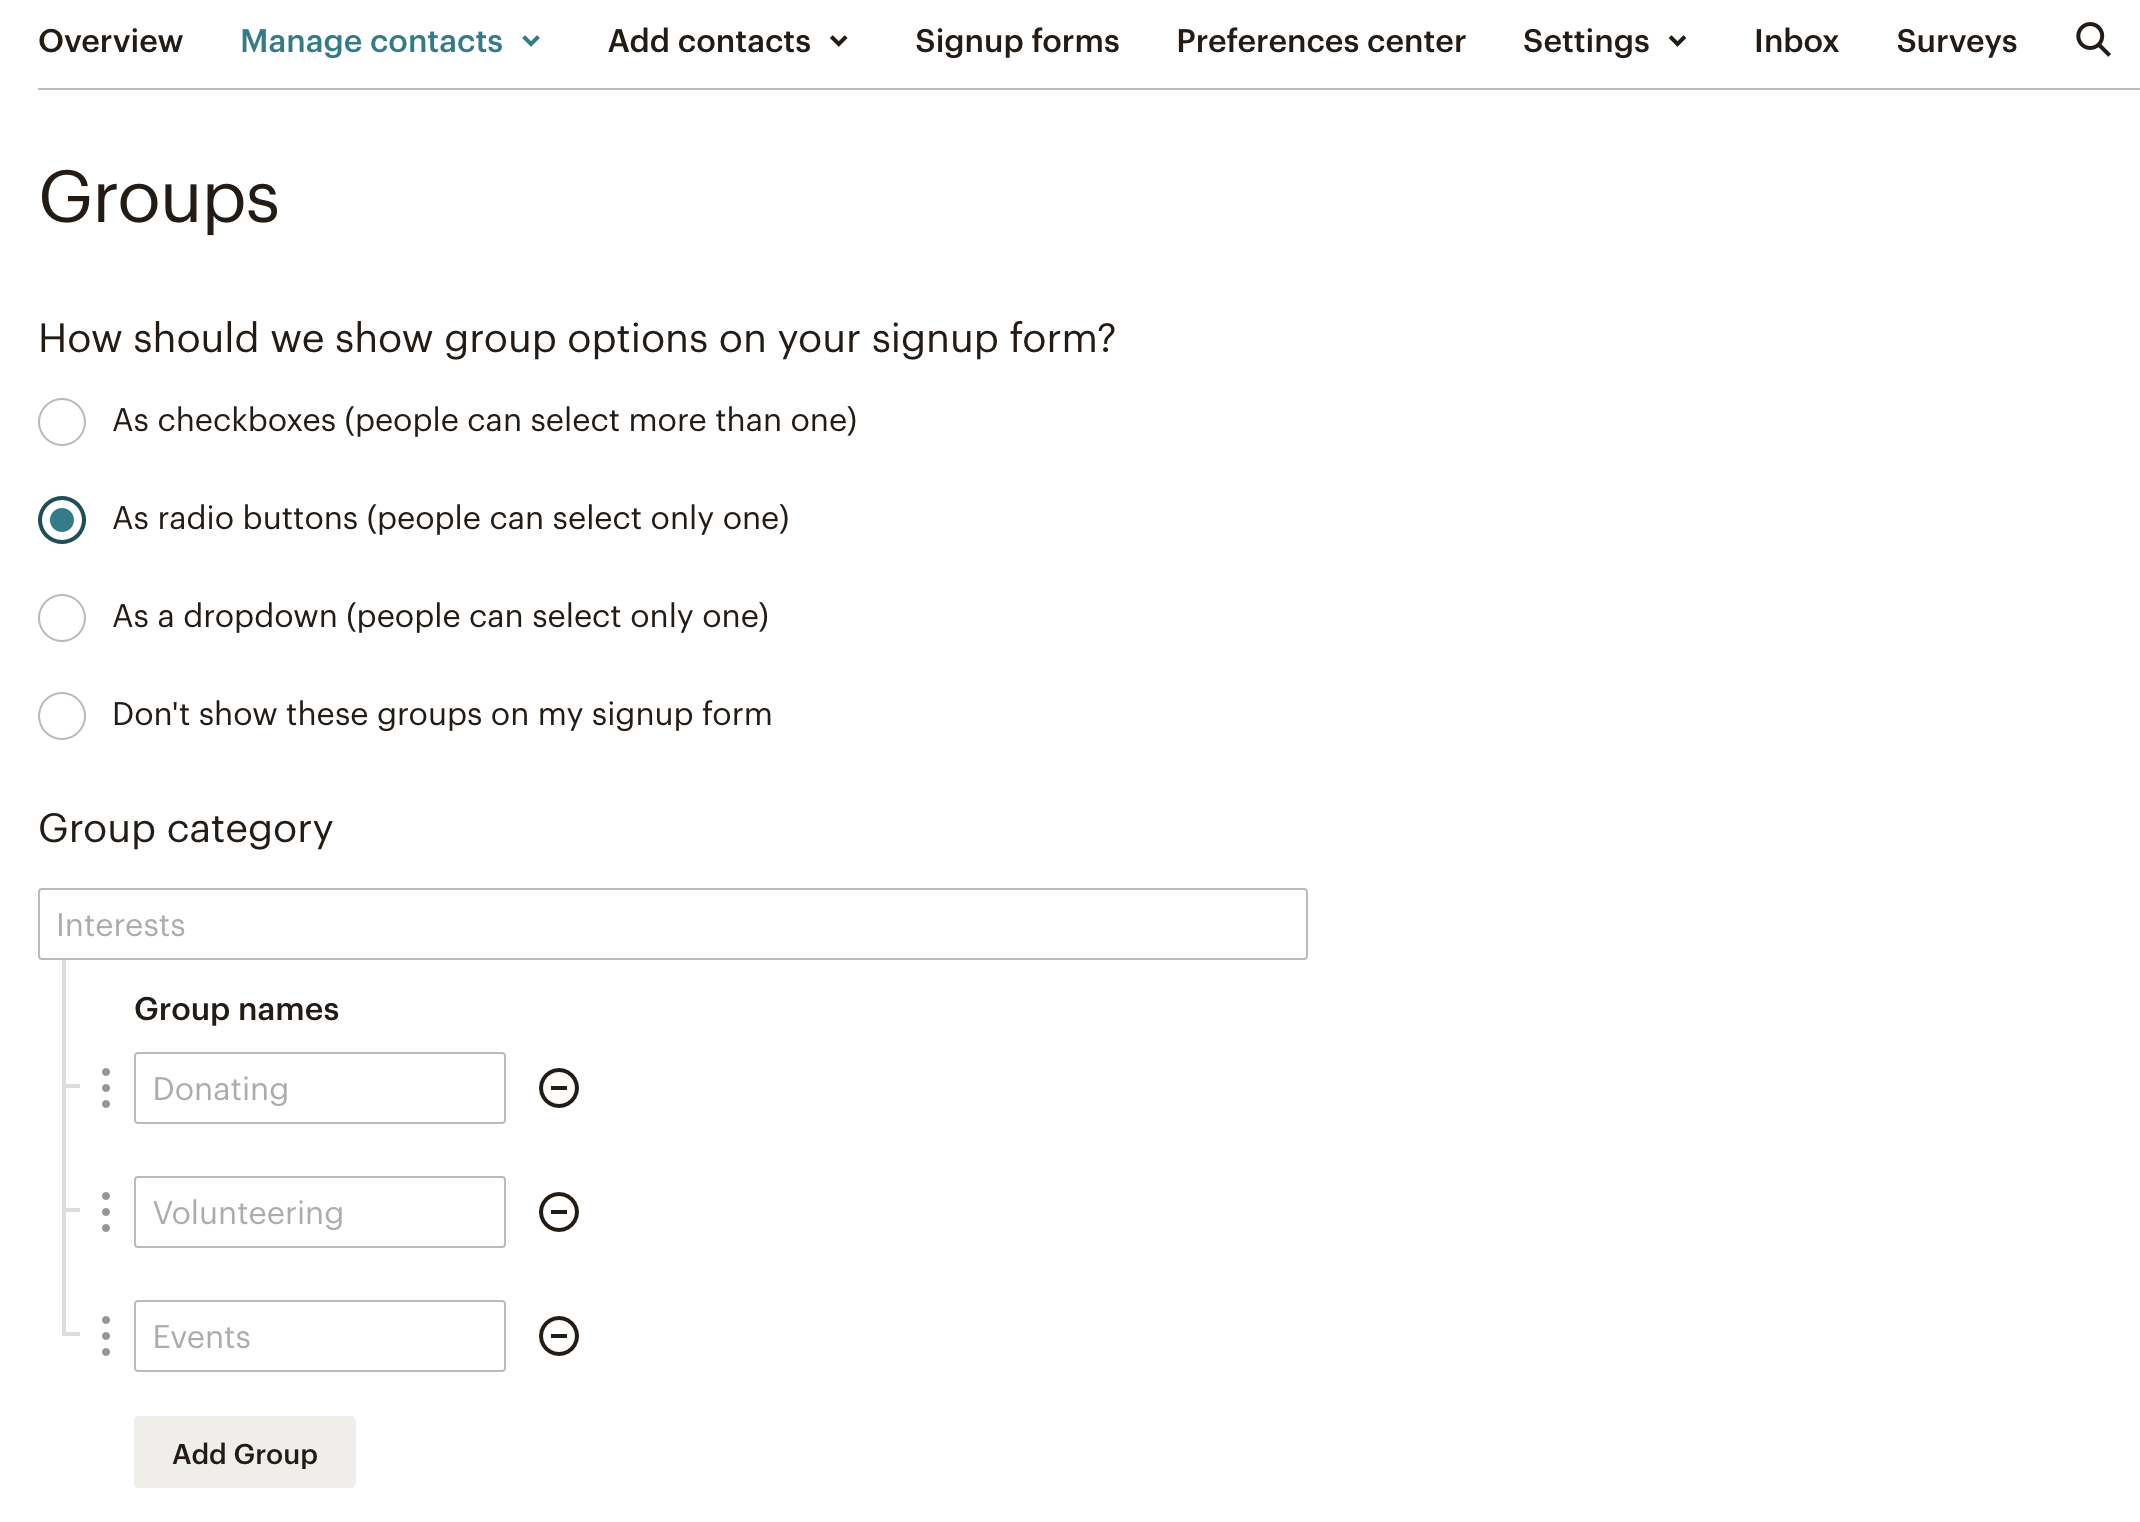
Adding subscribers to groups with your WordPress form using Conditional Logic
For the demonstration, we will use the Radio list field. Make sure the value field is filled out and matches the Label text.
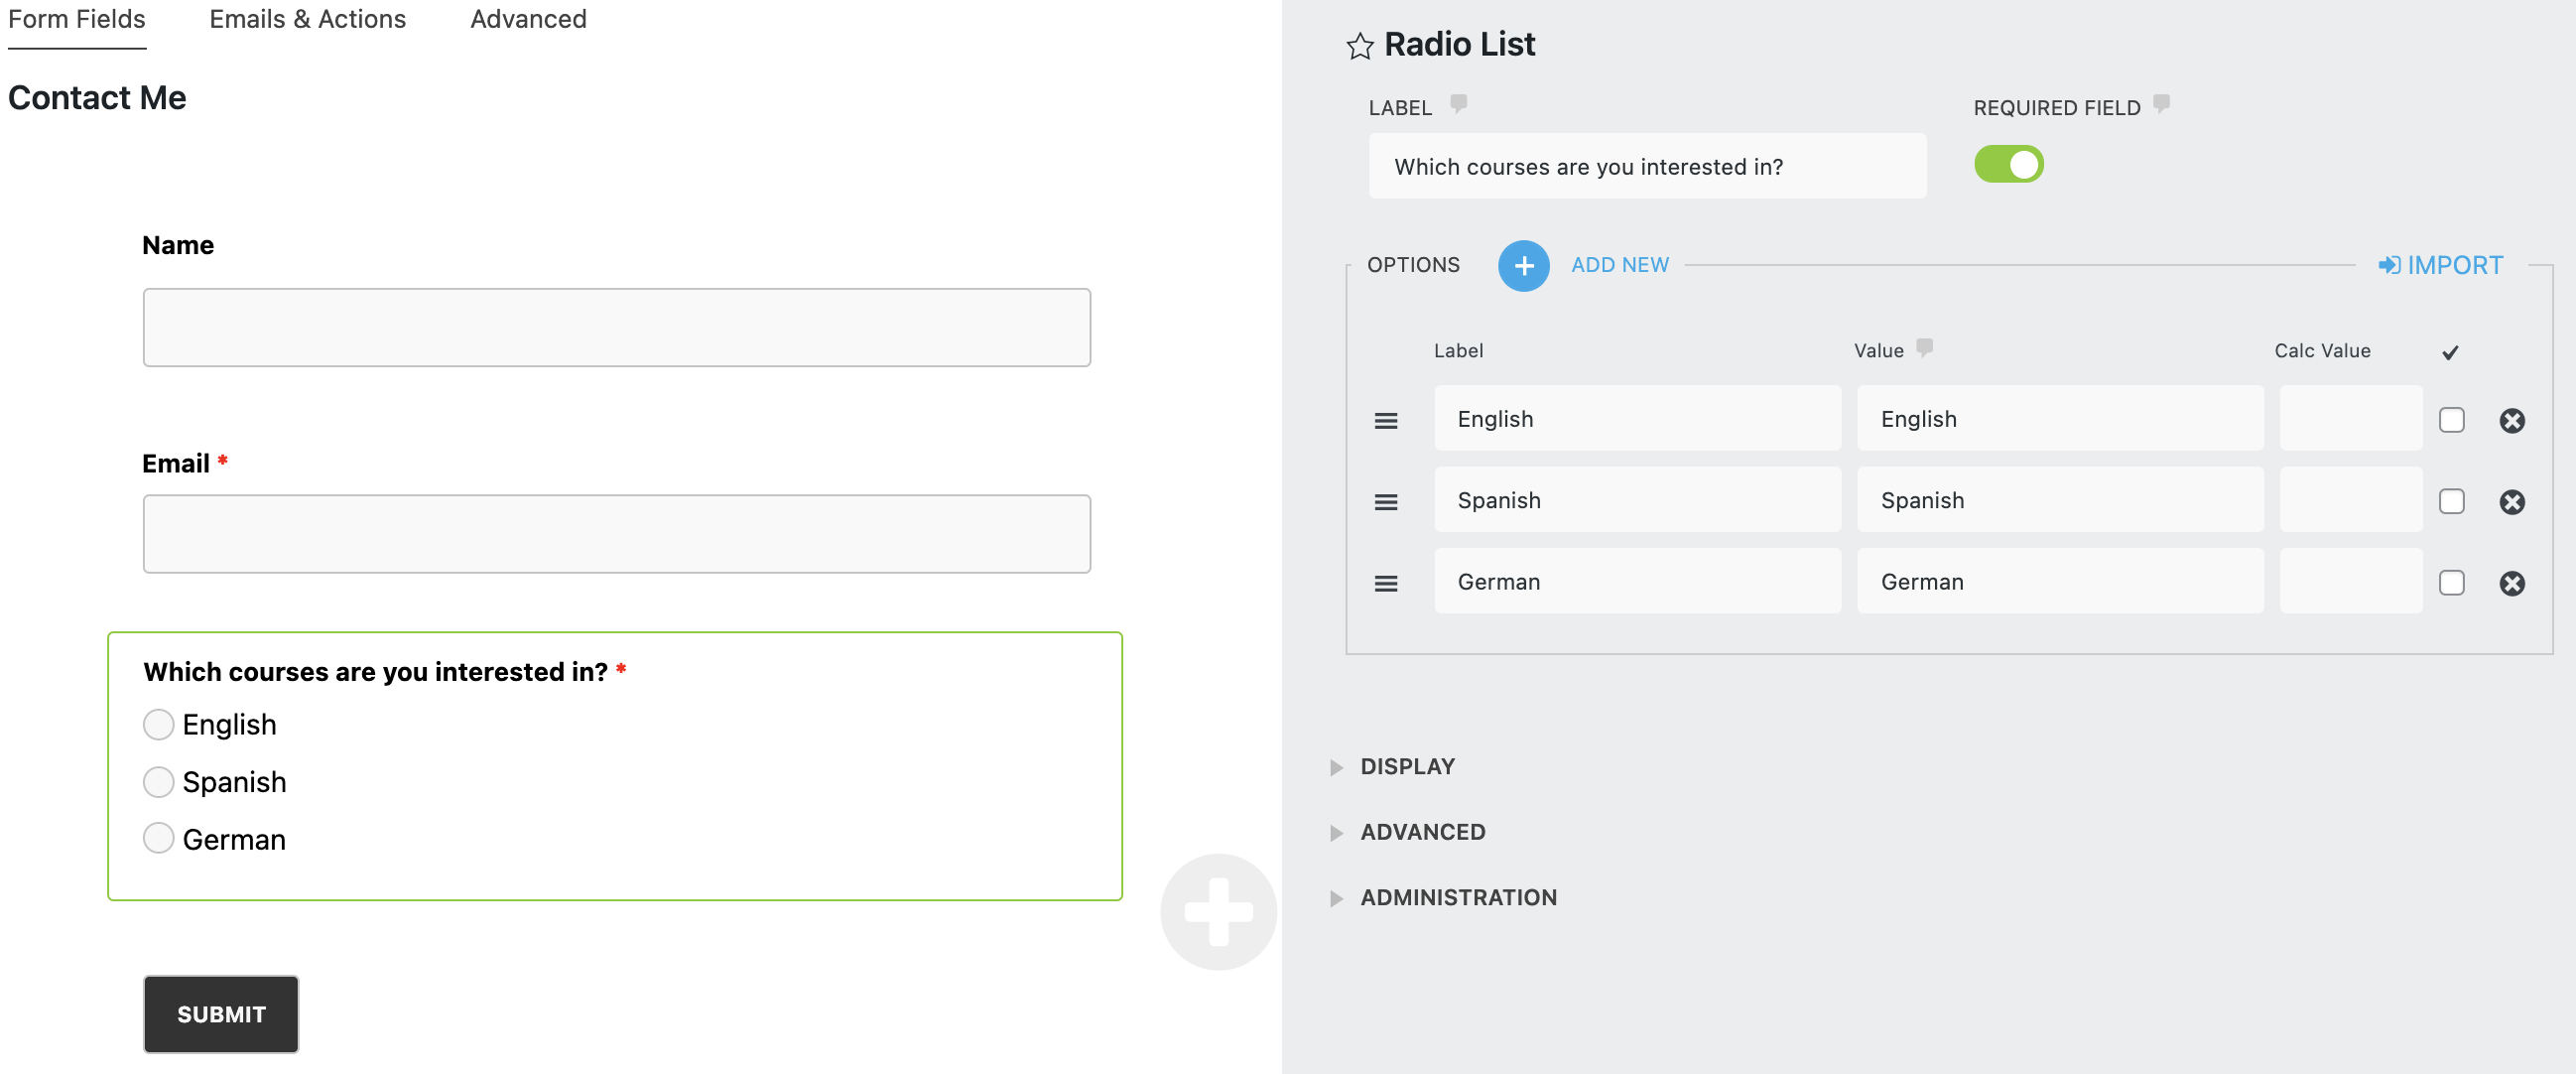
Now for each existing selection (group name), you want to create an individual Mailchimp action. Navigate to Emails & Actions > add new Mailchimp action > select the Mailchimp list (If you don’t see any, click the Refresh button).
When you choose your existing list, the List Field Mapping will show up and display the numerous fields. You want to take a look at the field Preselected Interest Groups.
For example, this is how your setup should look if your user selects he is interested in the Spanish course.
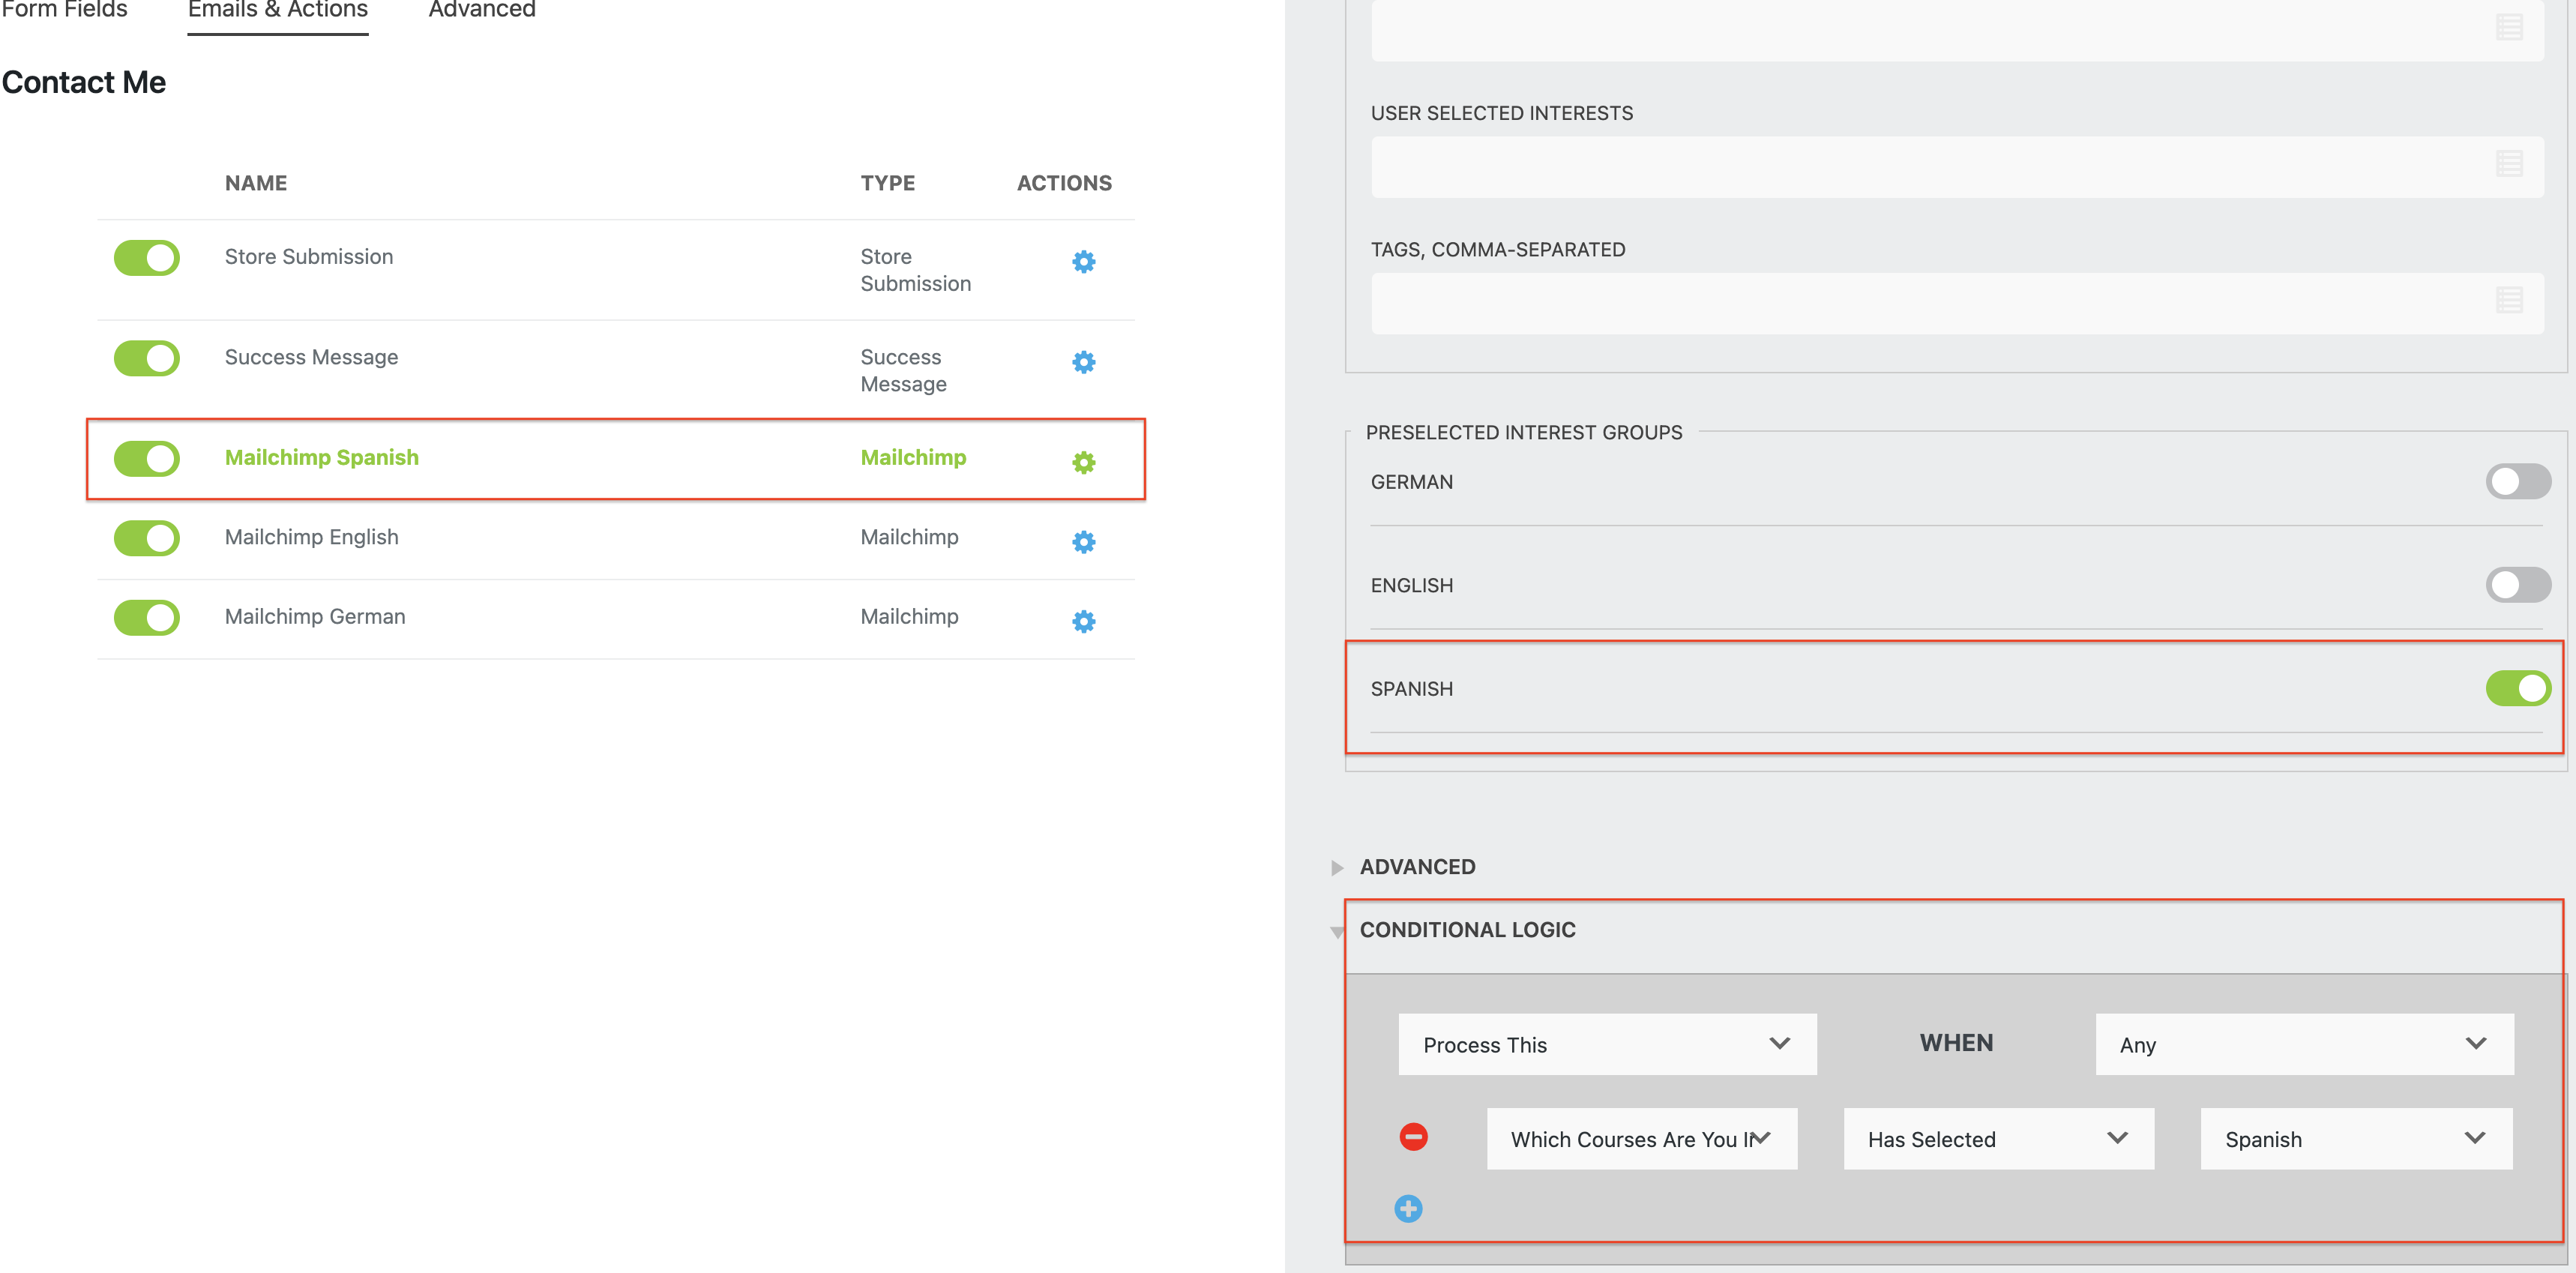
Don’t forget to toggle on Spanish under the Preselected Interest Groups and toggle off the rest of the options. You also want to make sure you set up your conditional logic so the proper action is triggered. Now you set up the same logic for the rest of the options (English & German) and that’s it!
Bonus: Adding tags to the Mailchimp contacts
There is no secret that better targeting equals successful marketing campaigns. Having tags helps you organize your audience and use that data to build segments. Subsequently, you can create customized email campaigns and maximize the success of your email marketing efforts.
How to add a tag in your WordPress Form
The great news is that our Mailchimp add-on supports the tag feature! You can insert numerous tags separating them by a comma like tag1, tag2, tag3, etc.
However, the new tags cannot be added to preexisting contacts. Your tag has to already exist in your audience otherwise won’t be imported. (If you want to create a new tag in Mailchimp, you can simply navigate to Audience > Tags > Create a tag.)
- Adding a tag to the user in your form
Once you are in your form, navigate to Emails & Actions > add new Mailchimp action > select the List (If you don’t see any, click the Refresh button). - When you choose your existing list, you will see the show fields under List Field Mapping. Now you can enter a tag or multiple tags into Tags, Comma-separated field. That’s it!
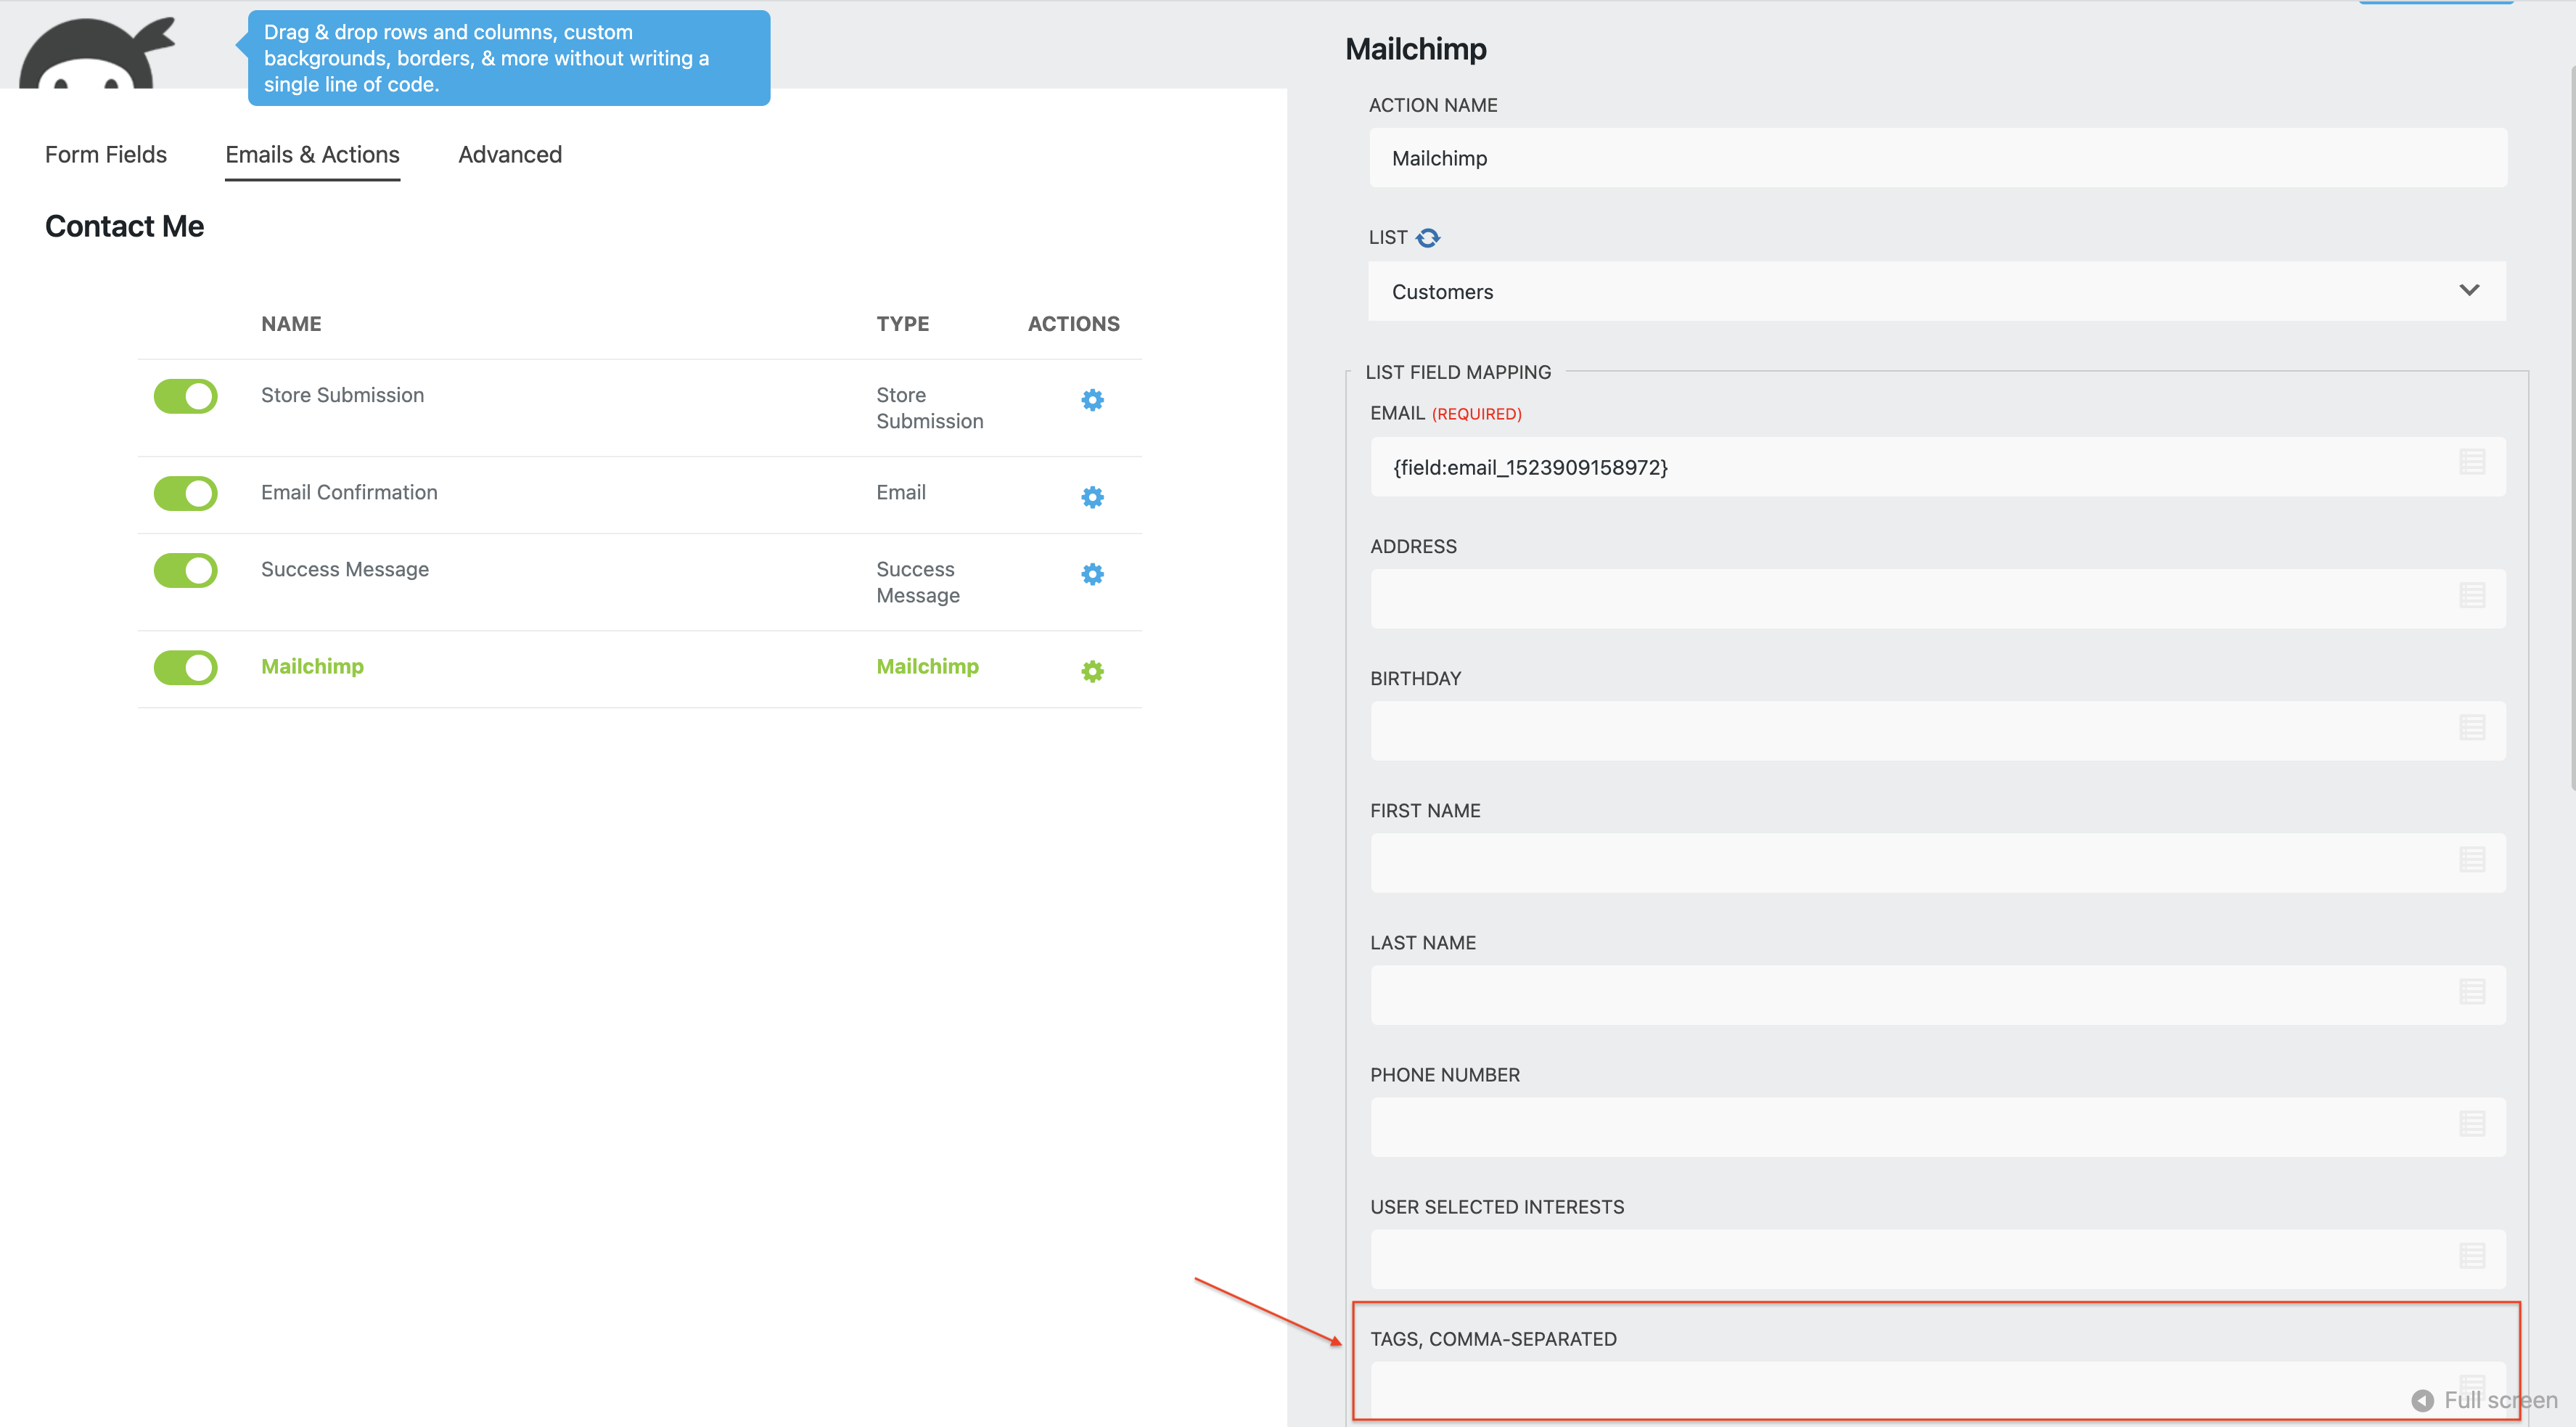
3. You can also add different tags to users based on their selection on the form using the Conditional Logic add-on. What you’ll want to do is create a Mailchimp action per each user selection and enter a tag:
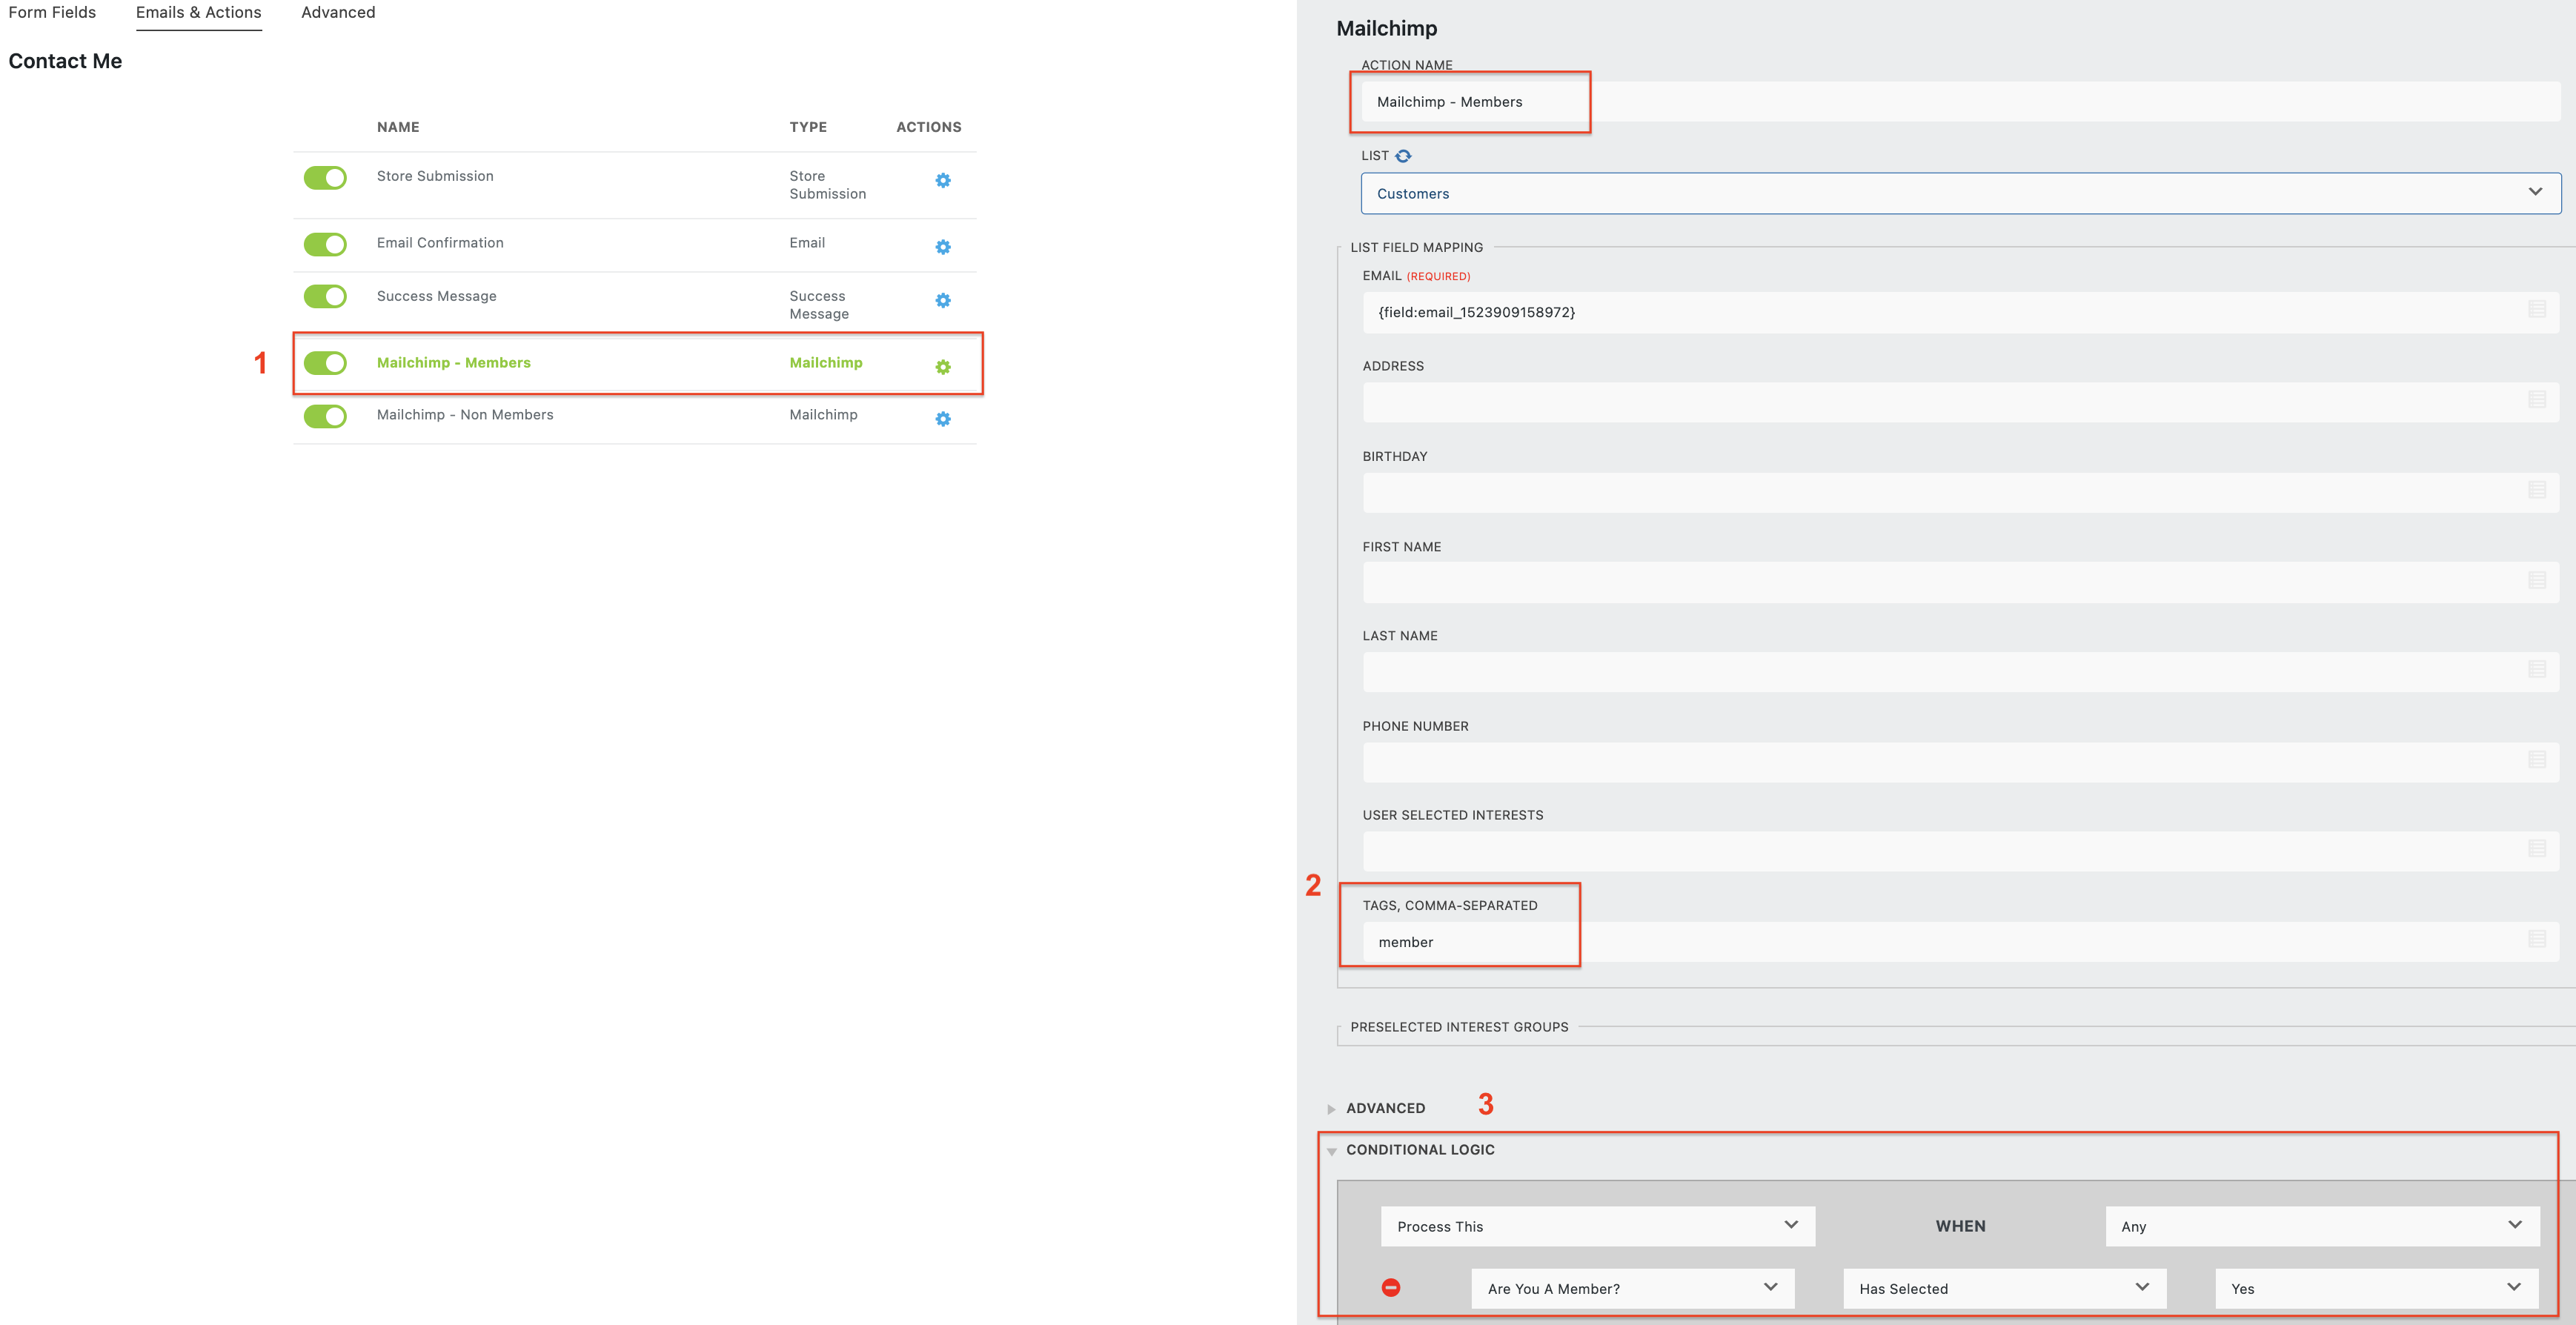
For example, if your user selects the option “Members”, you want to type to the Tag field the tag “member”. To assign a non-member tag to a user who selected the option Non-Members, you need to create another Mailchimp action and follow the same logic as shown on the screenshot.
Superpower your forms with Mailchimp and Conditional Logic!
Pairing Mailchimp with Conditional Logic can save you plenty of time when it comes to organizing multiple mailing lists with different groups and tags. What would take you hours to do manually, will now only take few simple clicks in a couple of seconds! Want to try it out? Bundle and save with our memberships, if you haven’t yet taken advantage of great savings!
We want to know what you think of our add-ons, so let us know your thoughts if you give it a try!



Matt says:
Ah! I was struggling to figure out the difference between groups and tags. It seems that tags are more for internal usage, which was confusing, where groups are more for front-end user selections. Very useful!
Lenka Uhliarova says:
Glad, we could help Matt!