
Picture this: your email marketing game is on point, but there’s one thing that’s holding you back – organizing your subscribers. Managing multiple mailing lists can be a nightmare, but what if there’s a straightforward solution that not only simplifies the process but also empowers your subscribers with user-selected email subscription forms, letting them chart their own course?
Intrigued? Then buckle up because today’s blog post will introduce you to the magic of Ninja Forms’ Conditional Logic add-on for Constant Contact, a game-changer for streamlining your email marketing efforts.
In this step-by-step guide, you’ll learn how to create a user-selected email subscription form, enabling your subscribers to pick their preferred mailing lists. Say goodbye to manual sorting and hello to the power of automation!
And the best part? It’s much easier than you think. So, let’s dive into the world of hassle-free email marketing management and unlock the full potential of Ninja Forms’ Conditional Logic add-on!
Step 1. Create the WordPress form
First, install and activate the Conditional Logic add-on. Then, build your form. If you already have a form, simply add the required fields as mentioned below. If not, create a new form with the fields:
- First Name (First Name / Single Line Text)
- Last Name (Last Name / Single Line Text)
- Email Address (Email)
- List Selection (Radio or Dropdown Field with available mailing lists)
Step 2. Add Constant Contact actions
Click on Emails & Actions and add a Constant Contact action for each list available. Name the actions according to their corresponding lists. Open each Constant Contact action and map the form fields to their respective Constant Contact fields.
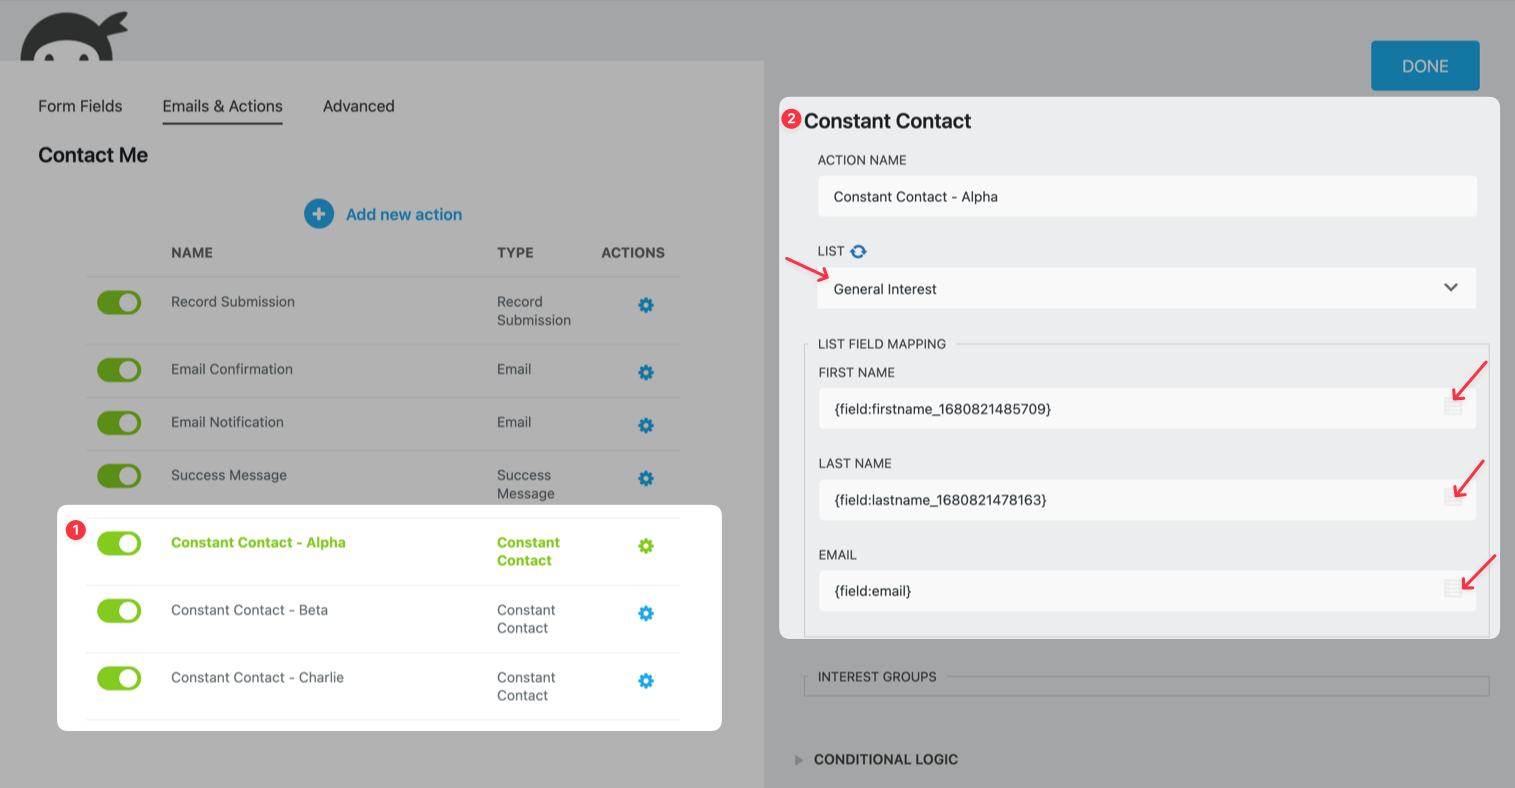
Step 3. Apply conditional logic
For each Constant Contact action, you’ll apply conditional logic based on the List Selection field.
- Under each action, find the Conditional Logic dropdown.
- Open the dropdown and select the List Selection, Select field.
- Set the condition to match the corresponding list for that action.
For example, if you have a “Newsletter” list, the conditional logic for that action should be set to send subscribers to the “Newsletter” list when they select it from the List Selection field.

Step 4. Save and test your form
After applying the conditional logic, save your form and run a test submission to ensure everything works as expected. Your subscribers will now be automatically sorted into their chosen mailing lists based on their selection.
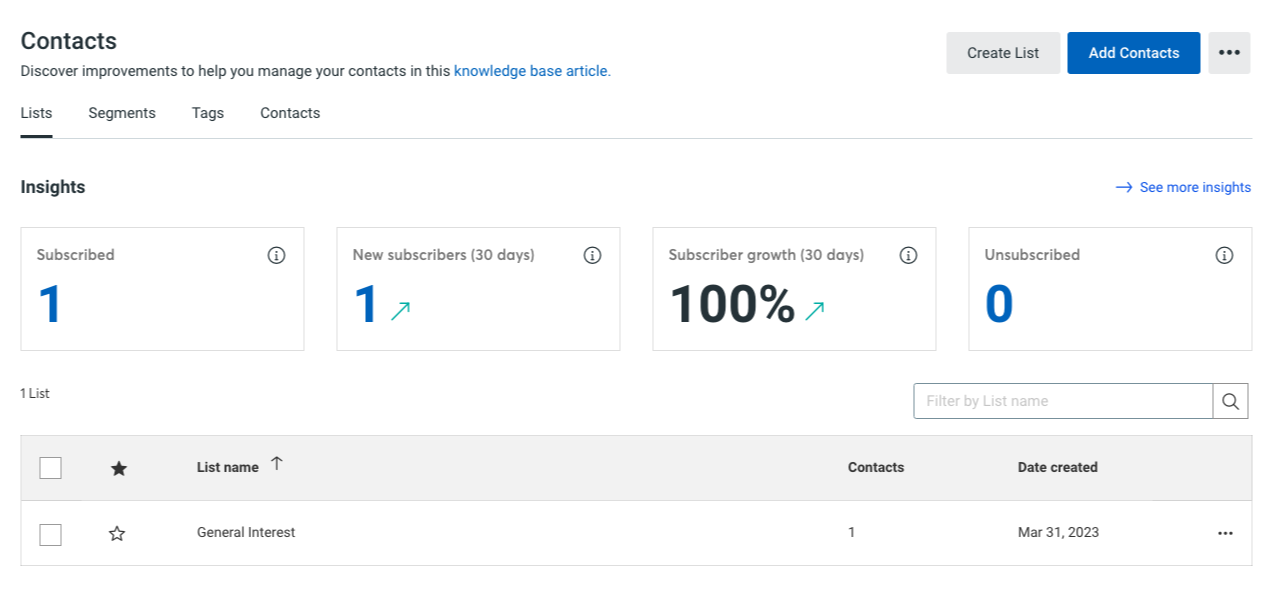
With the Conditional Logic add-on for Constant Contact, you can effortlessly manage your mailing lists and provide a personalized experience for your subscribers. For more details on using conditional logic, refer to the Ninja Forms documentation.
Let subscribers select their own email list with the Constant Contact add-on form Ninja Forms
Congrats! You’ve built your first user-selected email subscription list for WordPress. Surprise, surprise. It only took a few steps and ended up being a lot easier than you thought. Now that you are a pro, you can spend your time doing the important work of capturing those leads!
With Conditional Logic, you can do more than build user-selected email subscription forms. Use it to:
- Modify lists.
- Change values.
- Show & Hide fields.
- Generate custom responses.
- Build intelligent redirects.
- And much more
Get the Conditional Logic add-on separately in a one-, five-, or twenty-site license or free with the Elite membership and enjoy a 14-day money-back guarantee with no risk involved.