Two Quick and Easy Methods to Add Google Maps to Your WordPress Forms, Posts, and Pages
Searching the web for a way to add Google Maps to your WordPress forms, posts, and pages can quickly become overwhelming. It doesn’t need to be!
You may already have tried one of the many plugins for Google Maps. Building out a site recently as a side project for a realty business, that was the first thing I did. There were tons of them. Some worked, some didn’t. Some had so many additional features I felt like I was trying to reinvent Google Earth.
You probably don’t need an extra plugin.
You may have tried adding a map manually. That was the next thing I tried. Yikes! I have to add code? That looks complicated even for someone moderately experienced with HTML.
Adding a map to your WordPress forms, posts, and pages is actually very easy.
Let us show you how!
Do This First: Find your Map Location
I’m breaking this up below into Method 1 (embed map in post or page) and Method 2 (embed map in WordPress form). However, first and foremost, you are going to need your chosen location on Google Maps ready to go.
Head over to Google Maps and find the location you need. This can really be anything from your business address or a cafe you’re planning an event at, to the great pyramids of Egypt or an airplane graveyard.
Go to Google Maps, find your location, and click on the Share icon:

This will open a new window with a location code (iframe) in Google Maps. Click the Embed Map button and copy the entire location code provided. If you want to get fancy you can also choose the size of your map, or set a custom size. Regardless of map size, you are still going to need that location code.
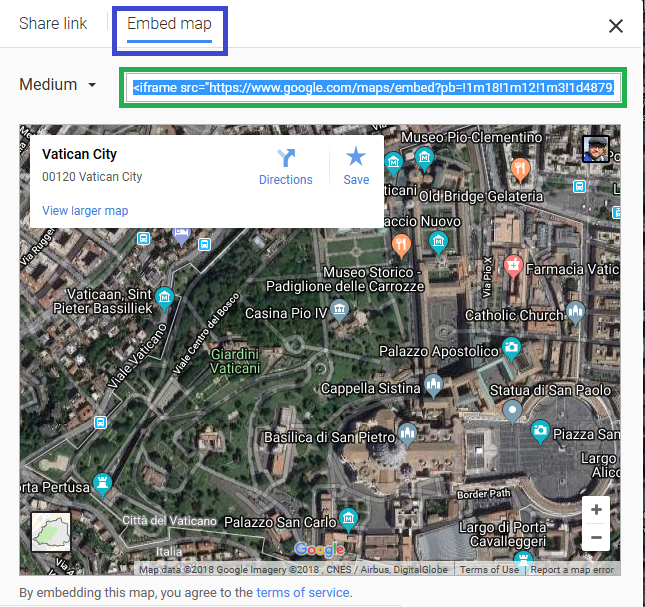
Once you have your location code copied, set it aside somewhere for safe keeping and head to your WordPress dashboard.
Method 1: Embed your location in a WordPress post or page
From your WordPress dashboard, go to Posts > Add New, or open an existing post/page in editing mode. From here, select Text instead of Visual and input your location code at the spot you desire in your text. In the image below, you can see I’ve added it before the text. It can also easily go after or in the middle.
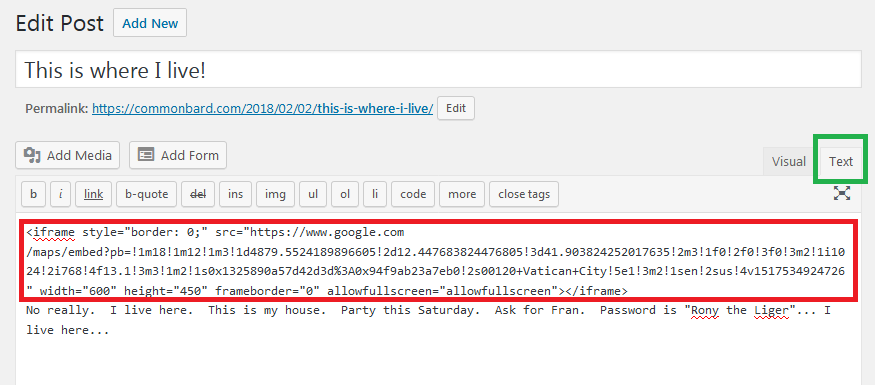
Once you’ve set your location code into your article, you can return to the Visual display to check and make sure the map has been embedded properly.
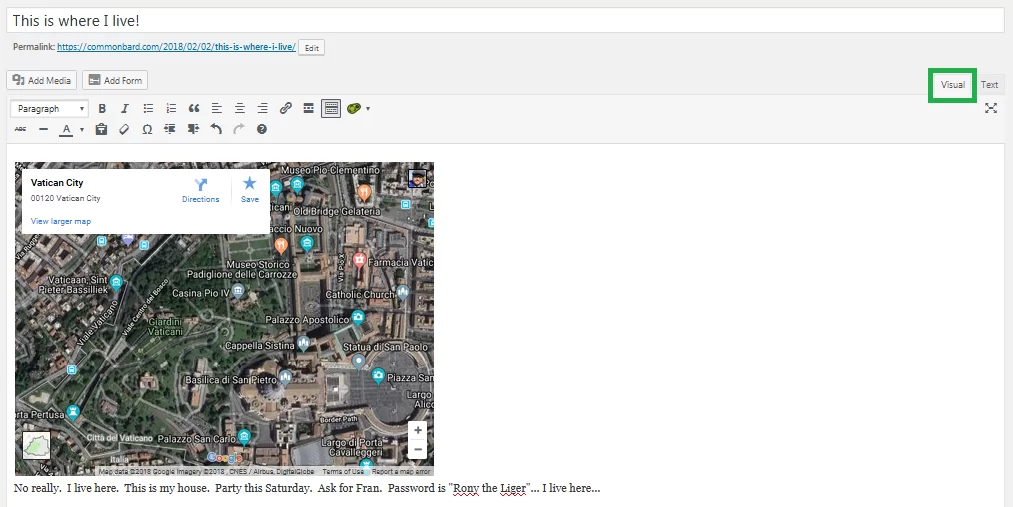
If there is a mistake, make sure the location code was copied and pasted properly.
Method 2: Share a Google Maps location in a WordPress form
Using Ninja Forms, you are going to need to create a form with an HTML field, or add an HTML field to an existing form.
For this example, I made a blank form with nothing but an HTML field. You, of course, can use whatever form you need (i.e. product form, event registration, etc.). Just make sure there is an HTML field on whatever form you use. This is where the location code will be placed in your form, and how the map will be displayed.
In the settings for the field, go ahead and place any text you would like to go along with your map, and then select the <> icon in the upper right.
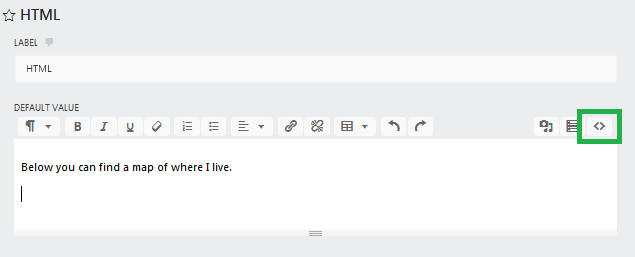
This will open a coding window. Simply paste the location code where you would like the map to display.
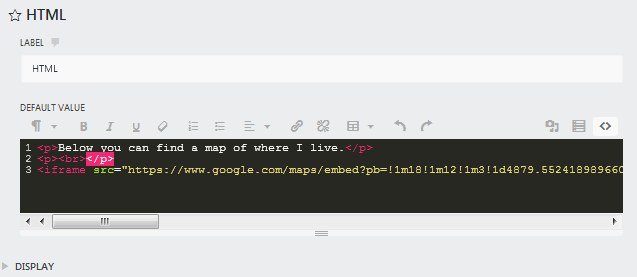
Once again, if you need to check your efforts click the <> icon to return to the previous view where the map should now be displayed. Save your form and return to the Page/Post you would like the form + map you have created to live, and select Add Form.
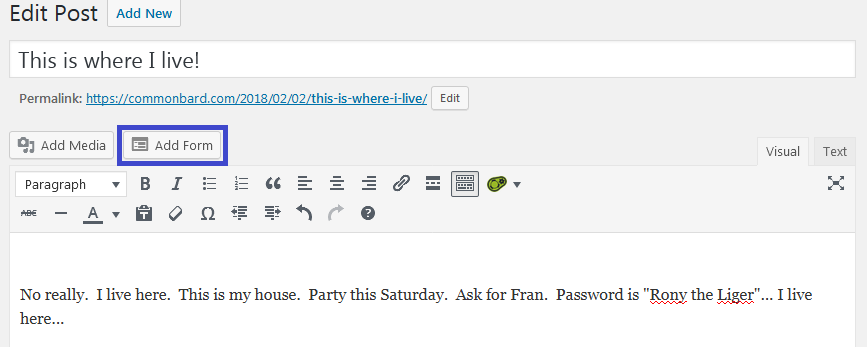
This will open a window where you can select the form you just created to be placed into your Post/Page.

To finish up, click Preview in the upper right hand corner to check your new Post/Page, and you are done!
It really is that easy to add Google Maps to your WordPress website, and Ninja Forms helps make this ability even more versatile. Show the location of events your users are registering for, meetups, job sites, business locations, and more. If you want a more granular level of control over where the form is displayed within the form, be sure to check out the Layout and Styles extension!
If you have any tips or tricks you have found when added maps to your own sites, be sure to share them below. Happy crafting!
