Free WordPress Form Builder with PayPal: Take Payments With No Upfront Cost
You need to take a payment for a visit booking, a deposit or a donation, nothing fancy. What you’d rather not do is spend money before you’ve taken a single dollar. For a small organization on a tight budget, fifty dollars for a payment add-on before the first booking comes in can be a real stretch.
That’s why we’re thrilled to announce that you can now take PayPal payments with nothing up front using Ninja Forms. No add-on required, no upfront purchase to make. You pay nothing at all until money starts coming in, entirely removing upfront cost in exchange for a very small 1.9% per-transaction fee.
Below is how to get started in four easy steps!
What you’ll need
- Ninja Forms 3.16.0 or later
- A PayPal account that can receive payments, which you can create while you connect
Here’s how to set up your free WordPress form builder with PayPal in 4 easy steps
Connect PayPal once, add one action to your form, tell it what to charge, and publish. Everything you need is already in the plugin, so there’s nothing extra to install and nothing to buy.
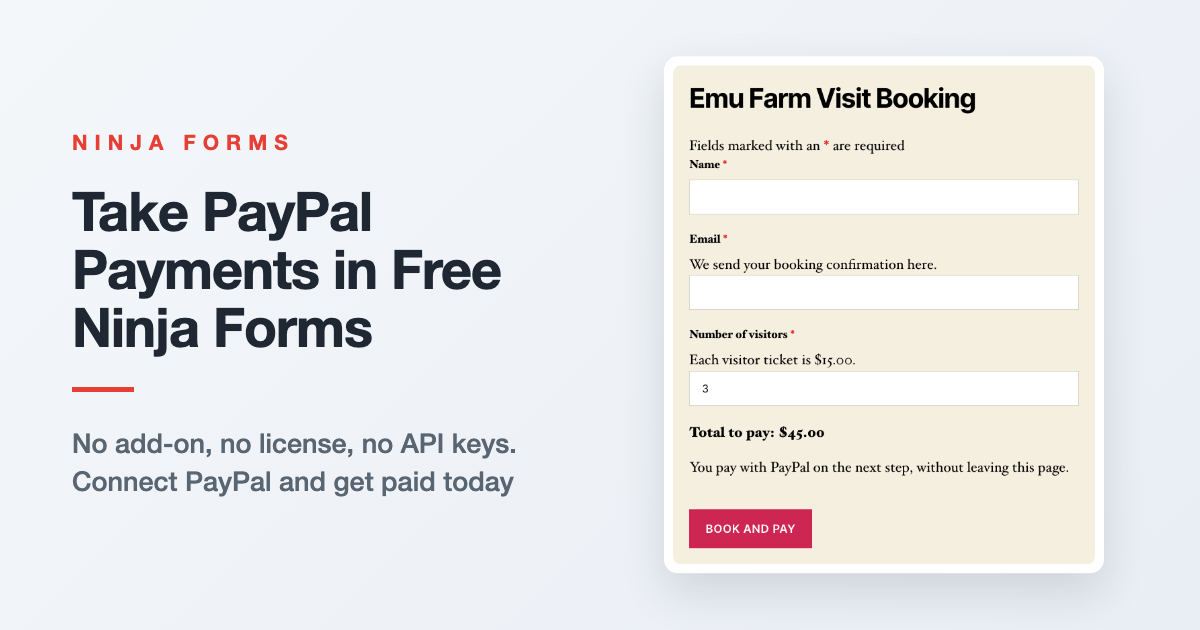
Our example is an emu farm that books visits at $15.00 per visitor. Swap in your own form as you go.
1. Connect your PayPal account on the Ninja Forms Payments page
This is the one step you only do once per site. Every form after this one skips straight to step 2.
- In your WordPress admin sidebar, go to Ninja Forms > Payments.
- Click the blue Connect to PayPal button.
- PayPal’s own window opens over the page. Sign in, or create an account right there, and grant the permissions PayPal asks for.
- Wait for the page to update itself to Connected. If PayPal’s window doesn’t hand you back, click I’m done in PayPal.
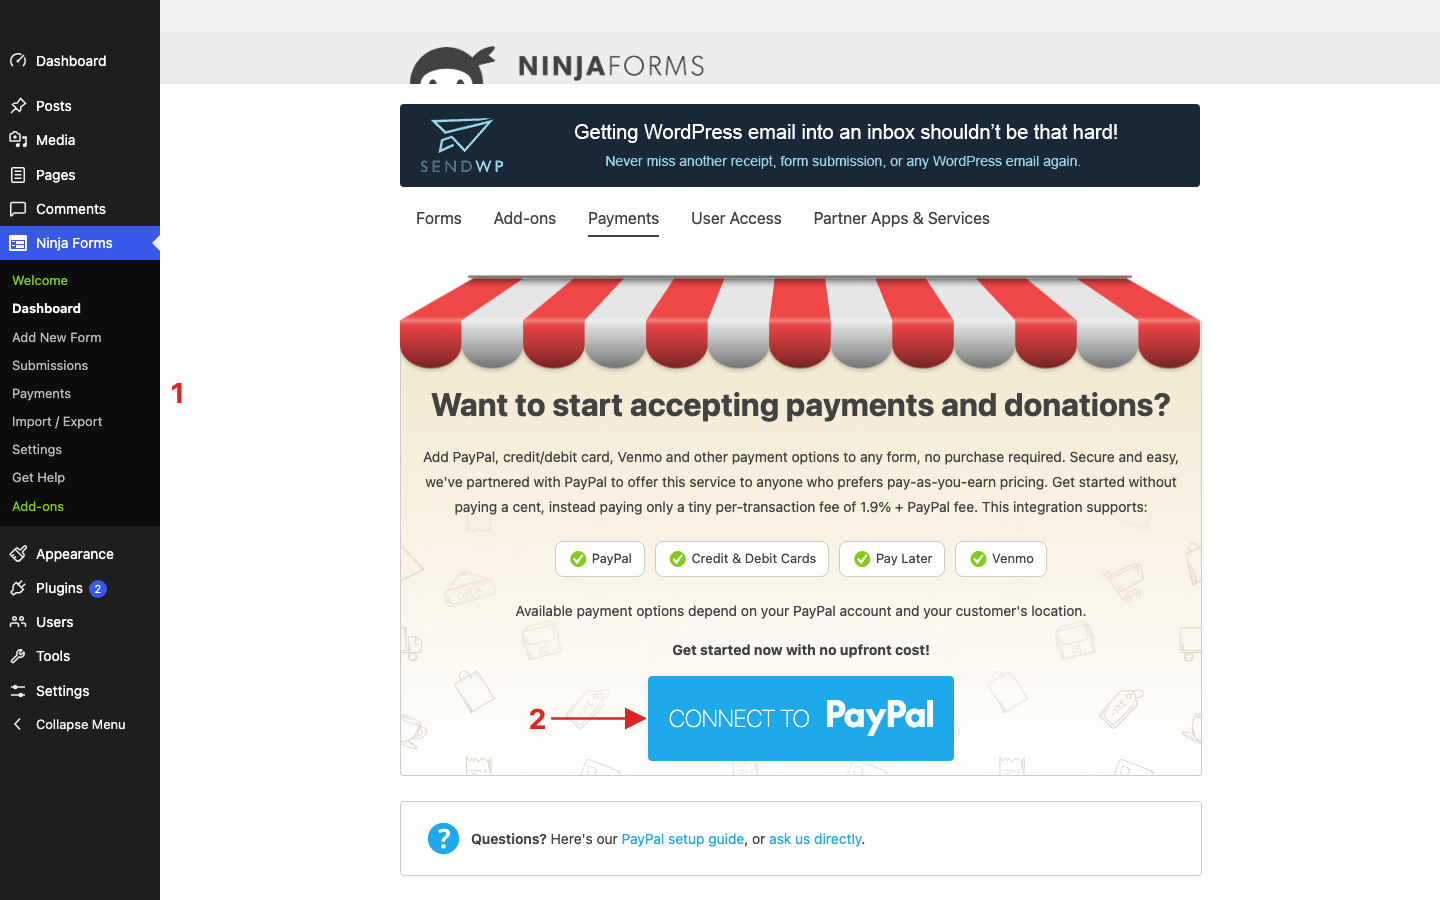
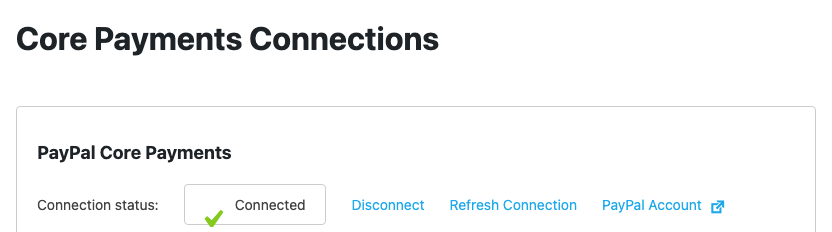
That Connected check is all you need from this page. The PayPal Core Payments documentation walks through the PayPal side if you’d like a second pair of eyes.
No Payments menu in your sidebar? The PayPal Checkout add-on (or the older PayPal Express add-on) is active on your site, and the menu stays hidden while either one is.
2. Add the PayPal Core Payments action to your form
Next up, the form itself.
- Go to Ninja Forms > Dashboard and click your form to open it in the builder.
- Click into the Emails & Actions tab at the top of the builder.
- Click the blue (+) icon to open the Actions window.
- Choose PayPal Core Payments.
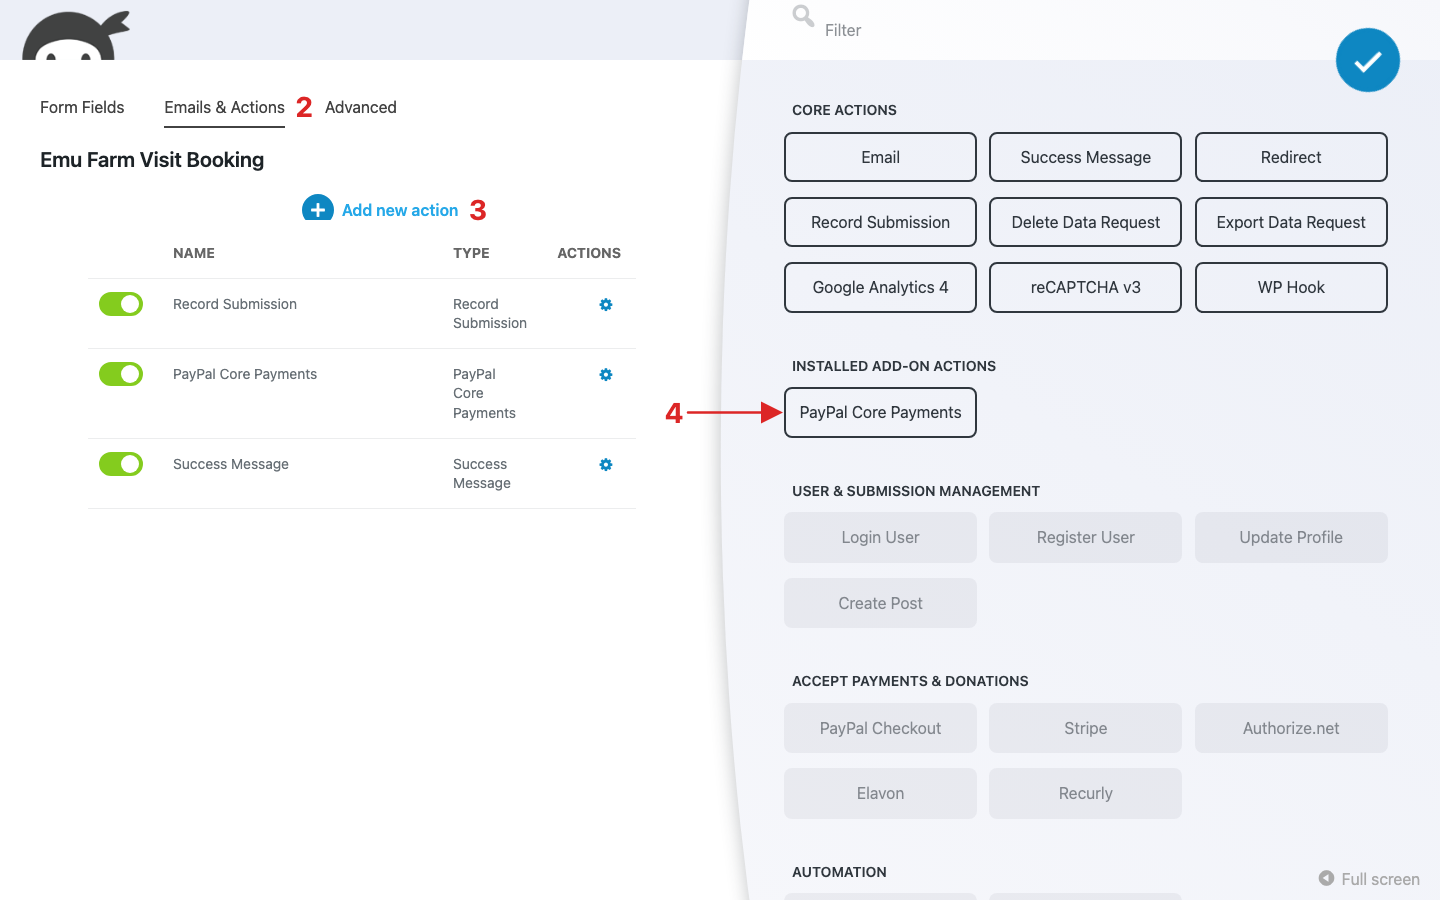
Your new action now sits in the Emails & Actions list. Click it to open its settings, and you’re on to step 3.
3. Choose how much to charge and how visitors can pay
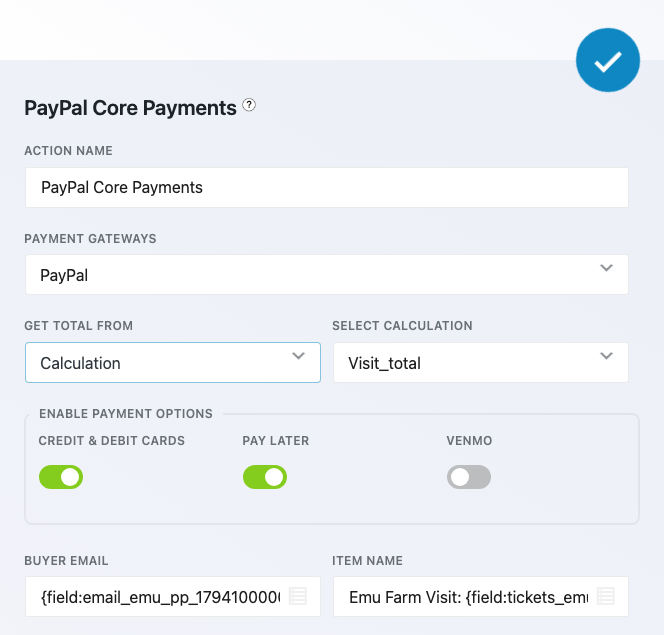
Both choices live in the action’s settings. Leave Action Name and Payment Gateways as they are, and start with Get Total From:
- Fixed Amount is the simplest, for one price like a ticket or a deposit. Type it into Enter Amount, 25.00 for example.
- Field is for “choose your amount” donations. Pick a Number, Single Checkbox, Select, Multi-Select, Radio List, Checkbox List or Select Image field in Select Field.
- Calculation is for prices that depend on answers, like $15.00 per visitor. Pick it in Select Calculation; the emu farm uses visit_total. Here’s how calculations work in Ninja Forms.
Whichever you pick, the amount is worked out on your server when the visitor submits. Nobody can change it from their browser.
Then choose how your visitors can pay, under Enable Payment Options:
- PayPal is always on. Every visitor gets the Pay with PayPal button, and there’s no toggle for it.
- Credit & Debit Cards, on by default, adds a Debit or Credit Card button.
- Pay Later, on by default, adds PayPal’s Pay Later button, with options like paying in four installments.
- Venmo, off by default, adds a Venmo button.
- Apple Pay and Google Pay are coming soon.
A toggle lets PayPal offer that way to pay. Your PayPal account and your visitor’s location decide which buttons each visitor actually sees. The two fields below the toggles, Buyer Email and Item Name, are optional, so you can leave them for now.
4. Publish your form and put it on a page
Click Done to close the action’s settings, then click Publish at the top of the builder. Then add the form to a page with the Ninja Forms block or its shortcode.
That’s it. Your form now takes PayPal payments.
Optional extra: show visitors their total before they press submit
The four steps above are all you need to get paid. This one is for forms where the price changes with the answers, like the emu farm’s, and a single-price form can skip it.
Nobody likes doing math in their head right before they pay. Here’s how to show the total as they go:
- In the Advanced tab, click into Calculations and add one that multiplies your quantity field by the price. The emu farm’s visit_total is the number of visitors times 15, with 2 decimals.
- In the Form Fields tab, click the blue (+) icon to open the Fields window and add an HTML field.
- Put the calculation’s merge tag,
{calc:visit_total}, in the HTML field’s content and drag the field above the submit button.
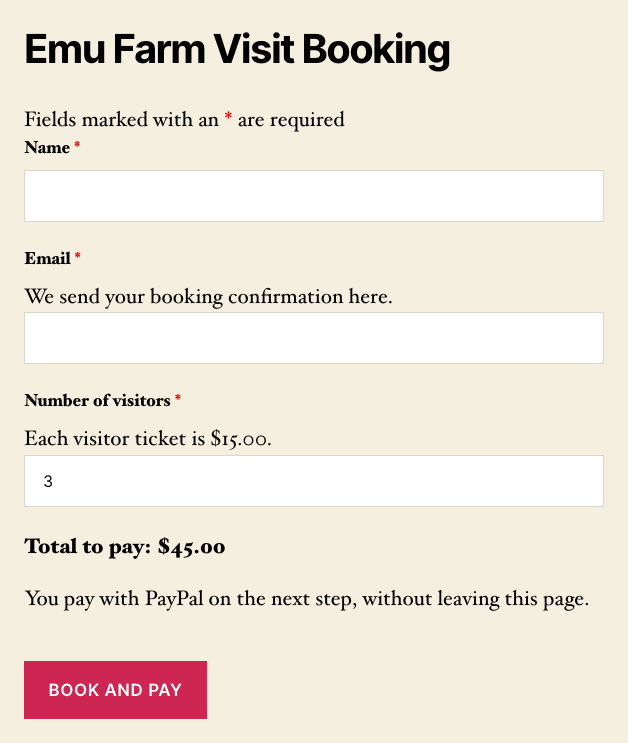
The total updates as your visitor types: $15.00 when the page loads, $30.00 for two visitors, $45.00 for three. And because the PayPal action reads that same calculation, the figure on your form is the figure PayPal charges.
Showing the total does more than save your visitor some math. PayPal’s window shows the amount again before they approve it, but once they press submit, your form’s fields and the total leave the screen, so their last look at the price on your site comes before that button. Help them check before they pay: show the total like this, put the unit price in the quantity field’s Description (“Each visitor ticket is $15.00.”), and label the submit button so it says money is involved (“Book and pay”).
That’s everything it takes to get paid from a form.
Give Ninja Forms a try today!
Ninja Forms is free! Optional premium features available with any membership.
What your visitors see when they pay
Your visitor never leaves your page. They fill in the form, press submit, and the form steps aside for an “Almost done!” message with PayPal’s buttons underneath.
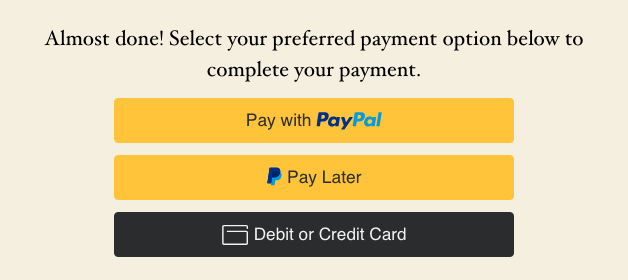
Which buttons show up is PayPal’s call. The toggles from step 3 let it offer a method, and your PayPal account and your visitor’s location decide the rest.
Pay with PayPal opens PayPal’s own window, with the amount on screen before they approve anything.
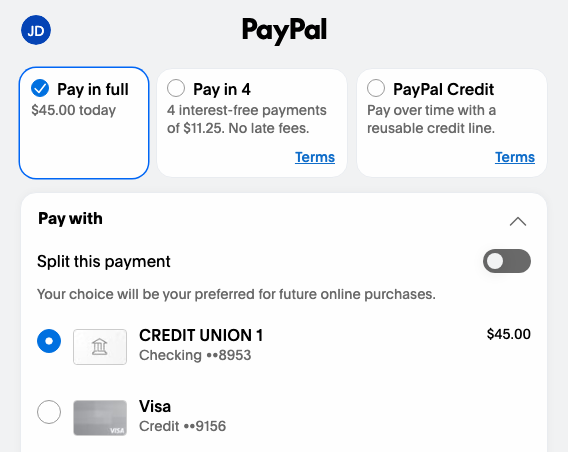
Once they press Pay, PayPal’s window closes and your form shows its Success Message.
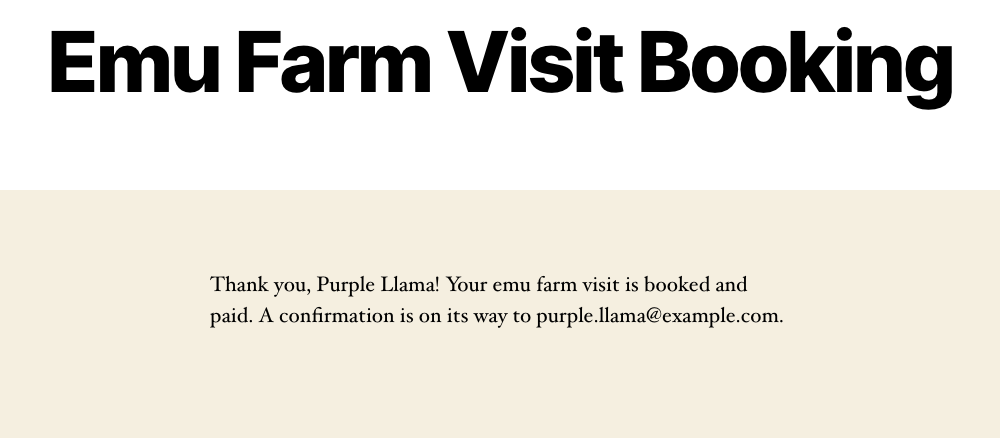
Changed their mind and closed PayPal’s window? The form tells them the payment was cancelled, and PayPal’s buttons stay put so they can try again.
Card and payment details stay with PayPal and never touch your site.
Where do you find a payment once it comes in?
On the entry, in Ninja Forms > Submissions. Pick your form in the Select Form dropdown, hover the entry and click Edit. The PayPal Payment block on the right shows the Status, Total, Transaction ID and Order ID.
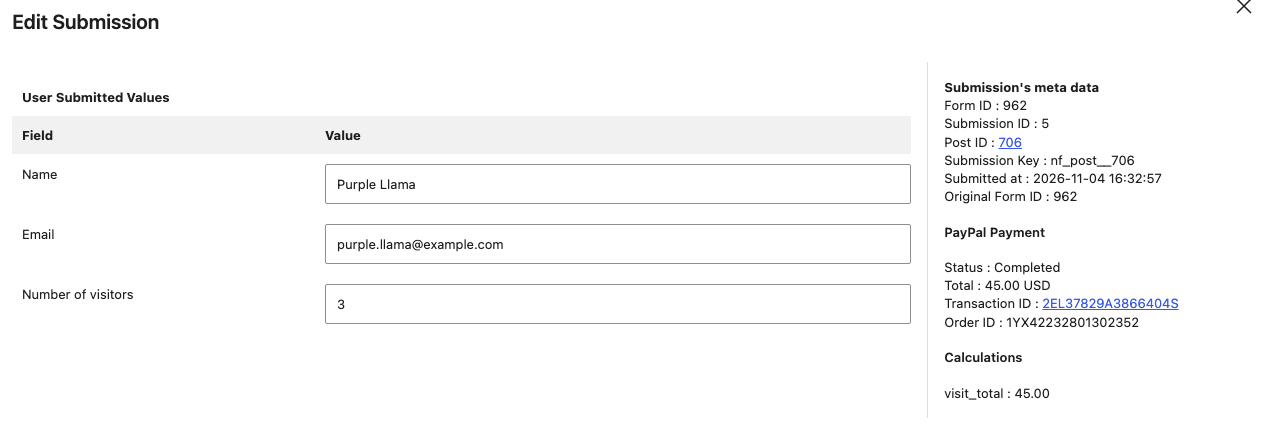
Completed means you got paid. Pending means PayPal is holding the payment for review, and Refunded means just what it says.
A visitor who reaches PayPal’s buttons and leaves without paying still leaves an entry, marked Not paid. Handy if you’d like to follow up with them.
Need to refund someone? Do it in your PayPal account
Refunds happen in your PayPal account, since there’s no refund button in WordPress. The next time you open the entry, it shows Refunded or Partially refunded; the site checks with PayPal at most once every five minutes, so give it a moment if you’re quick. Our fee comes back to you in proportion to the refund.
Does free Ninja Forms really take PayPal without an add-on?
Yes, since version 3.16.0 PayPal payments are built into free Ninja Forms, with no add-on, no plan and no API keys. Each payment costs 1.9% plus PayPal’s own fee, with nothing up front and nothing monthly. That makes it a free WordPress form builder with PayPal from the very first form you build.
For comparison, WPForms’ free version, WPForms Lite, adds 3% to PayPal payments where free Ninja Forms charges 1.9%, both on top of PayPal’s own fee (read in November 2026).
Still weighing PayPal against other ways to get paid? Compare your options for accepting payments in WordPress.
Start taking PayPal payments on your WordPress site today
Like we said at the top, there’s nothing to spend before your first payment comes in. Connect PayPal, add one action, set your price and publish. Four steps, nothing to buy first, and you only pay when you get paid.
If one form that takes payments is what you need, a free WordPress form builder with PayPal built in is the simplest way there. So go open that form and take your first payment!
Try Ninja Forms Today
Always free, with premium features available through our memberships.