Effortless Secure Payments
Authorize.net payment plugin delivers peace of mind and flexibility, backed by responsive customer support.
Risk-Free 14 Day Guarantee
You'll love it or we'll refund you fully. No questions asked.
The Authorize.net add-on for Ninja Forms lets you accept credit card payments directly inside any WordPress form. No redirects, no separate checkout page – the payment popup appears right after submission so your customers never leave your site.
Built for businesses that need more than a simple one-time charge, it supports recurring billing with trial periods, flexible pricing structures, and full transaction data access after every payment.
With the Authorize.net WordPress plugin add-on, you can:
Key Features
Accept Credit Card Payments
Process payments directly in your WordPress form with no redirect to a separate checkout page.
Recurring & Subscription Billing
Set up automated recurring payments with configurable intervals, payment counts, and optional trial periods.
Flexible Payment Amounts
Charge a fixed amount, calculate totals from form fields, or let visitors enter their own amount for donations.
Sandbox & Test Mode
Test your payment integration fully before going live using Authorize.net sandbox credentials.
Transaction Merge Tags
Use transaction data in confirmation emails and notifications with merge tags for card type, last four digits, and transaction ID.
Billing & Shipping Details
Transmit customer billing and shipping information to Authorize.net alongside every payment.
Key Features of the Authorize.net Add-On
Accept credit card payments in your WordPress forms
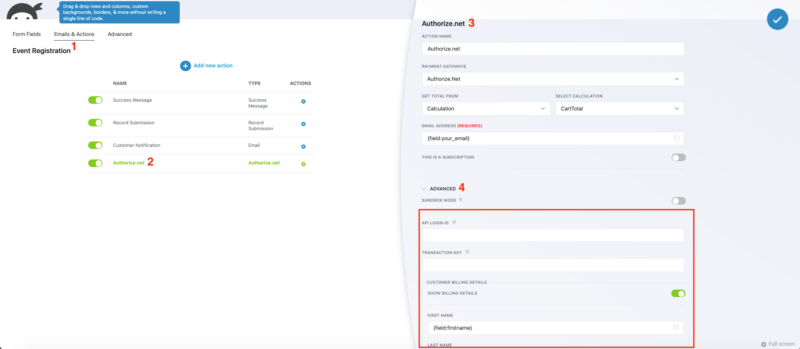
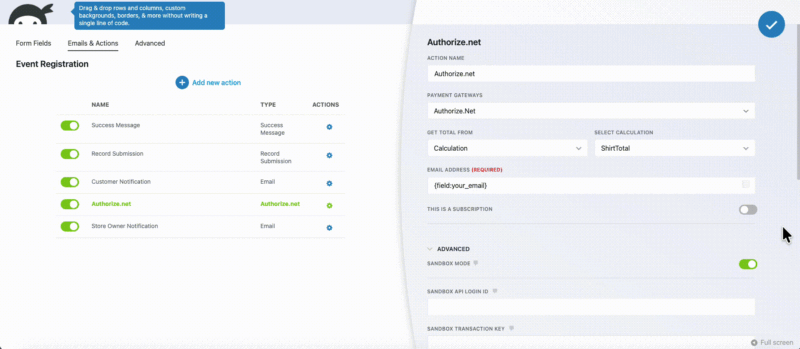
Connect your Authorize.net merchant account and start processing payments without sending customers to a separate checkout page. After form submission, a payment popup appears for credit card entry and confirmation. Once the transaction clears, the remaining form actions fire and your confirmation email goes out.
Configuration is straightforward: enter your API Login ID and Transaction Key in Ninja Forms settings, assign the Authorize.net action to your form, and you are processing live payments.
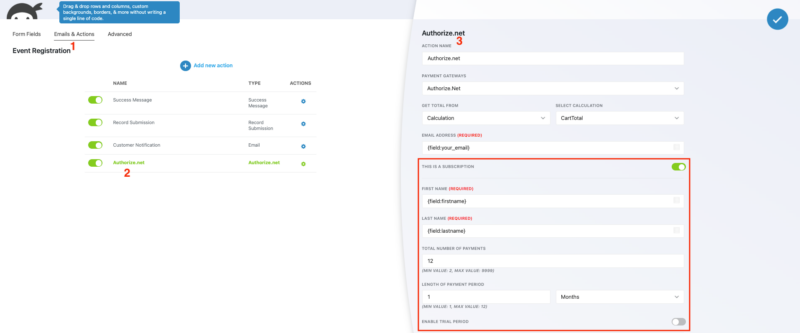
Recurring billing and subscription payments with trial periods
Set up subscription-style billing directly from your WordPress form. Configure the payment interval (days or months), the total number of payments, and whether a trial period applies before the regular billing amount kicks in. Trial periods let you charge a lower amount for a set number of cycles before transitioning to the standard rate.
This makes the add-on a solid fit for membership sites, SaaS products, and recurring service businesses that need automated billing without a separate subscription platform.
Flexible payment amounts for any pricing model
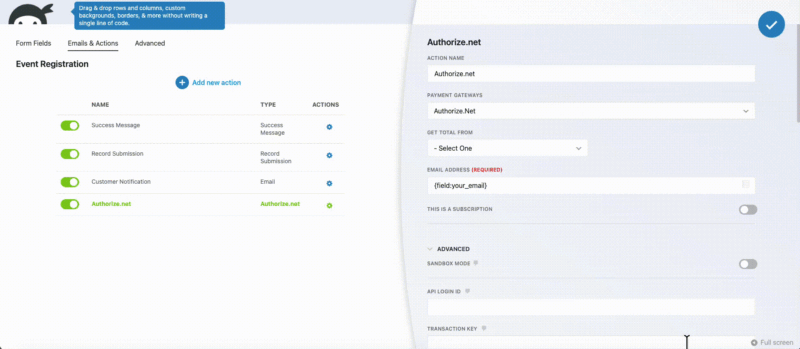
You are not limited to a single fixed price. The add-on supports four ways to set the charge amount: a fixed static amount, a total pulled from a Ninja Forms Calculation field, a value derived from checkbox, select, radio, or quantity fields with assigned pricing, or a free-form number field where the visitor types in their own amount. That last option is purpose-built for donation forms where the donor decides what to give.
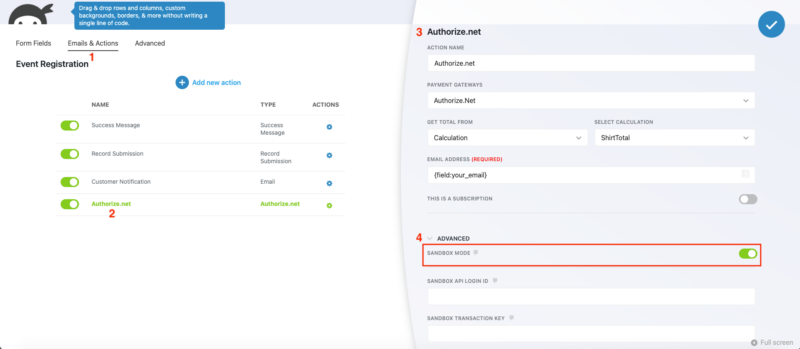
Sandbox and test mode
Before going live, switch the form to sandbox mode and connect your Authorize.net developer account credentials. Run test transactions with Authorize.net’s test card numbers to confirm the integration is working correctly, then flip to production credentials when you are ready. No code changes required.
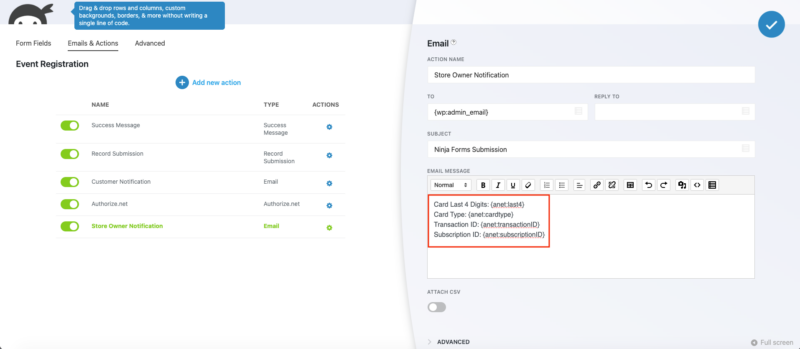
Transaction merge tags for confirmation emails and notifications
Four merge tags become available after each transaction: {anet:last4} for the last four digits of the card, {anet:cardtype} for the card brand, {anet:transactionID} for the payment reference, and {anet:subscriptionID} for recurring billing subscriptions. Drop them into your confirmation email, admin notification, or any post-submission action to give customers and staff the payment details they need.
Billing and shipping detail capture
Optionally transmit customer billing and shipping information to Authorize.net alongside the payment. Map your form’s address fields to the corresponding billing and shipping fields in the action settings. This keeps your Authorize.net transaction records complete and supports downstream processes like order fulfillment or fraud review.
Connect Authorize.net to your forms in minutes
Take credit card payments directly in your forms with your own Authorize.net credentials, with no third-party checkout in the middle. Add it to your cart and connect your account in minutes.
Backed by priority email support and a 14-day money-back guarantee.
WordPress Authorize.net Payment Forms: Use Cases
Recurring membership and subscription payments
For membership sites and subscription services, configure recurring billing with the interval and payment count that matches your model. Use the trial period option to offer an introductory rate before full billing begins. Because everything runs through a standard Ninja Forms form, you can combine subscription billing with conditional logic, multi-step layouts, or any other add-on in your stack.
Donation forms with variable amounts
Set the payment amount source to a Number field and let donors enter what they want to give. Pair it with preset amount options using radio buttons or a select list with assigned values, or leave the field fully open-ended. The Authorize.net add-on handles both approaches without additional plugins. Start with a pre-built donation form template or build your own.
Common Use Cases
- Accept payments without WooCommerce: Collect one-time payments for services, products, or events directly in a Ninja Forms form, no ecommerce platform required.
- Run a membership or subscription service: Set up recurring billing with configurable intervals and payment counts, with an optional trial period before the full rate begins.
- Build a donation form: Let supporters enter their own donation amount using a number field, or offer preset giving levels via select or radio fields.
- Sell digital products or services: Gate delivery behind a payment form and use confirmation email merge tags to include transaction details in the notification.
- Collect installment payments: Use the recurring billing feature to split a larger total into scheduled installments over a defined number of cycles.
- Test before launch: Use sandbox mode with Authorize.net developer credentials to validate the entire form-to-payment flow before switching to production.
Real payments, on your own site
Customers complete the whole transaction inside your form, and the add-on passes the payment securely to your existing Authorize.net merchant account, with no redirect offsite. Add it to your cart and keep checkout on your site.
Priority email support and a 14-day money-back guarantee included.
Frequently Asked Questions
-
Install the Ninja Forms Authorize.net add-on, then enter your Authorize.net API Login ID and Transaction Key in Ninja Forms settings. Add the Authorize.net action to any form and configure your payment amount. When visitors submit the form, a payment popup appears for credit card entry. No redirect to an external page is required.
-
Yes. The Ninja Forms Authorize.net add-on connects directly to your Authorize.net merchant account so you can collect credit card payments through any WordPress form. It supports one-time charges, recurring subscriptions with trial periods, and flexible pricing from fixed amounts to user-entered donation values.
-
Yes. The add-on includes a subscription billing option that lets you configure the payment interval (days or months), the total number of payment cycles, and an optional trial period at a lower rate before regular billing begins. This works directly within Ninja Forms with no additional subscription plugin needed.
-
Yes. Set the payment amount source to a Number field and visitors can type in their own donation amount. You can also pair it with preset amounts using radio buttons or a select list. The Authorize.net add-on handles both variable and fixed donation amounts natively.
-
Four merge tags are available after each transaction: {anet:last4} (last four card digits), {anet:cardtype} (card brand), {anet:transactionID} (payment reference), and {anet:subscriptionID} (recurring subscription ID). Use them in confirmation emails, admin notifications, or any post-submission action.
-
Yes. Enable sandbox mode in the form's Authorize.net action settings and enter your Authorize.net developer account credentials. You can run test transactions to verify the integration is working correctly before switching to your production credentials. No code changes are needed.
-
Yes. The action settings include optional fields for billing and shipping details. Map your form's address fields to the corresponding Authorize.net fields and that information will be transmitted with every payment, keeping your transaction records complete.
-
Licenses are subscription based and will auto-renew each year unless cancelled. If cancelled, you may still use your extensions but will no longer receive important updates or support once the license expires.